TILE Mentoring Guide: Overview

This guide walks you through the steps of adding a mentor role to your course, as well as how to answer questions and give feedback to your learners.
Click each tab for step-by-step guidance.
Instructions
You can add multiple mentors to your online course in TILE. We recommend adding a mentor role for yourself, so you can participate in the “Ask-a-Mentor” feature of TILE (see the “Ask-a-Mentor” tab for more information). We also recommend assigning mentor roles for any teaching assistants you may be using.
Watch this video for a quick example of how to add a mentor role in TILE Composer. You can also follow the Step-by-Step instructions below.
Step-by-Step Instructions
Add Mentor Role
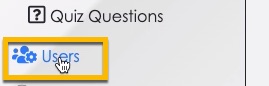
- Go to TILE Composer. Then select the Users option in the side menu.
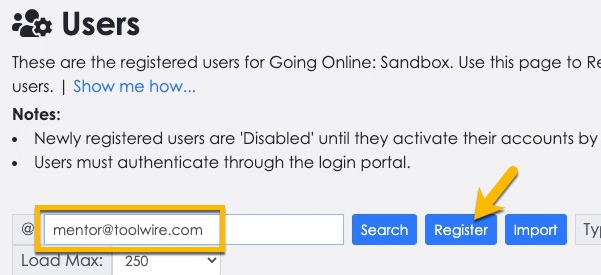
- Click the Lock & Edit button at the top of the screen. Select the “@” field and enter a unique email address for the new mentor you are adding. (NOTE: if you are adding the mentor role for yourself, this email address must be different than the address you are using for your admin/instructor role.) Click the Register button after you enter the mentor email address.
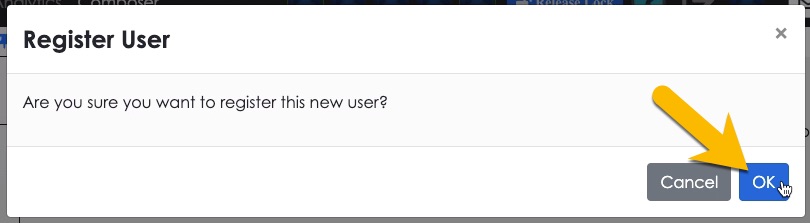
- Click OK in the ‘Register User’ confirmation box.
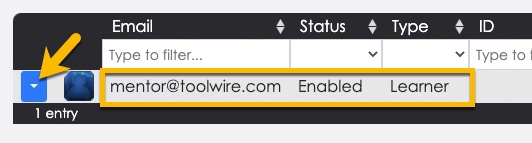
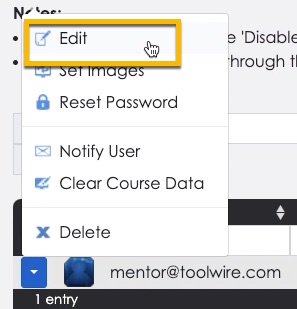
- The new mentor account appears in the users list, but is assigned to the ‘Learner’ role by default. Select the context menu for the user.
- Select the Edit option in the context menu.
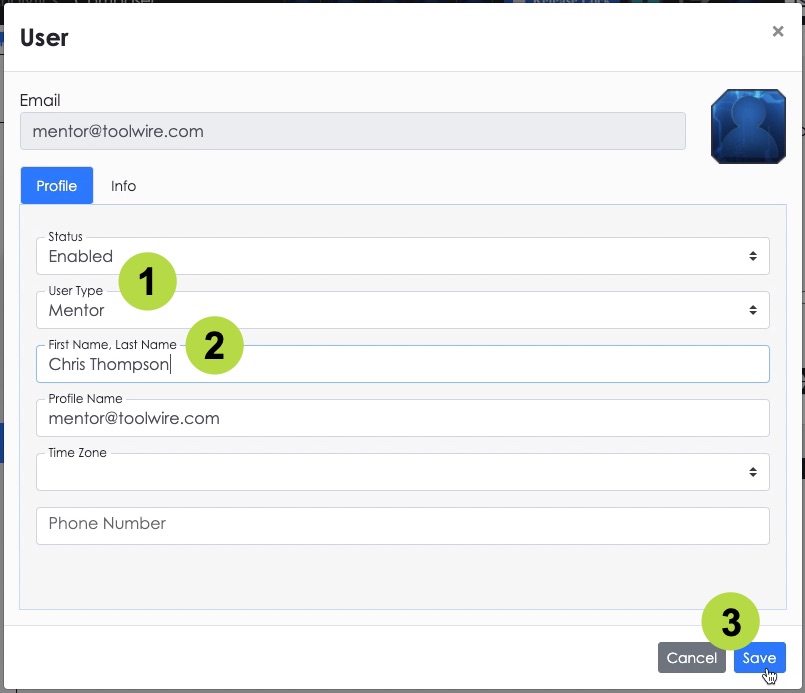
- The User panel opens. Set the User Type to ‘Mentor.’
- Enter a First Name and Last Name for the new mentor.
- Select Save when you are finished.
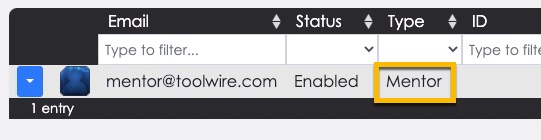
- The new mentor user is updated to the ‘Mentor’ role.
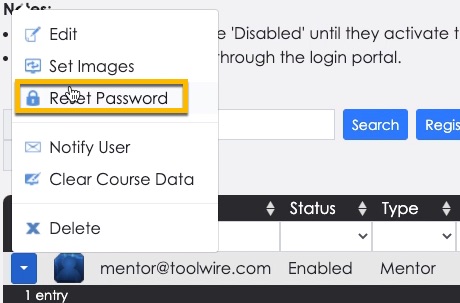
- Select the context menu again and select Reset Password. Follow the prompts to assign a custom password for the new mentor.
Enroll Mentor in Course
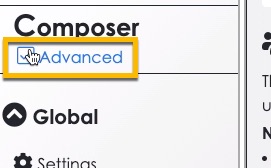
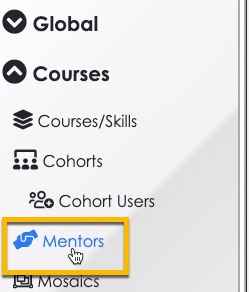
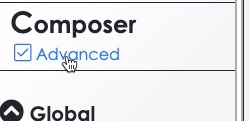
- Select the Advanced checkbox in the Composer side menu. Then select the Mentors option.
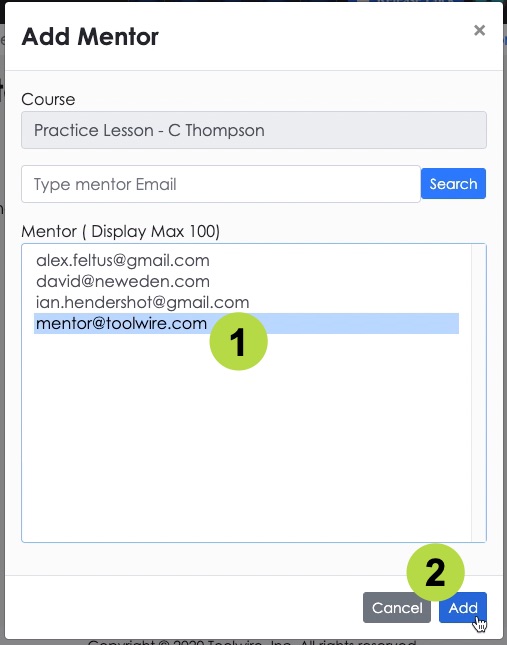
- The Mentors page displays. Make sure your course/lesson is selected in the breadcrumbs at the top of the screen. Then select the Add Mentor button.
- The Add Mentor panel opens. Select one or more mentors to add to the course/skill.
- Select Add.
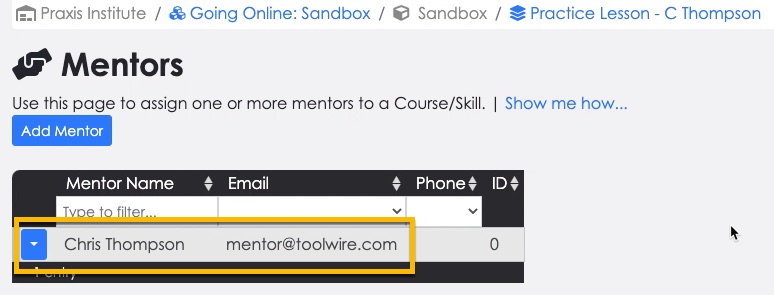
- The mentor is now enrolled in the course and can interact with the learners.

Enroll Mentor in Course
If you are using one or more cohorts in your course, you will need to add the mentor to these as well. Refer to the guidance on cohorts in the “Enroll Your Learners” skill for more information.
(back to top)Instructions
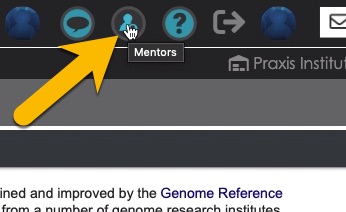
The “Ask-a-Mentor” feature allows learners to ask mentors questions at anytime while they are in the course. They access this tool via a button at the top of the screen.
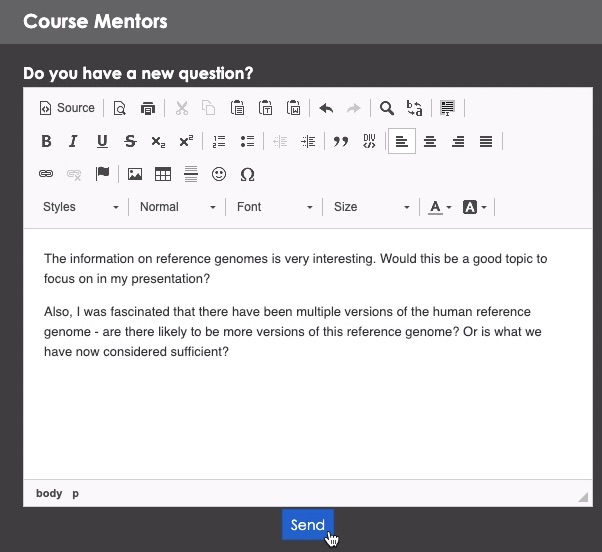
Questions submitted by learners will be sent to all course mentors. Watch this video to see how learners ask questions via ‘Ask-a-Mentor,’ and how mentors respond. Follow the Step-by-Step instructions below for more detail on how to respond to Ask-a-Mentor questions.
Step-by-Step Instructions
Answer ‘Ask-a-Mentor’ Questions
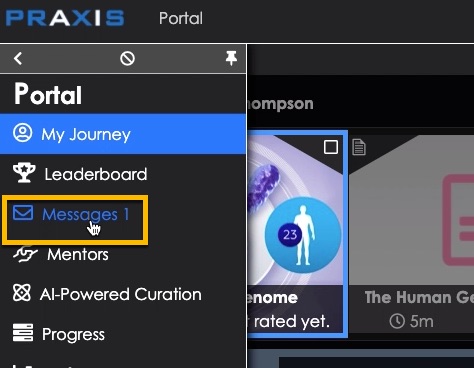
- Login to TILE as a mentor.
- The TILE Learning Portal opens. Select the Messages option in the portal side menu.
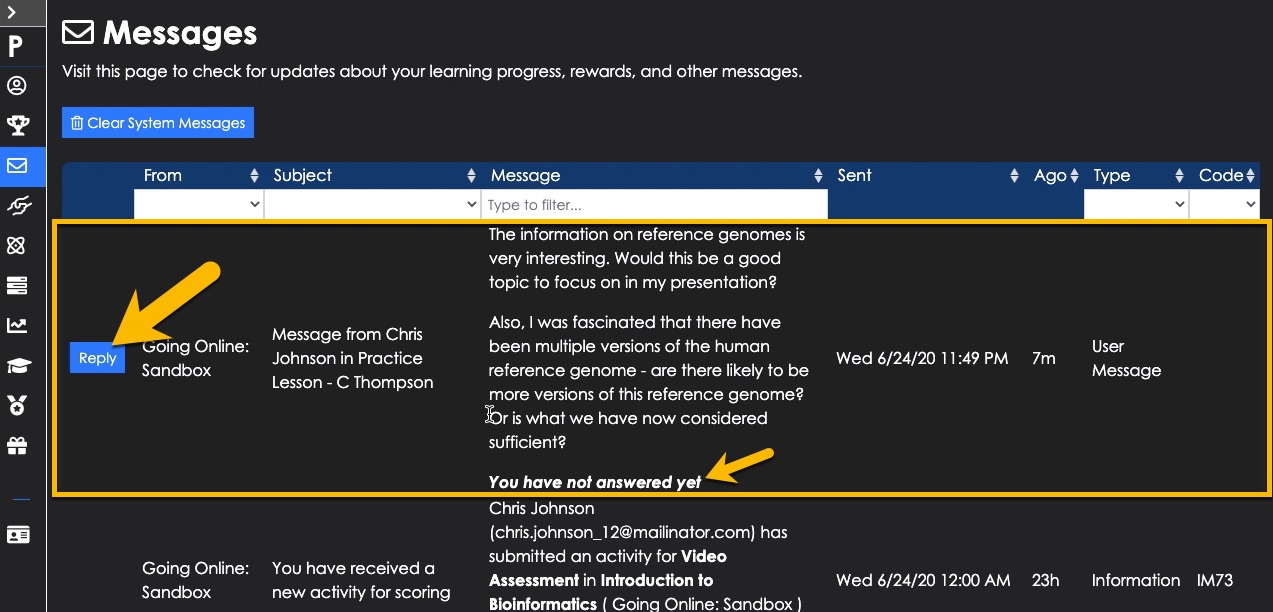
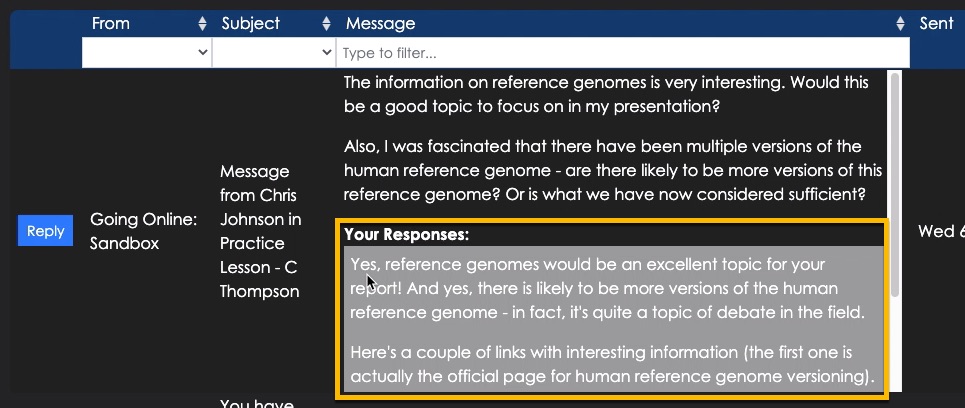
- Any questions submitted via Ask-a-Mentor will appear in your messages, along with an indication of whether you have answered the question. If you have not answered yet, select the Reply button.
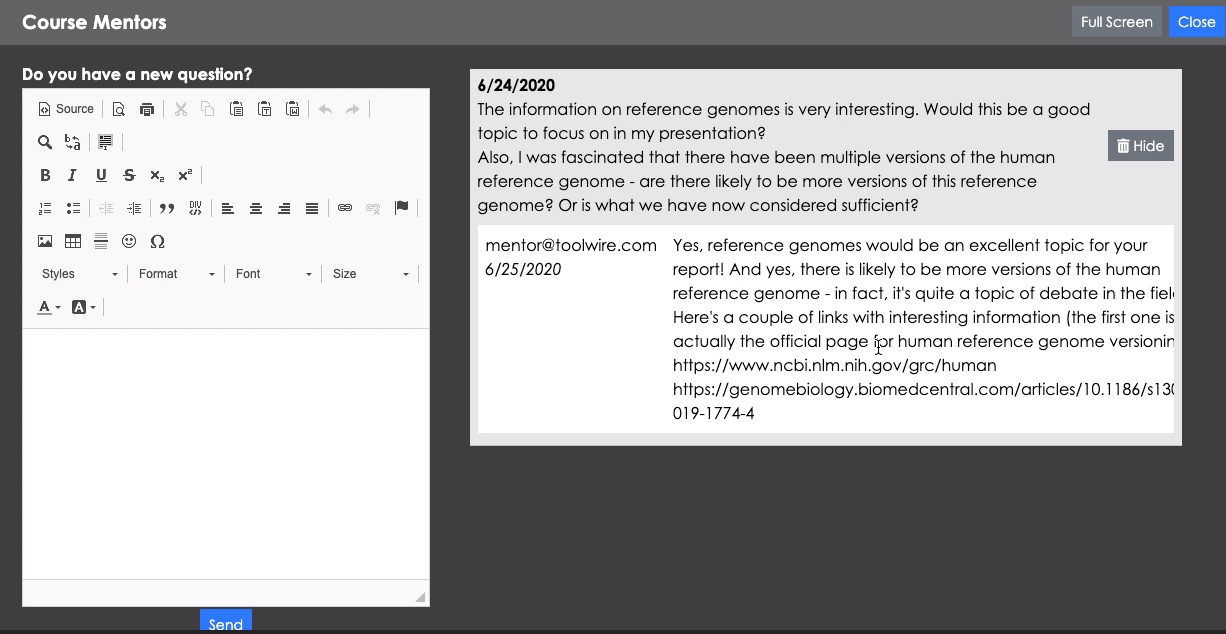
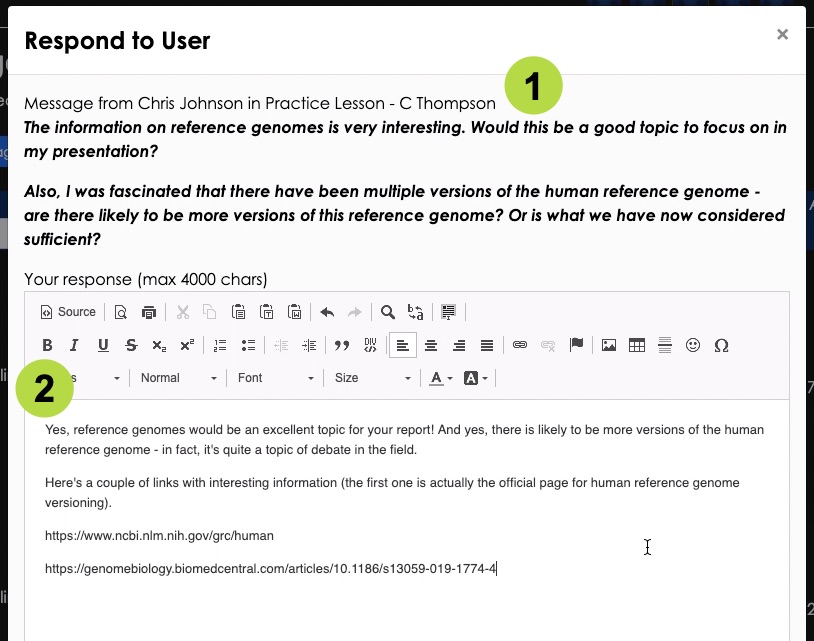
- The Respond to User panel opens. The learner’s question is displayed at the top.
- Use the rich text editor to write your response. You can add links, graphics, etc. to your message as desired.
- Select OK when you are done writing your response.
- You will see a short “Message Sent Successfully” message at the top of the screen. Then your response will be added to the Ask-a-Mentor message in your inbox.
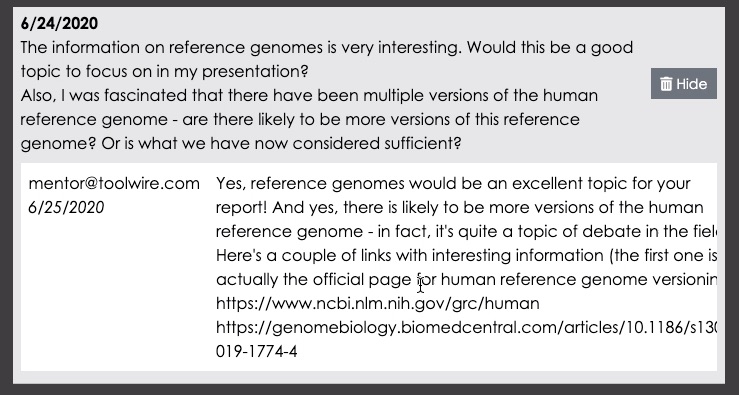
- This is how the response appears to the learner in the Ask-a-Mentor panel:

Instructions
TILE gives you the ability to message users directly through the learning platform. This is a handy communication option if you want to get a message out quickly to your learners. There are three ways to do this:
- Notify Single Learner
- Notify All Course Learners
- Notify Cohort
Watch this video to see how to use all three of these direct messaging methods. You can also follow the Step-by-Step instructions below.
Step-by-Step Instructions
Notify Single Learner. Follow these steps to send a message to one learner.
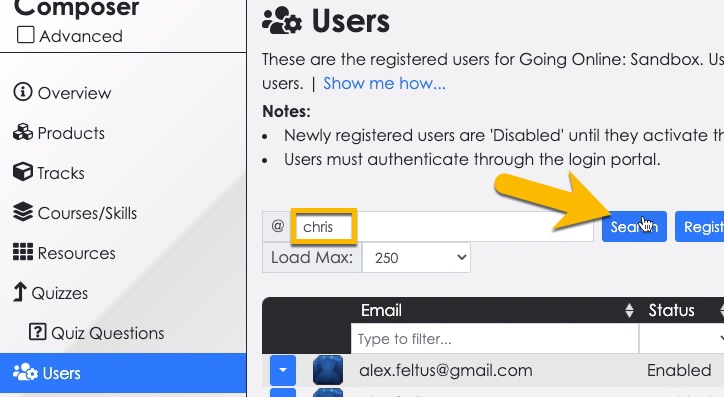
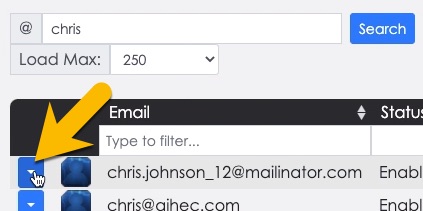
- Go to TILE Composer. Then select the Users option in the side menu. Then enter the name or email address of the learner you want to contact in the ‘@’ field. Then click Search.
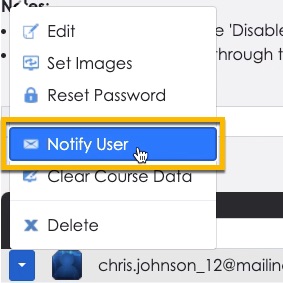
- The user list updates with results based on your search query. Select the context menu for the learner you want to message.
- Select the Notify User option.
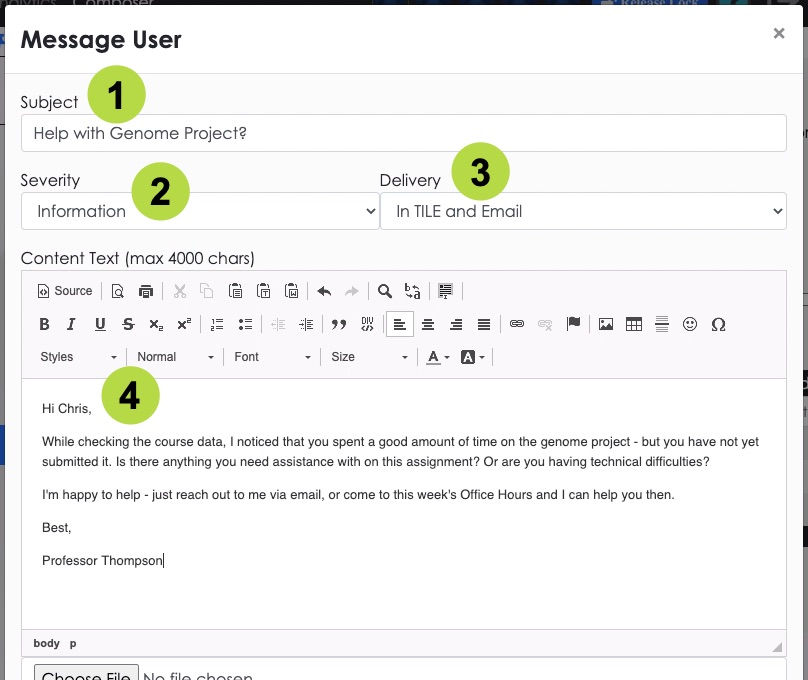
- The Message User panel opens. Write a Subject for the message.
- Leave the Severity set to ‘Information’ (unless your message relates to one of the other options).
- Select the Delivery method:
- In TILE. Only sends a message to the learner’s TILE message box.
- Email. Only sends a message to the learner’s registered email address.
- In TILE and Email (recommended). Sends the message to the user’s TILE message box and to their email.
- Write your message using the text editor. Click the Choose File button if you want to attach a file to your message.
- Select OK when you are ready to send your message.
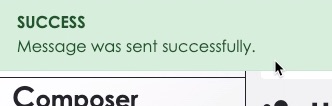
- A ‘Success: Message was sent successfully.’ alert will appear at the top of the screen – confirming that your message was sent to the learner.
Notify All Course Learners. Follow these steps to send a message to ALL learners in the course.
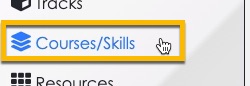
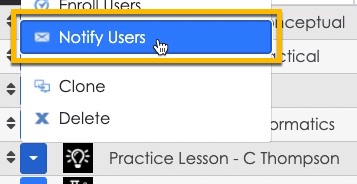
- Select the Courses/Skills option in the side menu.
- Select the context menu for the course/skill and then select the Notify Users option.
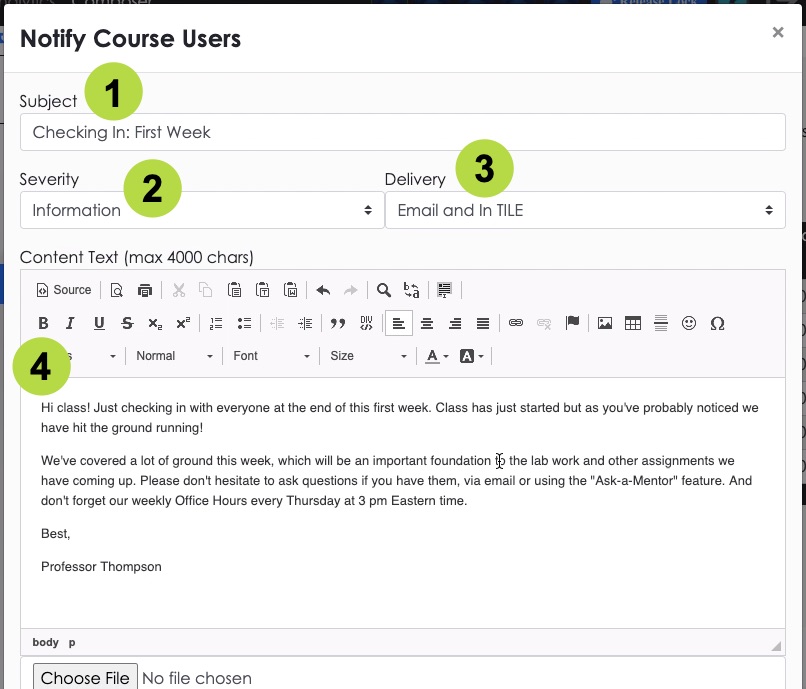
- The Notify Course Users panel opens. Write a Subject for the message.
- Leave the Severity set to ‘Information’ (unless your message relates to one of the other options).
- Select the Delivery method:
- In TILE. Only sends a message to the learner’s TILE message box.
- Email. Only sends a message to the learner’s registered email address.
- In TILE and Email (recommended). Sends the message to the user’s TILE message box and to their email.
- Write your message using the text editor. Click the Choose File button if you want to attach a file to your message.
- Select OK when you are ready to send your message.
- A ‘Success: Message was sent successfully.’ alert will appear at the top of the screen – confirming that your message was sent to the learner.
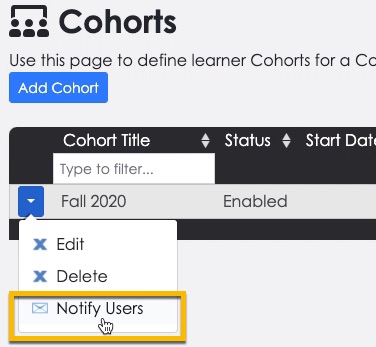
Notify Cohort. Follow these steps to send a message to ALL learners in a cohort.
- Select the Advanced option at the top of the Composer side menu. Then select the Cohorts option in the side menu.
- Select the context menu for the cohort you want to message, then select the Notify Users option.
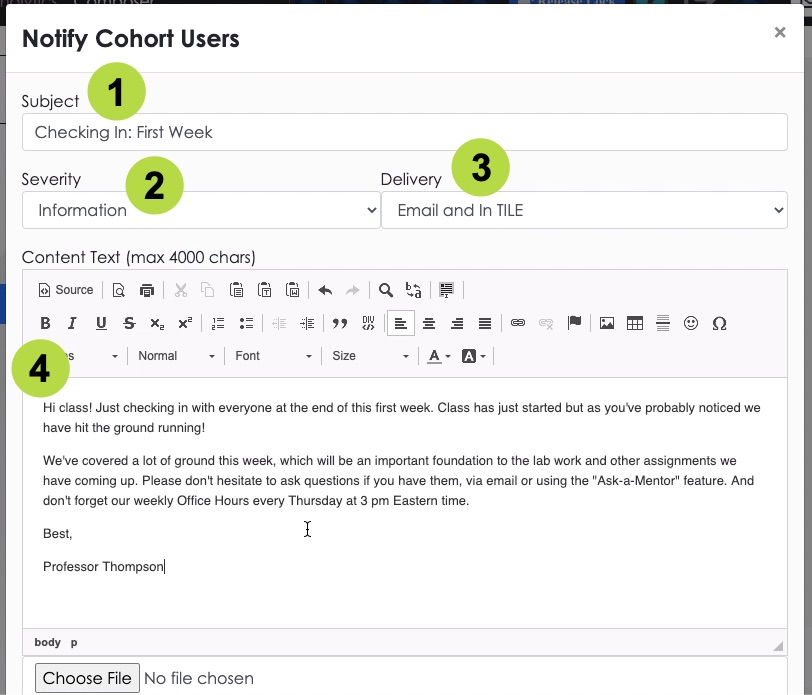
- The Notify Cohort Users panel opens. Write a Subject for the message.
- Leave the Severity set to ‘Information’ (unless your message relates to one of the other options).
- Select the Delivery method:
- In TILE. Only sends a message to the learner’s TILE message box.
- Email. Only sends a message to the learner’s registered email address.
- In TILE and Email (recommended). Sends the message to the user’s TILE message box and to their email.
- Write your message using the text editor. Click the Choose File button if you want to attach a file to your message.
- Select OK when you are ready to send your message.
- A ‘Success: Message was sent successfully.’ alert will appear at the top of the screen – confirming that your message was sent to the learner.

Instructions
Another way to interact with learners and respond to questions in TILE is via the discussion feature. It’s important to monitor learner participation in discussion activities and answer questions or give feedback when appropriate.
Watch this video to see how this can be done. You can also follow the Step-by-Step instructions below. NOTE: TILE does not currently send notifications when a learner posts a message to a discussion activity, or to a resource discussion. So we recommend checking in on these discussion threads periodically (e.g., once a day).
Step-by-Step Instructions
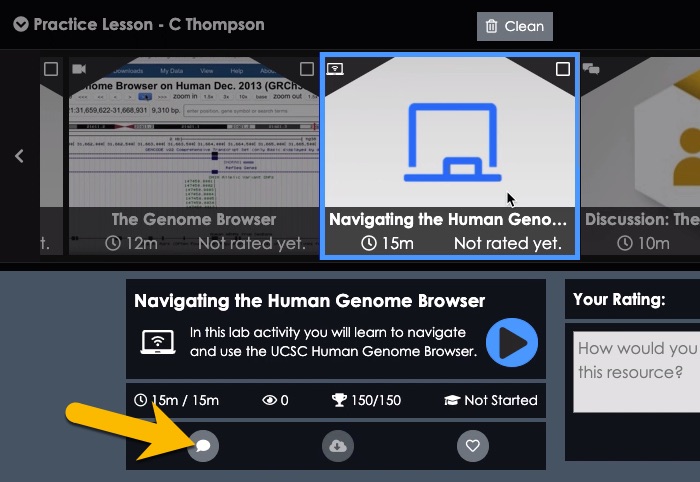
- Access the course learning interface (as an admin or in a mentor role) and locate the discussion activity or resource discussion you want to check on. Click the Discuss button for the resource.
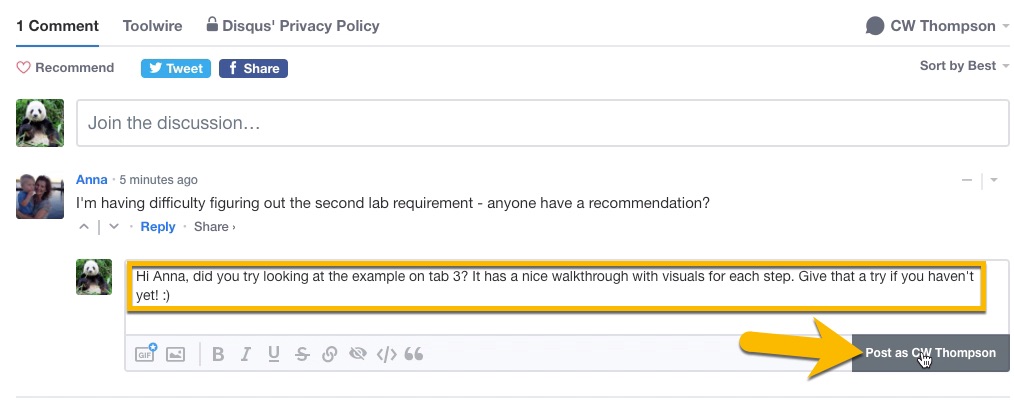
- The discussion loads. Review the comments to check participation and answer questions where appropriate. Add a new comment, or click the Reply option for an existing comment, and then enter your response. Click the Post as… button when you are ready.
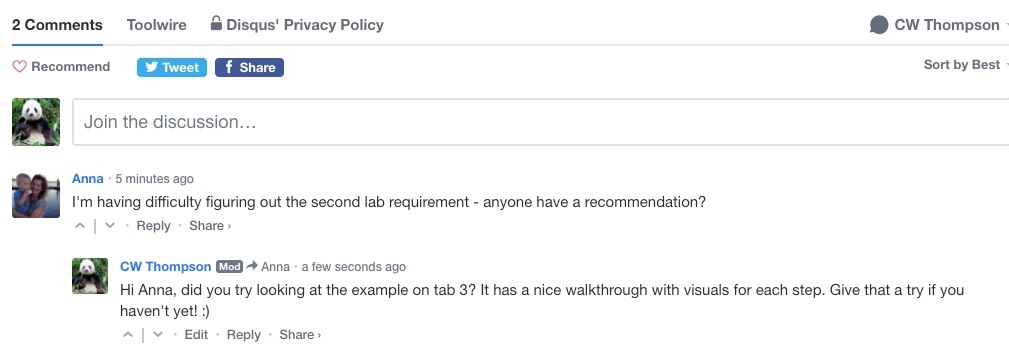
- Your comment is added to the discussion thread.