Quiz Guide: Overview

There's two main steps to create a quiz in TILE Composer. First you create the quiz, and then you add questions to the quiz. This is true for informal "Knowledge Checks" and for formal quizzes and assessments. NOTE: You can add quiz questions directly in TILE or you can import them in a batch file to speed up the process (using the Quiz Bank Design template). After you set up the quiz and questions there's a third step where you will map the quiz to a resource instance in your lesson/course.
Refer to each of the tabs for step-by-step guidance. Start with the Create a Quiz tab.
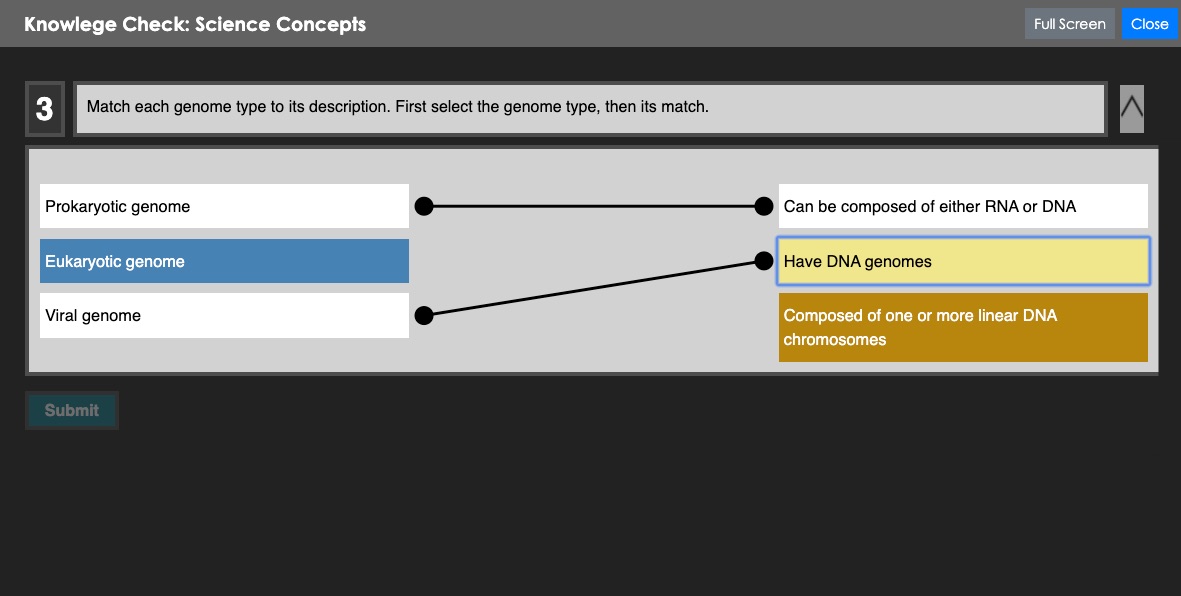 (Preview a TILE quiz)
Overview
There's two simple steps to create a quiz in TILE Composer:
- Clone an existing sample quiz (in the Composer Lesson Template you previously cloned for your practice lesson)
- Update the settings in your new quiz copy
Click the next section and then follow the steps to create your quiz.
Create a Quiz
Watch this video for a quick example of how to create a Sample Quiz in Composer. You can also follow the Step-by-Step instructions below.
Step-by-Step Instructions
Clone a Sample Quiz
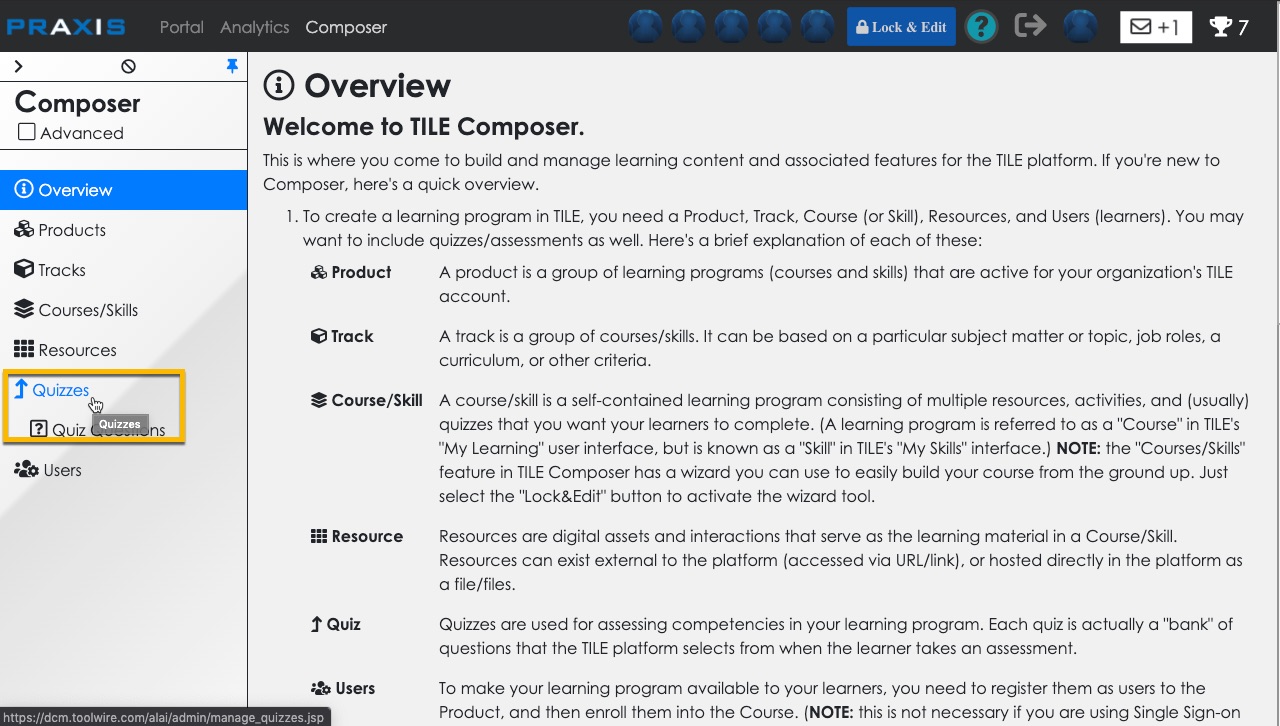
- Select the Quizzes option in the side menu.
- The Quizzes page loads. Make sure it is the quizzes page for your practice lesson/course by looking at the breadcrumbs at the top of the screen. If your lesson/course isn't displayed, click the last breadcrumb to open the course selection screen and then select your lesson.
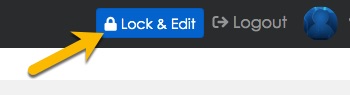
- Back on the Quizzes page, select Lock & Edit to activate the page for edits.
- There are two quiz types available by default in a Composer Template Lesson: "Basic" and "Advanced." Both of these have starter questions that you will either update or replace. The basic quiz has Multiple Choice and True False questions, while the advanced quiz has these and more advanced question types like Matching, Sorting, and Text Input. To get a preview of either quiz type, just select the context menu for the quiz and then select Preview.
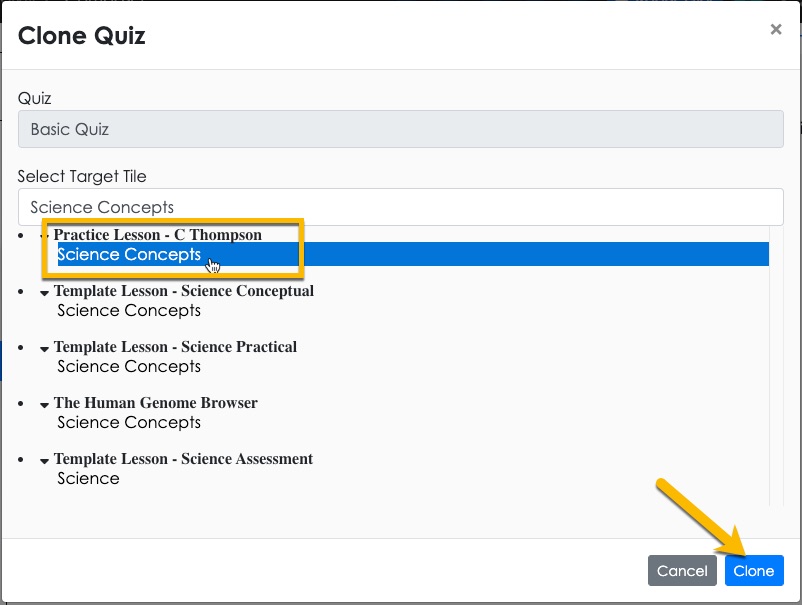
- When you decide which quiz type you want, select the context menu for that quiz and then select Clone.
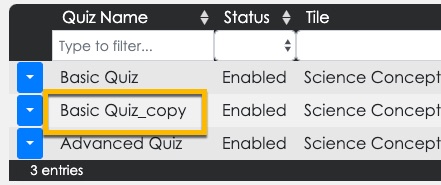
- Select "Concepts" in your lesson and then click Clone.
- A new copy of the Quiz appears in the list.


Update Quiz Settings
Select the context menu for the quiz copy you just created and then select Edit. The Quiz Settings panel opens.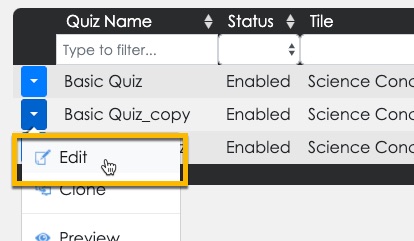
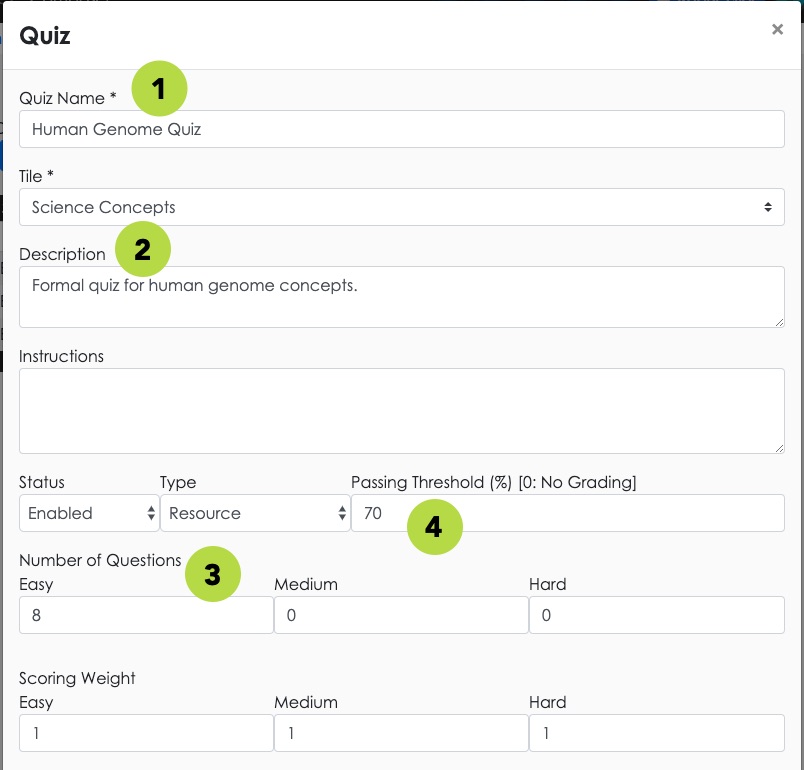
- Give the Quiz a Name. (NOTE: This name is for your reference only - it will not be visible to learners.)
- [Optional] Enter a Description of the quiz. The Description will also not be visible to learners, but may be useful for notes.
- Enter the Passing Threshold of the quiz. Set this to '0' if the quiz is an informal "Knowledge Check" with no score.
- Enter the Number of Questions to display for each quiz attempt. This number may be lower than the total number of questions in the quiz question bank (e.g., if you want to randomly display 10 questions out of 20 total options). If you have different levels of difficulty/rigor for your questions, you can allocate the desired number of questions for each level (e.g., display 4 easy, 3 medium, and 3 hard questions).
- Set the Duration of the quiz. In general, allow one minute per question (but adjust as necessary depending on difficulty level, length of question prompt, etc.).
- Set the Question Feedback to your preference: "All Possible Choices" shows correct/incorrect for all answer options; "Selected Only" shows feedback only for options selected by the learner; "No Feedback" does not show any question-level feedback during the quiz.
- Set the Questions Order logic to be used for the Quiz:
- Increased Difficulty - questions displayed in order of difficulty, from easiest to hardest (NOTE: in this setting, questions are displayed randomly within each difficulty level)
- Bank - questions displayed in the order set in the question bank (see Quiz Questions tab for details)
- Random - questions displayed in random order
- NOTE: we recommend setting this to 'Random' for typical quizzes
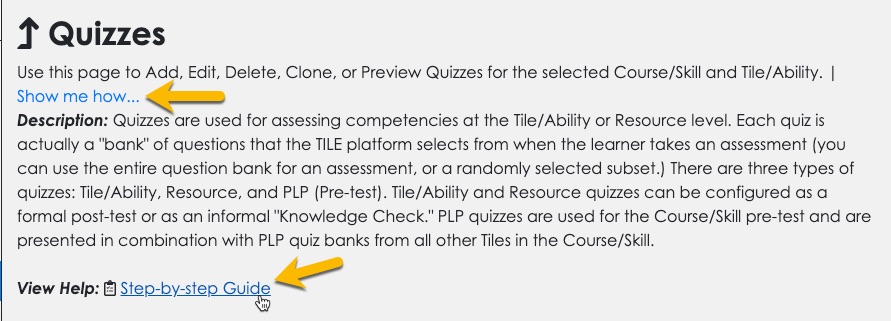
- Leave all other quiz settings as they are. (NOTE: If you would like to learn how to configure more advanced settings for a quiz, refer to the quiz help located on the Quizzes page:
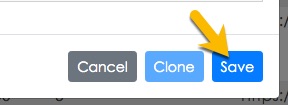
- Select Save when you are ready.

Your quiz is now configured - time to set up the questions! Click the Add Quiz Questions tab to learn how. (back to top)
Overview
There are two options for adding questions to your quiz:
- Import the questions all at once in a batch file (using the Quiz Bank Design template)
- Adding quiz questions one-by-one directly in TILE Composer
Click the option you want to use below and then follow the steps.
Option 1 - Import Quiz Questions All At Once
To save time, TILE Composer allows you to import quiz questions as a batch, instead of adding them one-by-one. Watch this video for a quick example of how to import quiz questions in Composer. You can also follow the Step-by-Step instructions below.
Step-by-Step Instructions
Prepare Questions for Import
- If you haven't done so already, download and use the Quiz Bank Design template to create a "question bank" for the quizzes in your course. Use the "Questions" tab in the template to document the questions and question choices for each competency in your course, either by writing them from scratch or by copy/pasting them from an existing source/file.
DOWNLOAD: Quiz Bank Design Template
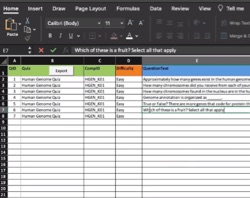
(Click image to see how to use this template.) - When you are finished documenting your questions and answer choices, you need to convert them into an XML format that can be imported into TILE Composer. To do this, click the Export button in the template:
 (If you see a "Grant File Access" message, follow the prompts to select a folder on your device and grant access to the template Macro.)
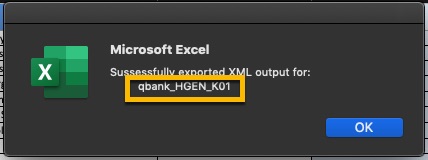
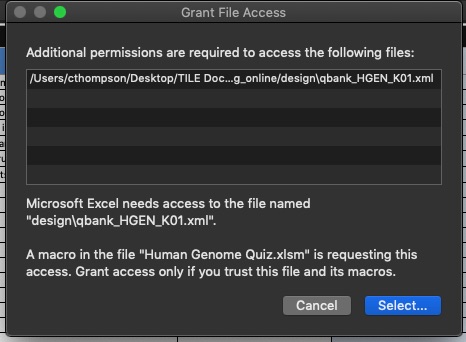 A message displays, confirming that the questions were exported into XML format. Take note of the XML filename.
Import Quiz Questions
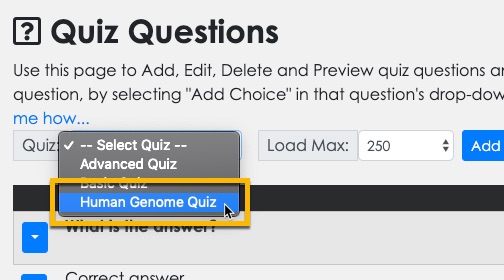
- When you have created the XML import file with your quiz questions, go to TILE Composer and select the Quiz Questions option in the side menu.

- The Quiz Questions page loads. Select your quiz in the quiz drop-down menu. (NOTE: Don't forget to click the Lock & Edit button if you haven't already.)
- Select the Import button.
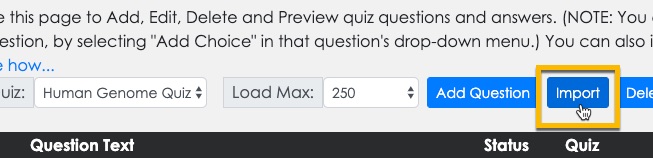
-
The 'Import Quiz Questions' box opens. Select the Choose File button.
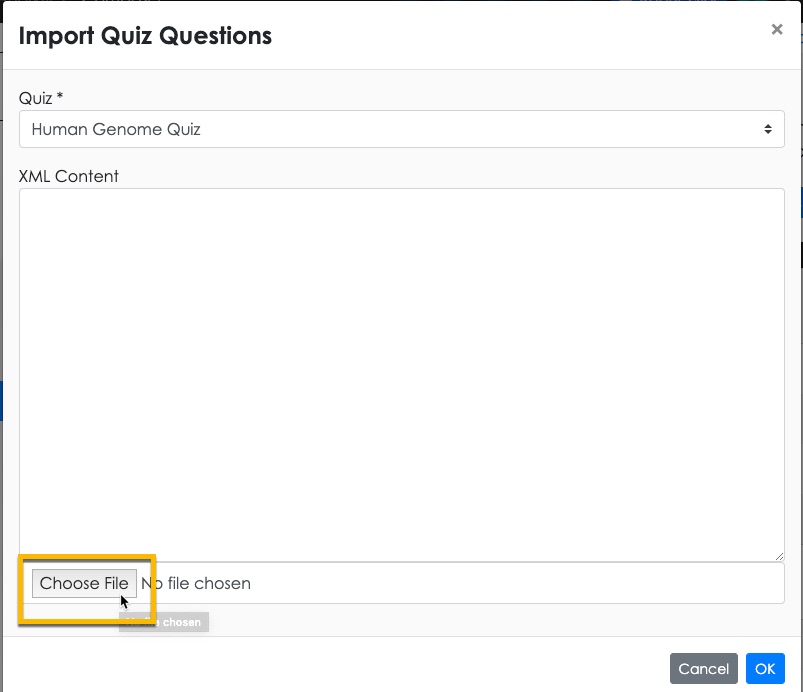
-
Browse to the XML file you created and select it. Then select the Open button.
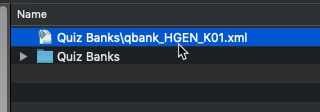
-
The XML from your file appears in the 'XML Content' window. Select the OK button.
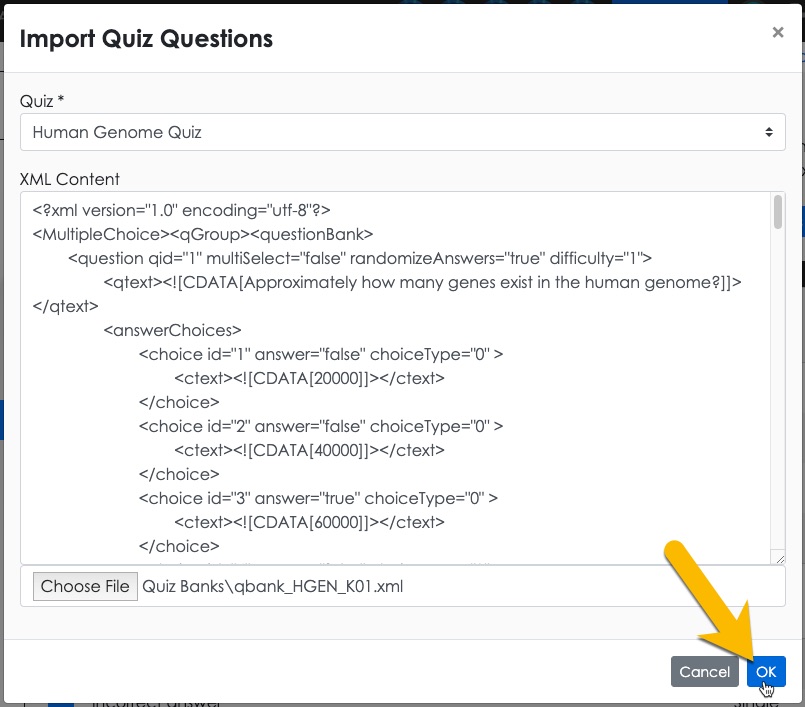
-
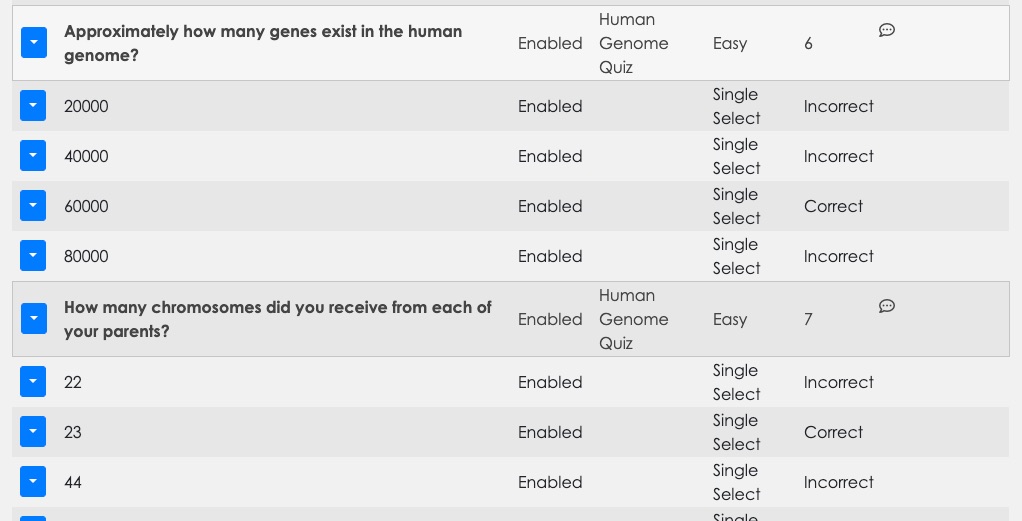
The questions are imported and added to the selected quiz question bank.
-
To see what a question will look like to learners, just click the context menu and select Preview.


-
If you want to remove a question, just click the context menu and select Delete.

Your quiz and quiz questions are ready to go! The final step is to map your quiz to a resource. Click the Map Quiz to Resource tab to learn how. (back to top)
Option 2 - Add Questions One-by-One
If you prefer, you can add quiz questions directly in TILE Composer. (NOTE: This isn't the best option if you have a large amount of quiz questions. If you have more than 10 questions, we recommend using the import steps in the previous section.) Watch this video for a quick example of how to import quiz questions in Composer. You can also follow the Step-by-Step instructions below.
Step-by-Step Instructions
Display Quiz Questions with Answer Choices
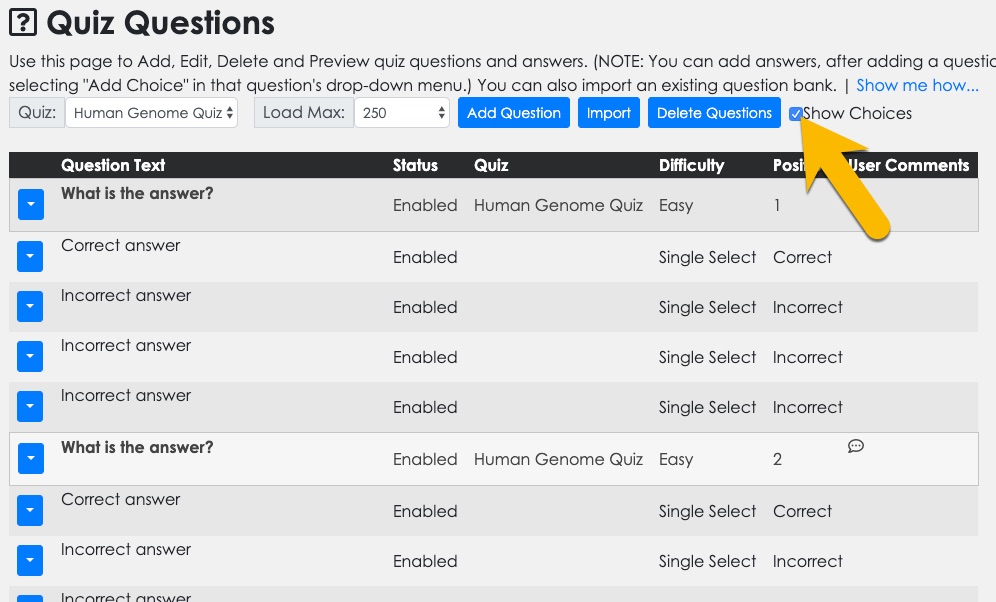
- Go to TILE Composer and select the Quiz Questions option in the side menu.
- The Quiz Questions page loads. Select your quiz in the quiz drop-down menu. (NOTE: Don't forget to click the Lock & Edit button if you haven't already.)
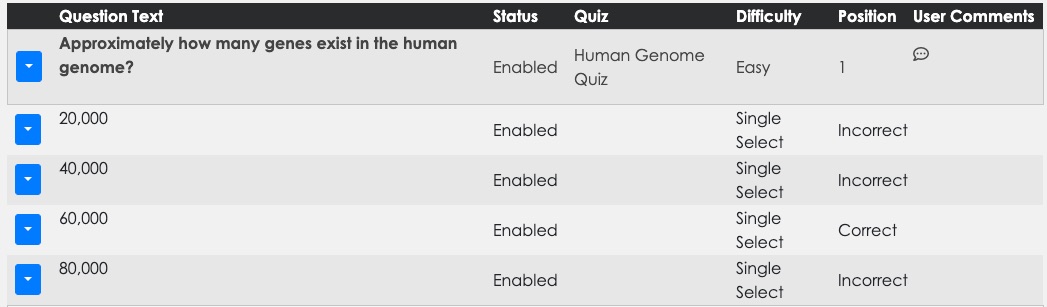
- If you created your quiz from a quiz template, there will be some starter questions in the quiz already. Select the Show Choices checkbox to display the answer choices for each question.
Edit an Existing "Starter Question"
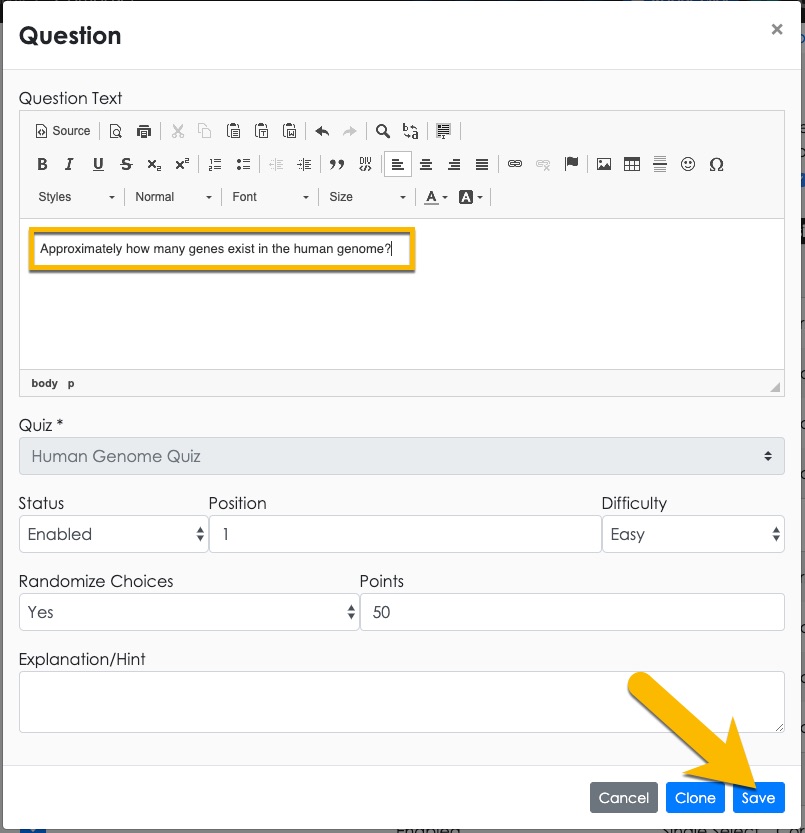
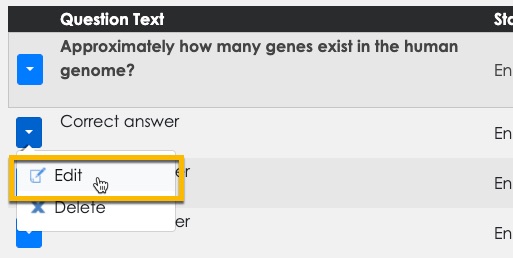
- You have the option to edit the existing starter questions, or to add brand new quiz questions. To edit a starter question, select its context menu and then select Edit.

- The Question Settings panel opens. Update the question text and then click Save.
- Now edit the answer choices for your question. To edit an answer choice, select its context menu and then select Edit.
- The Choice Settings panel opens. Update the answer text, select whether the choice is correct ('Yes' or 'No'), and then click Save.

- The answer choice updates. Repeat the process for the rest of the answer choices to finish the question.

- Repeat the process above until you have entered all of the questions and answer choices for your quiz.
-
To see what a question will look like to learners, just click the context menu and select Preview.
-
If you want to remove a question, just click the context menu and select Delete.
Your quiz and quiz questions are ready to go! The final step is to map your quiz to a resource. Click the Map Quiz to Resource tab to learn how. (back to top)
Add a New Question
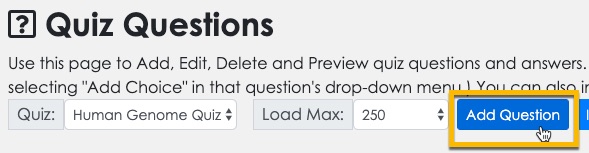
Adding a brand new question is similar to the process for editing an existing question. Select the Add Question button to open the Question Settings panel.
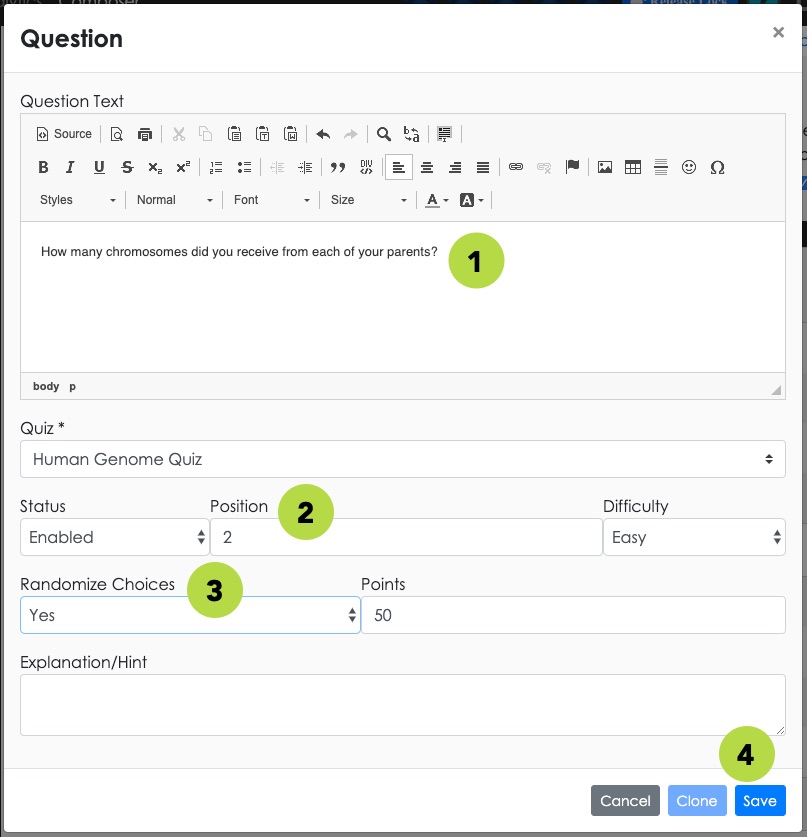
- The Question Settings panel opens. Use the Rich Text HTML Editor to enter the content for the question text. You can apply advanced formatting and incorporate rich media using the HTML editor.
- Set the Position for the question (the relative order you want the question to appear in).
- Set the Randomize Choices option to 'Yes' if you want the answer options for the question to be presented in a random order. NOTE: We recommend setting this to 'Yes' except for cases where a random order could be confusing, such as True/False questions.
- Leave the other settings as they are. (NOTE: If desired, you can enter an explanation or hint to display to the learner after they answer the question.) Select Save when you are ready.
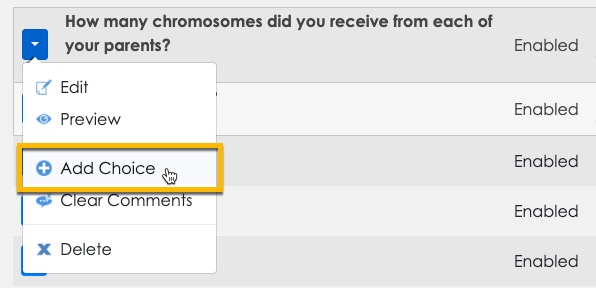
Next, add an answer choice to your new quiz question. Select the context menu for the quiz question and select the Add Choice option.
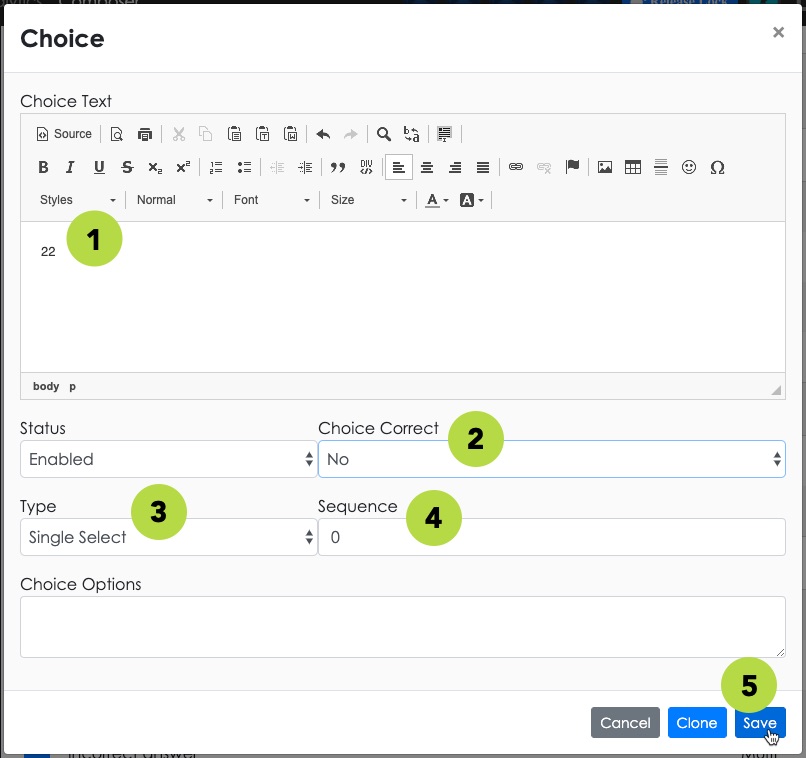
- The Choice Settings panel opens. Use the rich text HTML editor to enter the content for the answer choice.
- Set the Choice Correct to 'Yes' if it's the correct answer; otherwise leave it set at 'No.'
- Set the Type of the answer choice, as appropriate:
- Single Select.Use this for Multiple Choice and True/False questions.
- Multi Select.Use this for questions with multiple correct answers.
- Input Text.Use this for fill-in-the-blank and short answer questions.
- Match.Use this for questions where items in one column are matched to items in another.
- Sorting.Use this for questions where items are sorted into two or more categories.
- Sequence.Use this for questions where items are dragged into the correct order.
- Dropdown.This choice is currently under development.
- Radio.This choice is currently under development.
- [For 'Sequence' question type only] If the answer choice is for a 'Sequence' question type, enter the sequence number for the choice in the Sequence field.
- Select Save when you are ready.
-
To see what a question will look like to learners, just click the context menu and select Preview.
-
If you want to remove a question, just click the context menu and select Delete.
Your quiz and quiz questions are ready to go! The final step is to map your quiz to a resource. Click the Map Quiz to Resource tab to learn how. (back to top)
Question/Answer Types
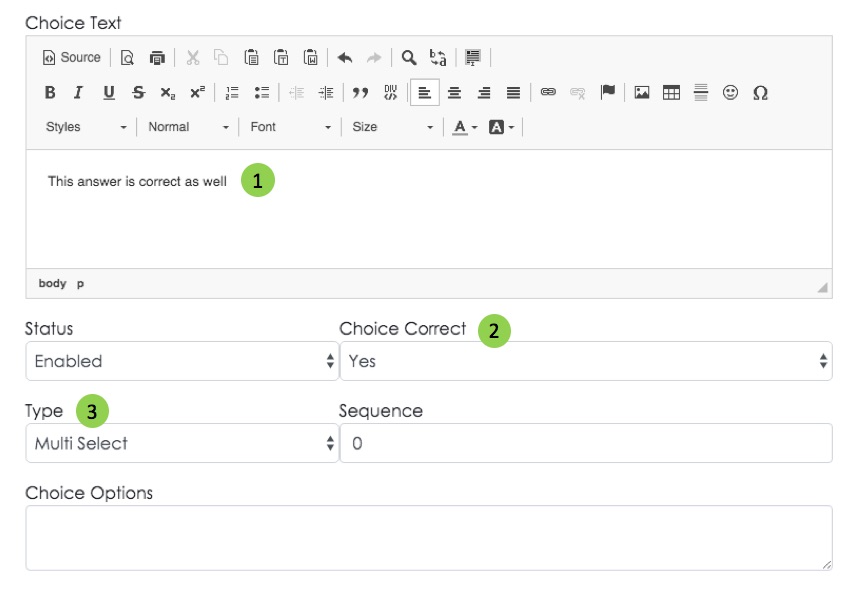
- Enter the text for the answer choice in the Rich Text editor.
- Set the Choice Correct field to 'Yes' or 'No' as appropriate.
- Set the Type to 'Multi Select.'

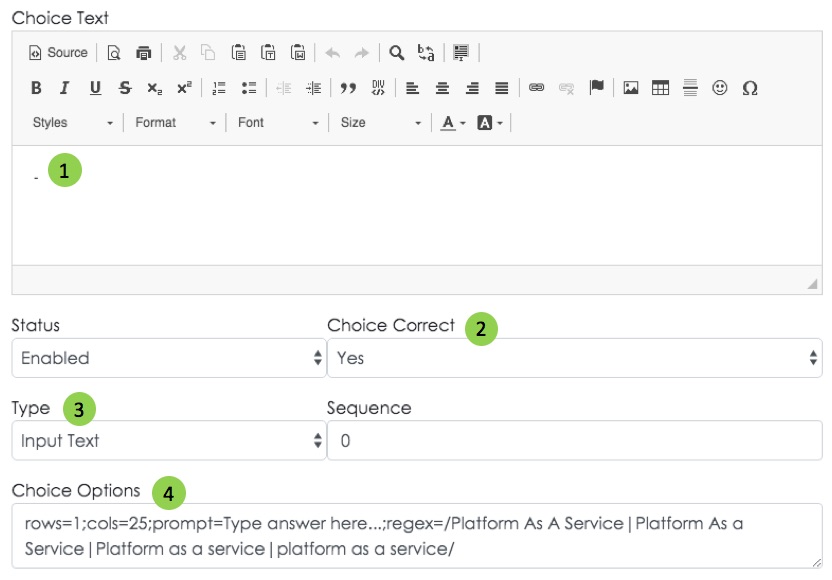
- If you ONLY want the input field, with no label, enter a '-' into the Rich Text Editor. (NOTE: the question stem text, e.g., "What does PaaS stand for?" would have been entered previously in the question editor.)
- Set the Choice Correct field to 'Yes.'
- Set the Type to 'Input Text.'
- Use the Choice Options field to set parameters for the input text field and related formatting:
- Use 'rows' and 'cols' attributes to set the size of the input field
- If desired, add a 'prompt' to the input field
- Designate the correct answer using the 'regex' attribute (NOTE: if you want to designate more than one option as correct, use the '|' character as a separator between these options)


- If you want a label, enter it into the Rich Text Editor. If you want the input field to be INCLUDED within the label for a fill-in-the-blank question, add a '[TEXTBOX]' designator where you want the input field to appear.
- Use the Choice Options field to set parameters for the input text field and related formatting. (NOTE: use the 'label_width=none' attribute if you want the label text to use all available screen width.)

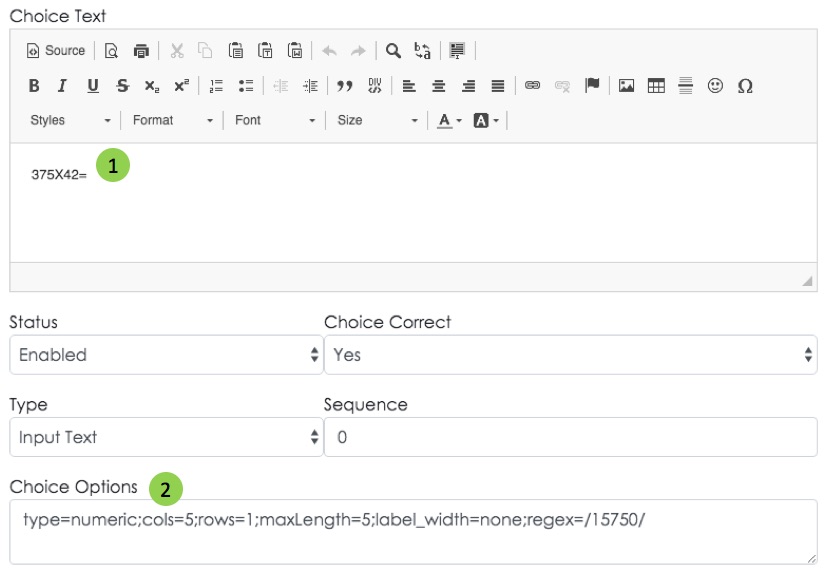
- You can enter problems/formulas in the Rich Text Editor for mathematical questions.
- Use the Choice Options field to set parameters for the input text field and related formatting. (NOTE: use the 'type=numeric' attribute if you want to constrain the input field to only allow numbers.)
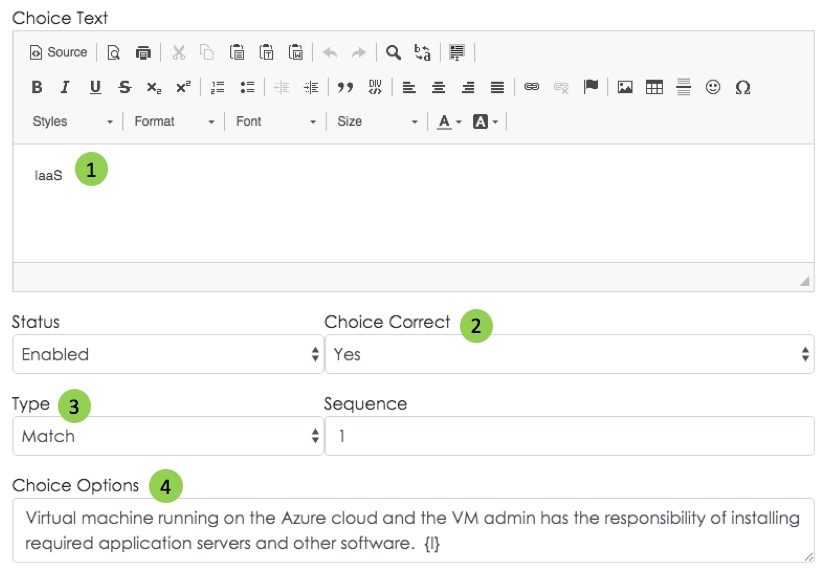
- Enter the text for the item (to be displayed in the left column) in the Rich Text Editor.
- Set the Choice Correct field to 'Yes.'
- Set the Type to 'Match.'
- Use the Choice Options field to enter text for the paired match (to be displayed in the right column).

- Enter the text for the target sorting category (to be displayed in the right column) in the Rich Text Editor.
- Set the Choice Correct field to 'Yes.'
- Set the Type to 'Sorting.'
- Use the Choice Options field to enter text for all associated items (to be displayed in the left column). NOTE: use the syntax shown in the image, including using a comma to separate multiple items.
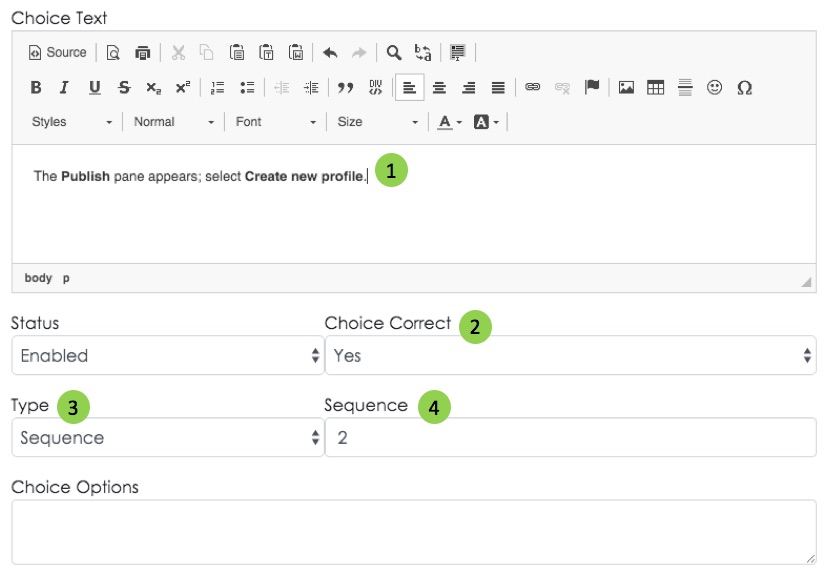
- Enter the text for the item in the Rich Text Editor.
- Set the Choice Correct field to 'Yes.'
- Set the Type to 'Sequence.'
- Enter the correct target position in the Sequence field.
Map Quiz to a Resource
Your quiz is all set up now, but there's one last step. You need to map it to a resource so your learners will be able to see and access it. Watch this video for a quick example of how to map a quiz to a resource. You can also follow the Step-by-Step instructions below.
Step-by-Step Instructions
Update Sample Quiz Resource
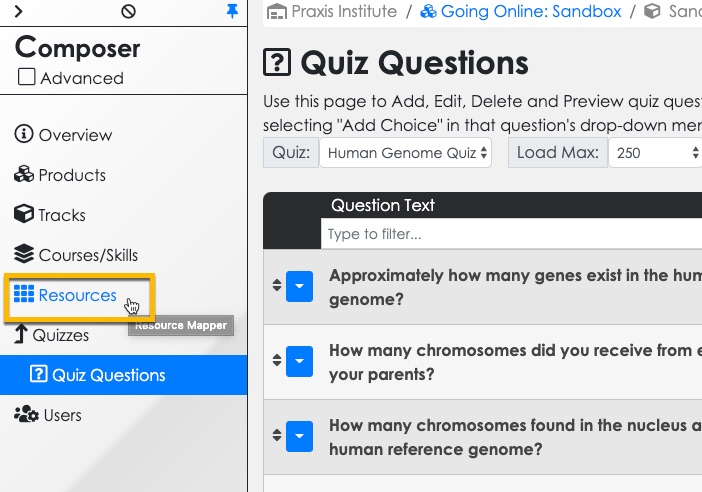
- Select the Resources option in the side menu.
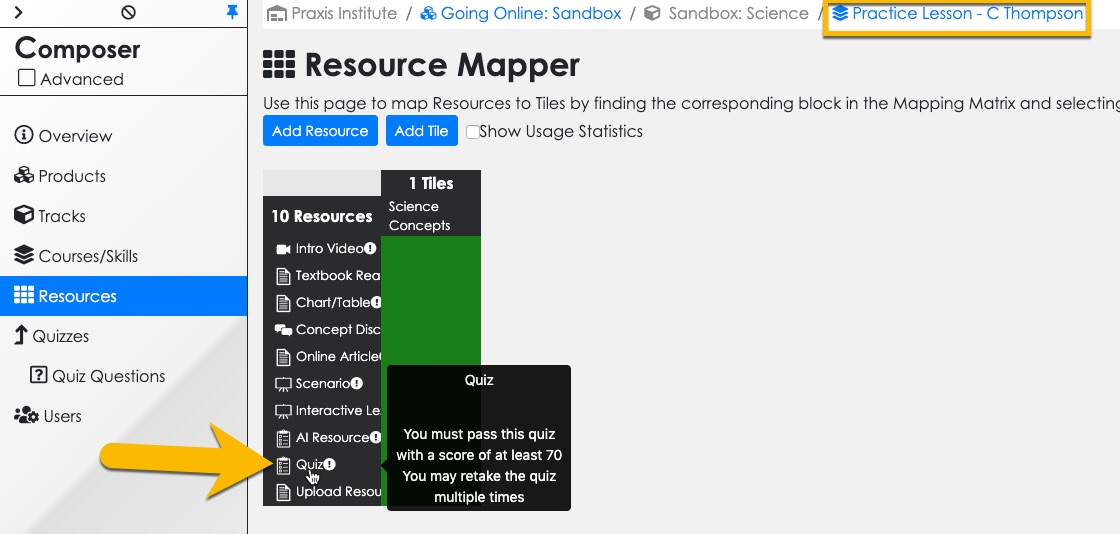
- The Resource Mapper page loads. Make sure it is the right page for your practice lesson/course by looking at the breadcrumbs at the top of the screen. If your lesson/course isn't displayed, click the last breadcrumb to open the course selection screen and then select your lesson. Then select the sample "Quiz" resource in the resource list.
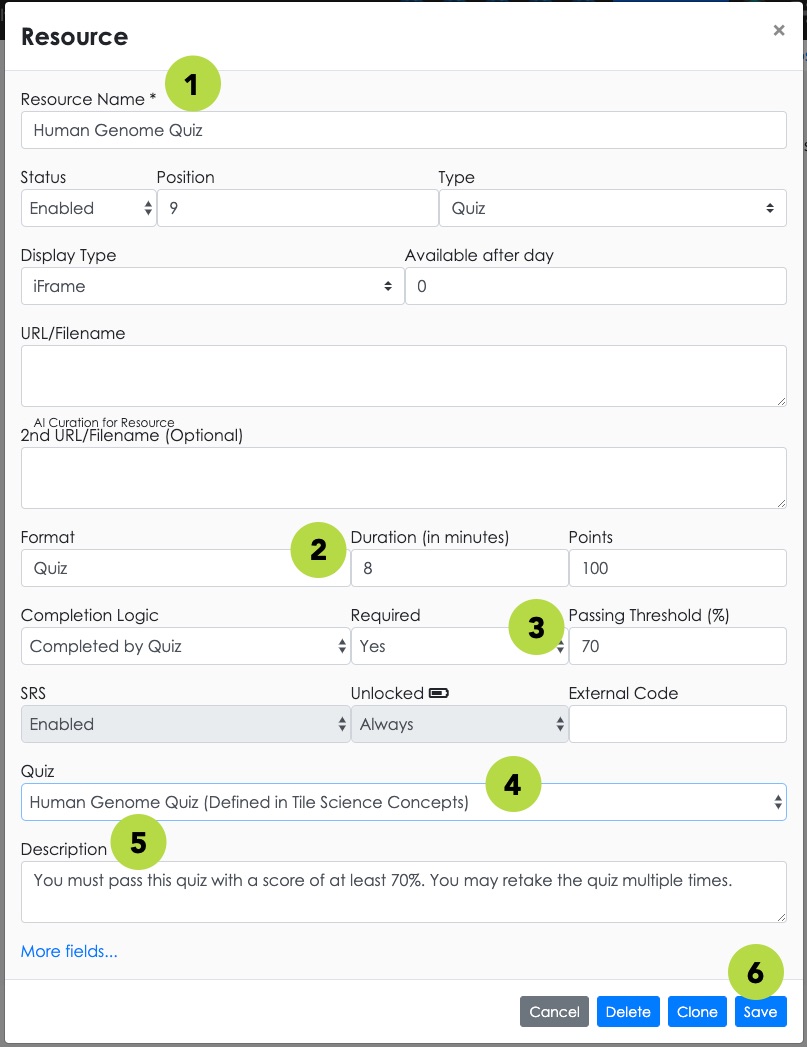
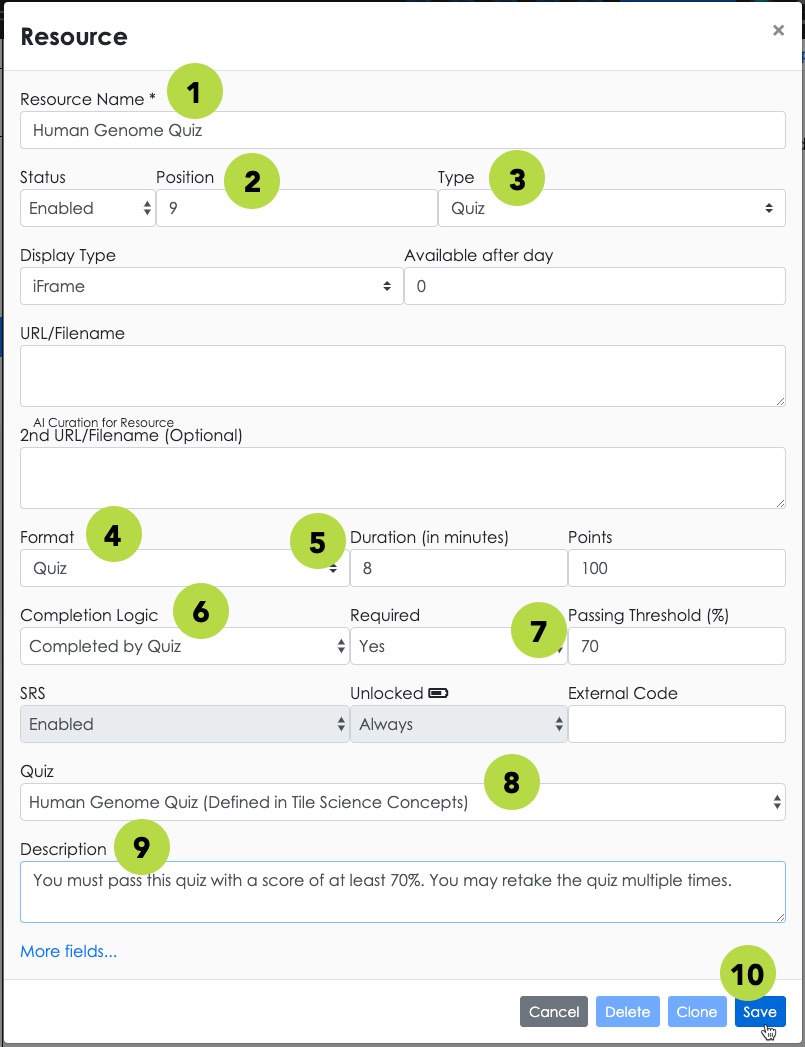
- The Resource Settings panel opens. Enter a name for your quiz - learners will see this title in the course interface.
- Set the Duration for the quiz. This will also be seen by learners and should be the same duration you previously set for the quiz.
- Set the Passing Threshold for the quiz - this should also match the threshold you set previously in the Quiz settings.
- Select the target quiz in the Quiz drop-down selector.
- Enter a brief Description of your quiz. Learners will see this description in the course interface.
- Select Save when you are ready.
- The Quiz resource is now updated and ready for your learners!
Add New Resource
If you want to add more quiz resources to your lesson, the process is very similar to the above - with just a few more steps. Here's what you do:
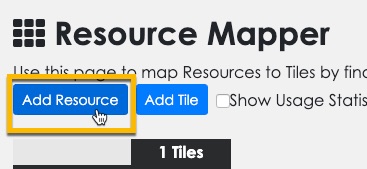
- Select the Add Resource button near the top of the screen.
- The Resource Settings panel opens. Enter a name for your quiz.
- Set the Position for the quiz so it displays in the right order in the lesson.
- Set the Resource Type to "Quiz."
- Set the Resource Format to "Quiz" as well.
- Set the Duration for the quiz. This should be the same duration you previously set for the quiz.
- Set the Completion Logic to "Completed by Quiz."
- Set the Passing Threshold for the quiz - this should match the threshold you set previously in the Quiz settings.
- Select the target quiz in the Quiz drop-down selector.
- Enter a brief Description of your quiz. Learners will see this description in the course interface.
- Select Save when you are ready.
- The Quiz appears in the resource list, but is not yet mapped. Click the empty cell next to the quiz name to activate it.

- Click OK in the confirmation box. The quiz is now activated and ready for your learners!

If you would like a preview of what your learners will experience when they take the quiz, continue to the next section.
Check Learner Access to Quiz
Follow the steps below to check the appearance and behavior of your quiz for learners.
Step-by-Step Instructions
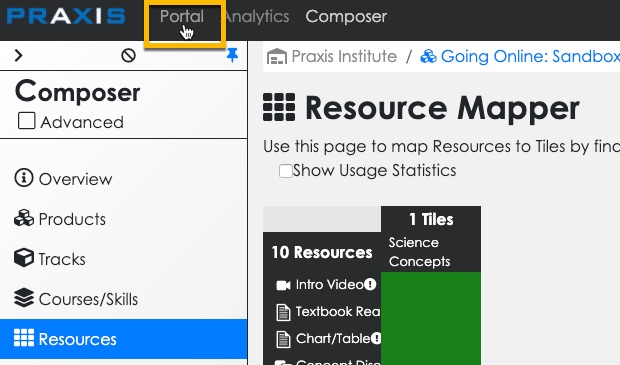
- Exit Composer by selecting the Portal option at the top of the screen.
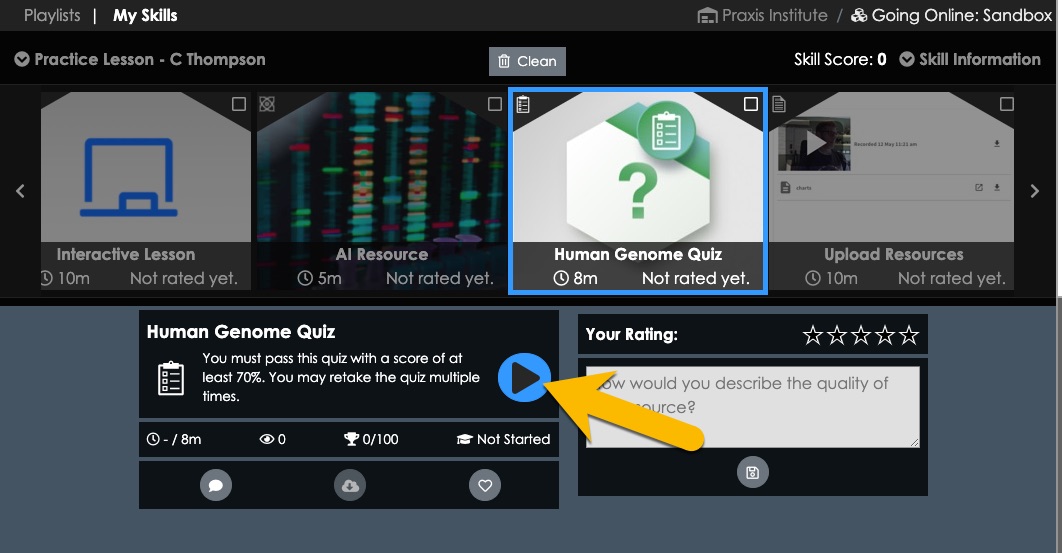
- Locate and select your quiz in the interface. Then click Play button to launch it.
- The quiz loads. Read and answer each question to check on wording, appearance, scoring behavior, etc. Then revise your quiz settings if necessary.

Your quiz is ready for use! Repeat steps 1-3 of this guide for any additional quizzes you want to add.
(back to top)