Virtual Classroom: Overview

The Virtual Classroom is essentially an integrated online meeting/web-conferencing tool – similar to Zoom, WebEx, and other tools. It allows instructors and learners to engage each other via livestream video. You can use Virtual Classroom to engage a large audience and connect up to 7 simultaneous webcams.
Because it’s integrated within the TILE platform, the Virtual Classroom is easy to set up. It’s especially useful for:
- Synchronous learning activities, like online lectures or group activities
- Virtual office hours at regularly scheduled times
Click each tab for step-by-step guidance on how to use the virtual classroom for these two activity types.
1 - Set Up Activity
Watch this video for a quick example of how to set up a Virtual Classroom synchronous learning activity in Composer. You can also follow the Step-by-Step instructions below.
Step-by-Step Instructions
Access the Collaboration Admin Page
- Select the Courses/Skills option in the side menu.
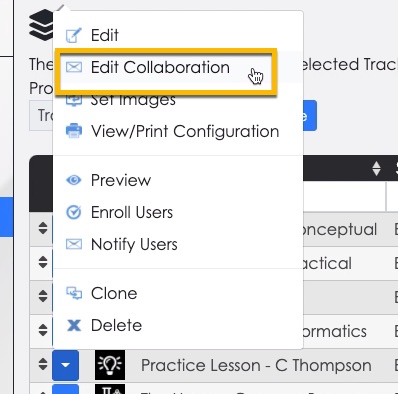
- Click the Lock & Edit button at the top of the screen. Select the context menu for your practice lesson, and then select the Edit Collaboration option.
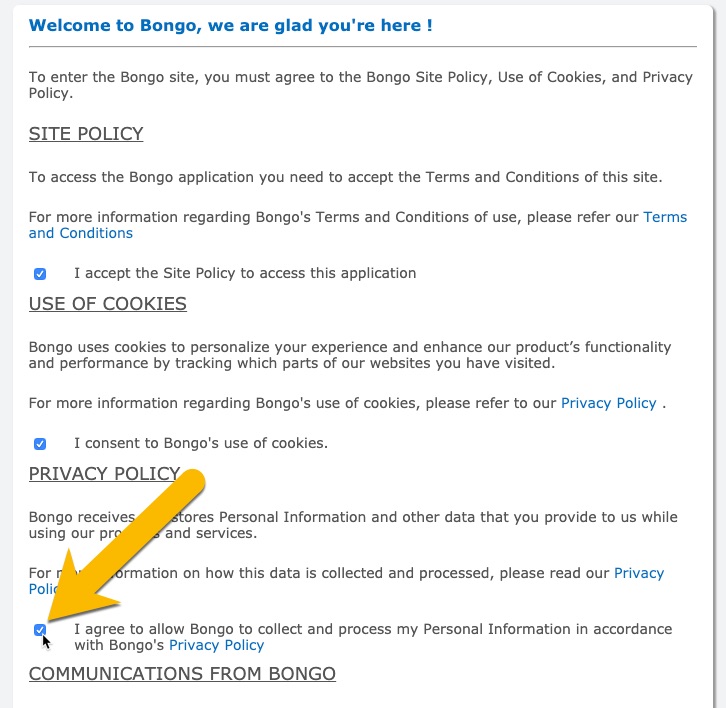
- (If this is your first time accessing the Collaboration Admin Page) select the “I agree…” checkbox to agree to the Bongo plugin terms of use. Then select OK at the bottom of the agreement.
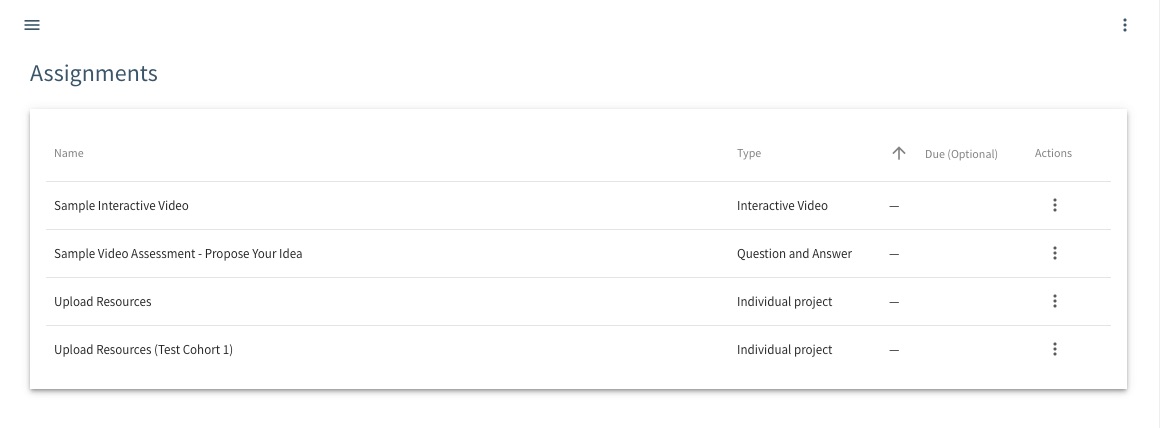
- The Collaboration Admin Page displays.


Create Virtual Classroom Activity
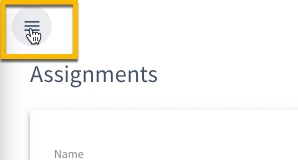
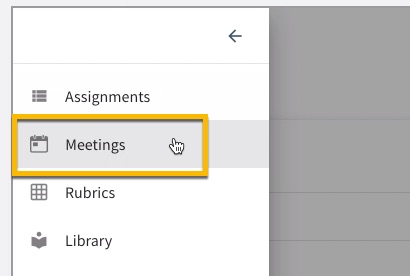
- Select the menu icon at the upper left corner of the Collaboration Admin Page. Then select the Meetings option.
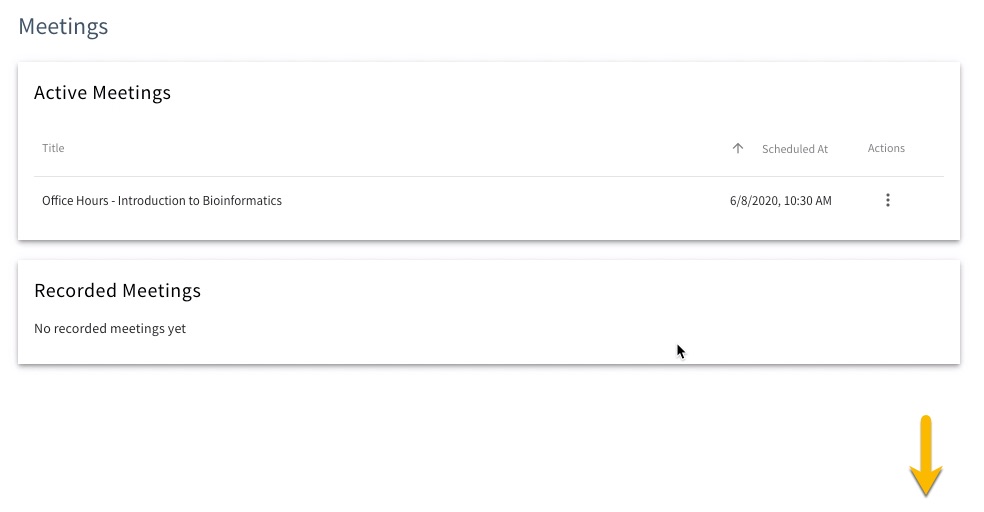
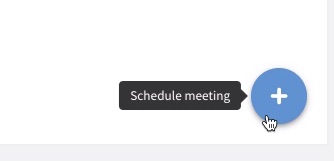
- The Meetings page opens. Select the ‘+’ icon at the bottom right corner of the page to 'Schedule Meeting.'
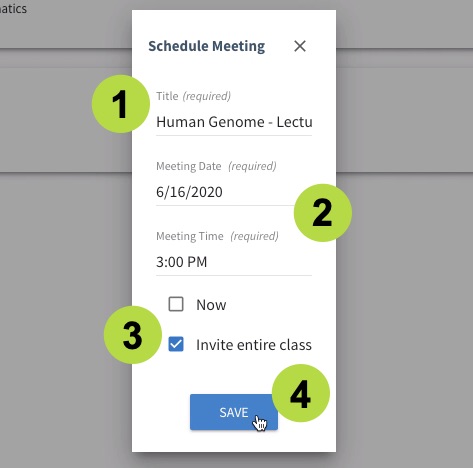
- The Schedule Meeting panel opens. (The Virtual Classroom is essentially a live meeting with collaboration features.) Give your meeting/activity a name.
- Set a Date and Time for the meeting.
- This should be a time when most, if not all, of your learners are available to meet, so you should find out this information before setting up the meeting.
- NOTE: We recommend scheduling a test meeting first – you can use this to get familiar with the Virtual Classroom features, and to rehearse your synchronous activity/lecture. (Refer to Section 2 – “Test/Rehearse the Activity”
- Select the Invite entire class option. This allows a meeting to be scheduled for the entire class without having to invite all users in the course and having to go back and invite more users who join the class later.
- Select Save when you are finished.
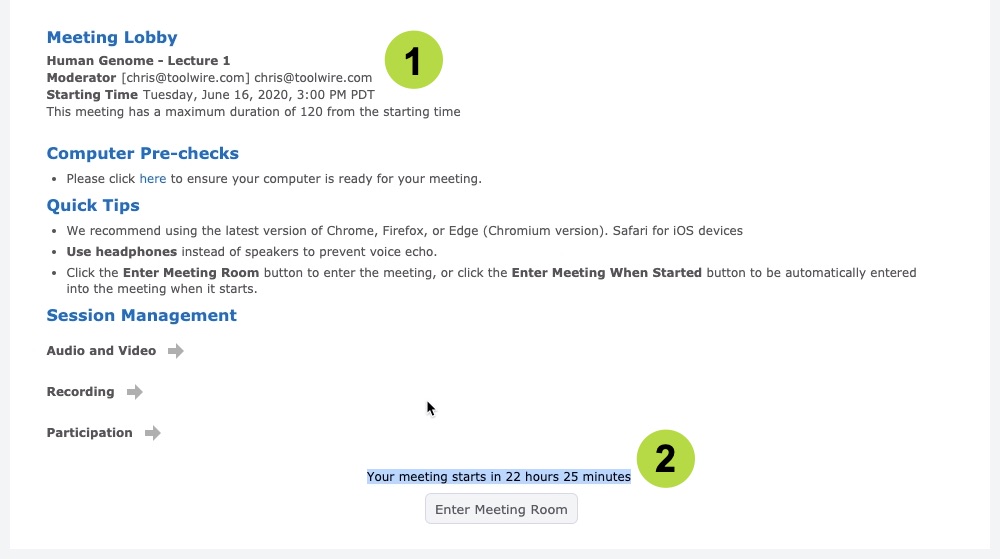
- The Meeting Lobby opens in a separate browser tab. Check the name and Starting Time for the activity/meeting.
- Verify the time remaining until the meeting begins. Then close the browser tab to return to the Meetings page in TILE Composer.
2 - Map Virtual Classroom Activity to a Lesson Resource
Your Virtual Classroom activity is set up, but there's one last step. You need to map it to a resource so your learners will be able to see and access it. Watch this video for a quick example of how to map a Virtual Classroom activity to a resource. You can also follow the Step-by-Step instructions below.
Step-by-Step Instructions
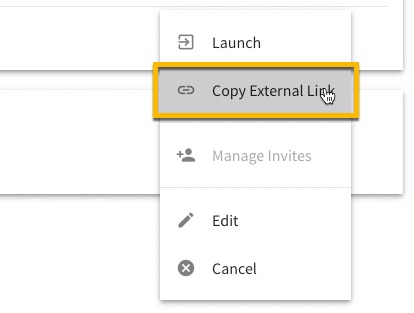
- Select the context menu for the meeting again, but this time select the Copy External Link option. Then select the Close button at the top of the Meetings page.
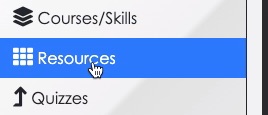
- Select the Resources option in the side menu.
- The Resource Mapper page loads. Make sure it is the right page for your practice lesson/course by looking at the breadcrumbs at the top of the screen. If your lesson/course isn't displayed, click the last breadcrumb to open the course selection screen and then select your lesson. Then select the Add Resource button.
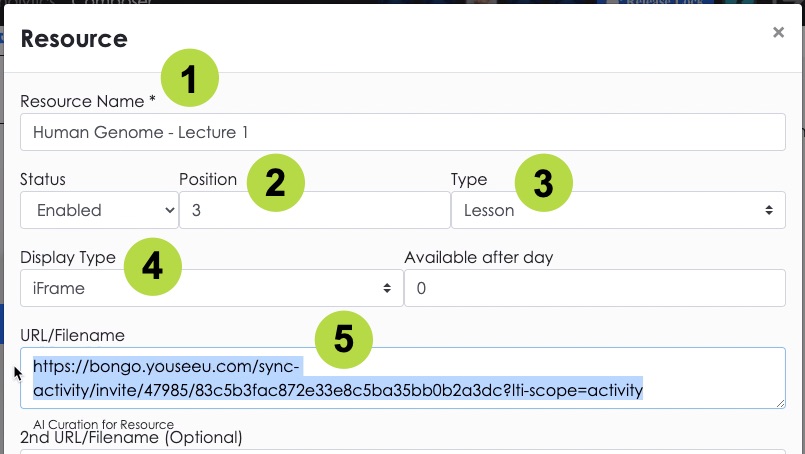
- The Resource settings panel opens. Give your activity a name.
- Set the Position for the activity so it displays in the right order in the lesson.
- Set the Resource Type to "Lesson."
- Leave the Display Type set to iFrame.
- Paste the "External Link" you copied in Step 1 into the URL/Filename field.
- Set the Resource Format to "Meeting."
- Set the Duration for the activity.
- Set the Completion Logic to your preference.
- Enter a brief Description of the activity. Learners will see this description in the course interface.
- Select Save when you are ready.
- The activity appears in the resource list, but is not yet mapped. Click the empty cell next to the activity name to activate it.
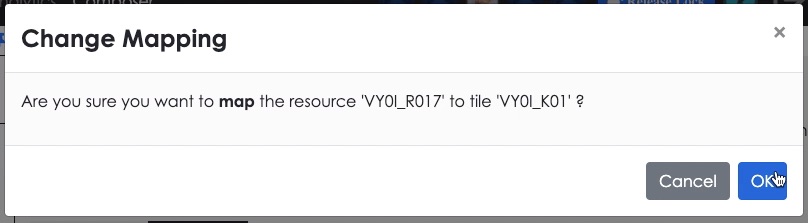
- Click OK in the confirmation box. The activity is now enabled and ready for your learners!


3 - Test/Rehearse the Activity
Watch this video for a quick example of how to test and rehearse for a Virtual Classroom synchronous learning activity. You can also follow the Step-by-Step instructions below.
Step-by-Step Instructions
Test and Rehearse for Activity
- At the scheduled meeting date and time, access the Collaboration Admin page for your practice lesson. (see previous section for instructions if needed)
- Select the menu icon at the upper left corner of the Collaboration Admin Page. Then select the Meetings option.
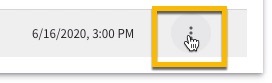
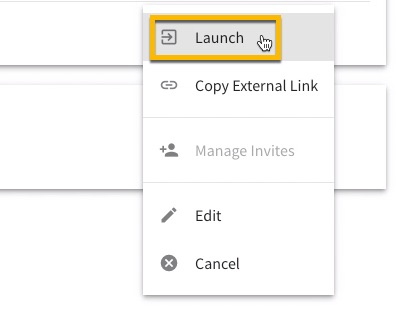
- The Meetings page opens. Select the context menu next to the date/time for the meeting and then select the Launch option.
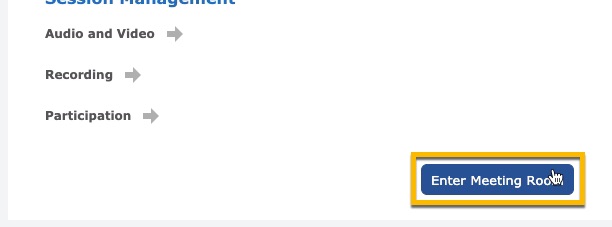
- The Meetings Lobby opens. Select Enter Meeting Room.
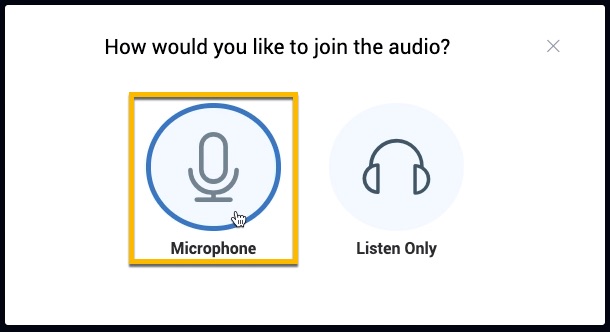
- The Virtual Classroom opens and the “How would you like to join the audio?” message appears. Select Microphone.
- An “echo test” message appears. Speak into your microphone and confirm that you can hear yourself, then select Yes. (If you can’t hear yourself, select No and follow the instructions to change your device’s audio settings.)
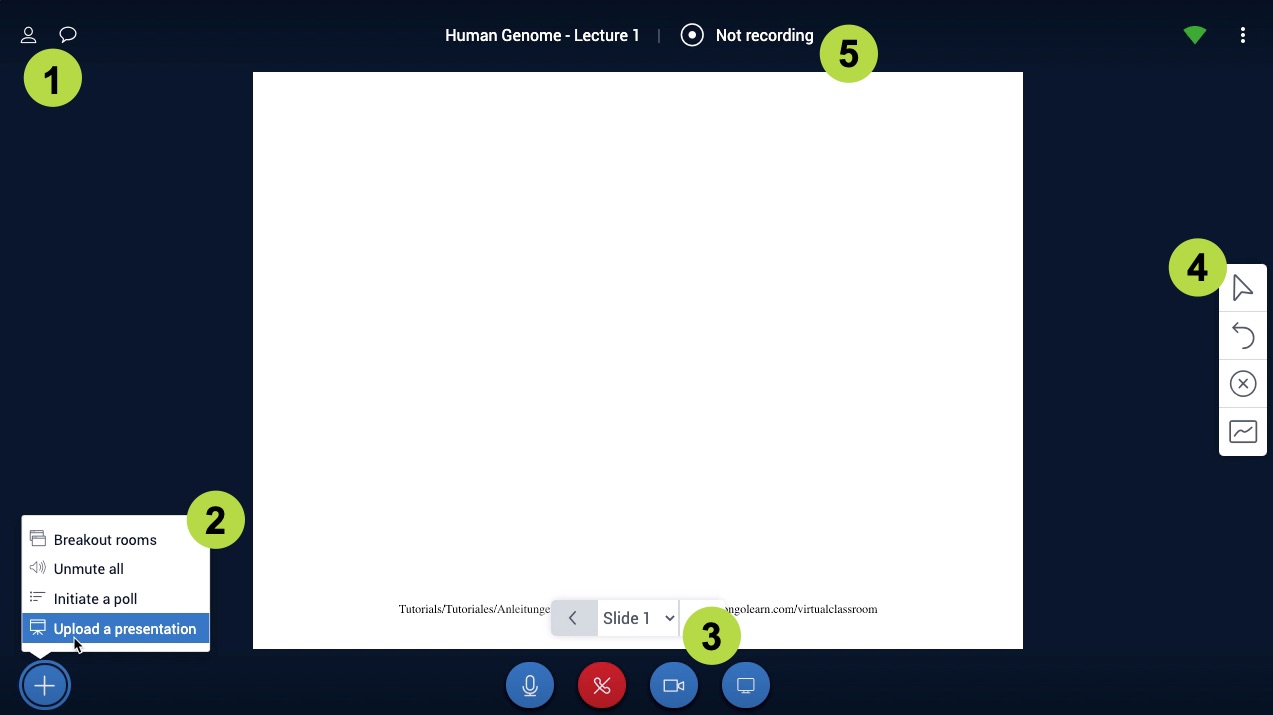
- Participant and Chat panels.
- Presentation, Polls, and Breakout rooms
- Share Camera and Screen
- Annotation tools
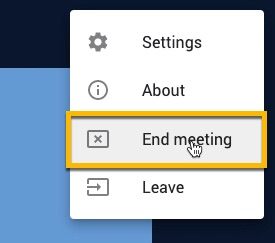
- When you’re finished exploring and testing each feature, exit the meeting by clicking the context menu at the upper right corner of the screen and then selecting the End Meeting option.

The main Virtual Classroom interface is displayed. Explore this synchronous learning environment to get familiar with the various features.
See “Virtual Classroom Features” section below for more information on how to use each of these features.

Virtual Classroom Features
Here’s a summary of the main features of the Virtual Classroom environment. Get familiar with each feature before using it in a live activity.
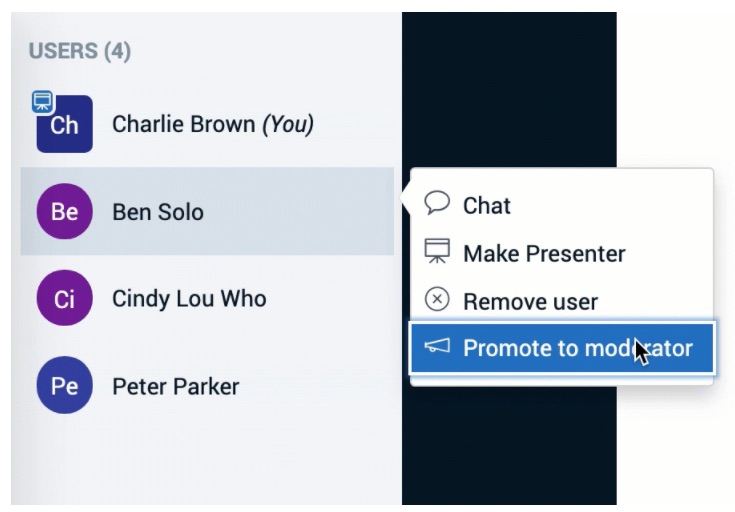
Participant Panel
- Select the participant icon at the upper left corner of the screen.
- The Participant Panel displays at the left of the screen. During your test, you will be the only participant (unless you invite someone else to participate). But during the actual meeting you will see each participant listed here. You can click on a user to chat directly with them, make them a presenter, remove them from the meeting, or promote them to moderator. (NOTE: You can always make yourself the moderator or presenter later by clicking on your own name in the list.)

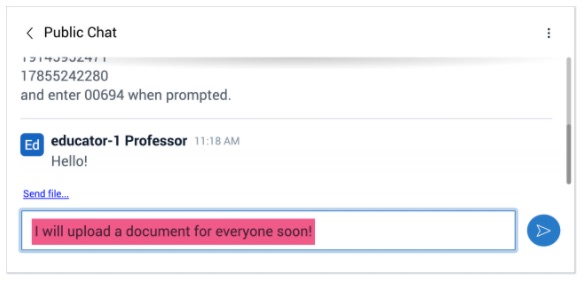
Live Chat Panel
- Select the chat icon at the upper left corner of the screen.
- The Live Chat Panel displays at the left of the screen. During your test, you will be the only participant (unless you invite someone else to participate). But you can tryout the various chat features to get familiar.
- Public Chat. Type in the text box and press the Enter or Return key to send your chat message.
- Upload File in Chat. In both public and private chat, you can upload files. Click Upload File in the top right corner of the chat box.

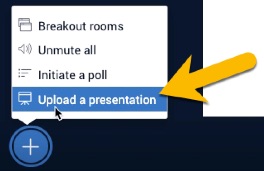
Presentations
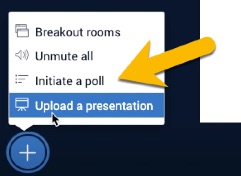
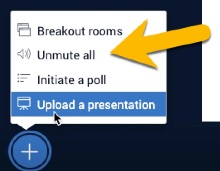
- Select the + icon at the lower left corner of the screen, then select the Upload a presentation option.
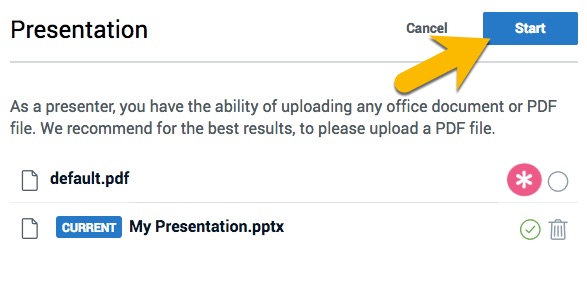
- The upload Presentation panel opens. You can drag a file into the uploading window or browse for files. Allowed file types include: doc, docx, xls, xlsx, pdf, txt, rtf, jpg, jpeg, png, bmp, html, htm, zip. The maximum file size is 30MB, and the maximum number of pages/slides that can be uploaded in a Virtual Classroom presentation is 200. If your presentation exceeds these limits, consider dividing your presentation into multiple files and uploading them one after the other. Click Start after your file is listed in the panel.
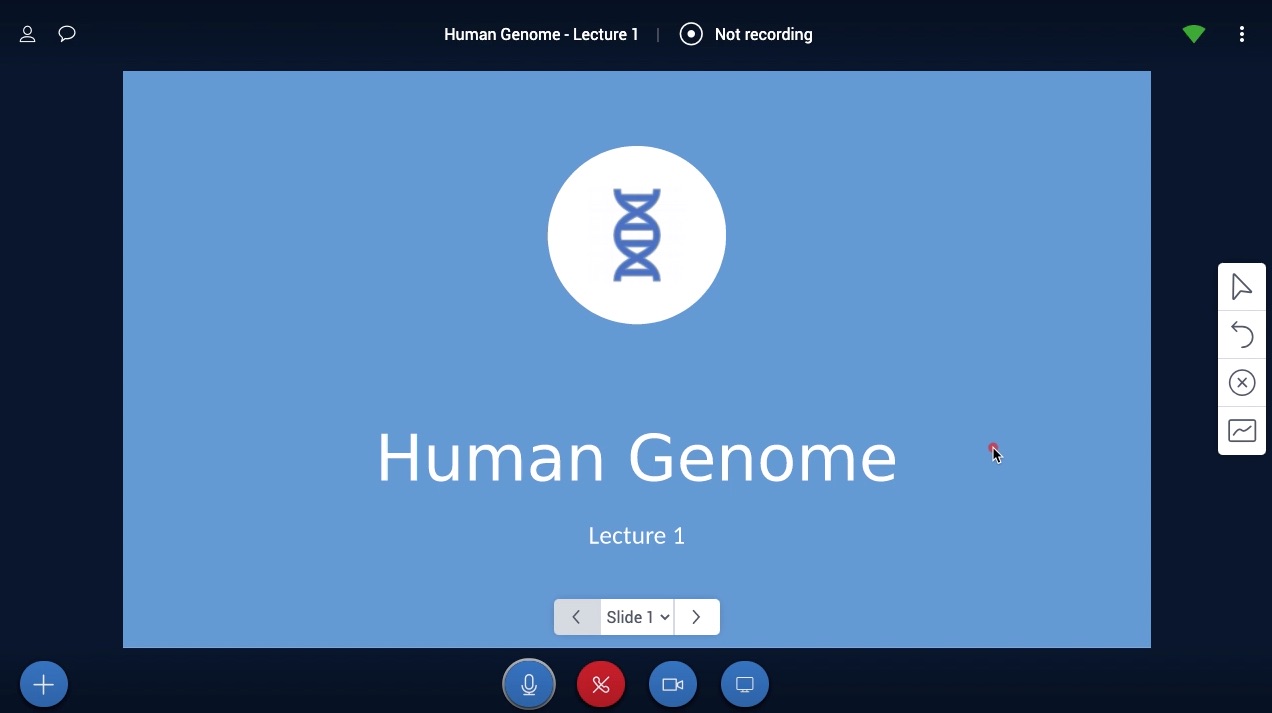
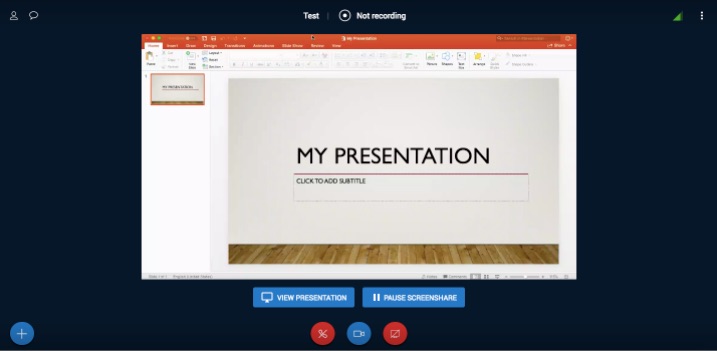
- Your presentation appears in the Virtual Classroom. Test each slide/page of the presentation and practice your lecture/activity as desired.
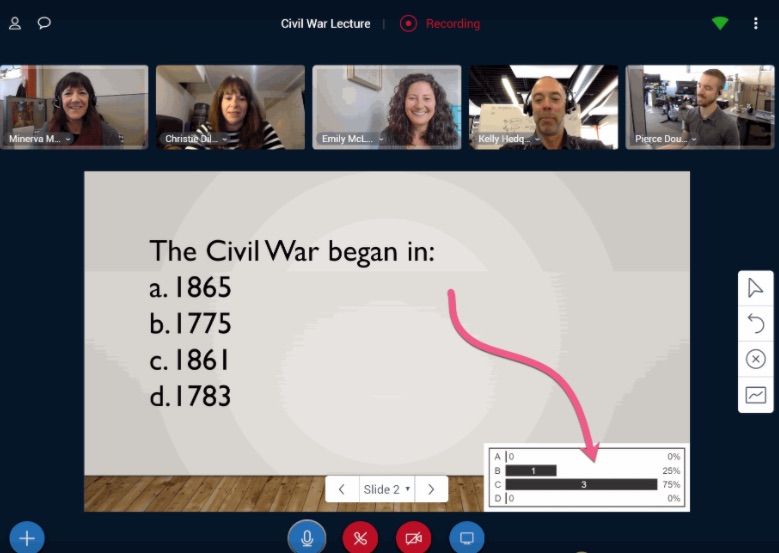
Polling
- Select the + icon at the lower left corner of the screen, then select the Initiate a Poll option.
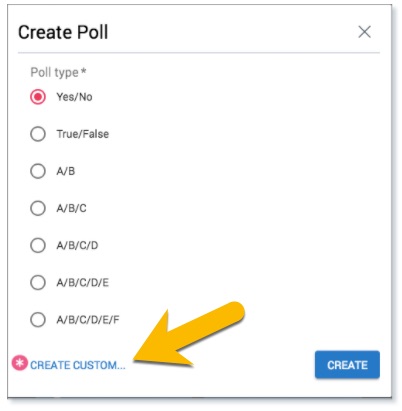
- Choose your preferred poll type from the menu. During the activity, you will ask the poll question and allow time for participants to respond. (The poll question can also be uploaded and displayed in the presentation window.)
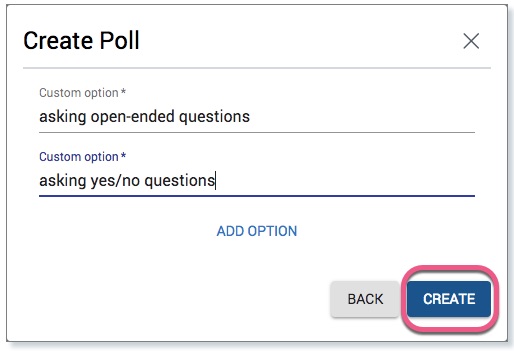
- If you select the “Create Custom” option you can write your own text for the question and answer options.
- Once the poll is created, you will be given the option to Close the Poll or Close the Poll and Publish Results.
- If you choose to Publish Results, the results will display on the whiteboard or the current slide.
- To clear a published poll, click on the Clear All Annotations button within the annotation tools box.
Muting
- You can use the Mute all/Unmute all button to mute or unmute all activity participants at once.
Breakout Rooms
- Select the + icon at the lower left corner of the screen, then select the Breakout rooms option.
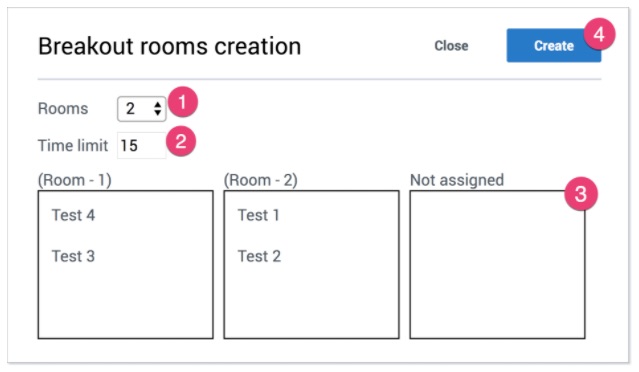
- In Virtual Classroom, you can temporarily divide learners into 2-6 Breakout Rooms - small groups for discussion. Learners can upload presentations, annotate content, and share their desktop. (The work in this space will not be saved or recorded.) You can test this feature with help from other test users.
- Select the number of breakout rooms you would like to create. (The maximum number of rooms you can create is 6.)
- Indicate the time limit for the breakout.
- Drag and drop names to assign them to the preferred Breakout Room.
- When finished, click Create. Then, learners will receive an invitation to join their assigned Breakout Room. The first person to enter the breakout room will be assigned the Moderator role. NOTE: if a user joins late you will be able to add them to a breakout room by selecting invite to breakout rooms option in the + menu.
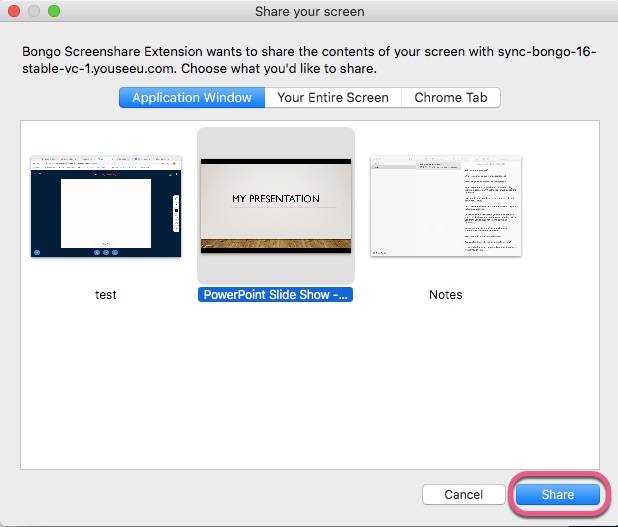
- Select the Share Screen icon at the lower center of the screen.
- You can share Your Entire Screen (recommended*) or Application Window. Select your preferred option and Share.
- The Virtual Classroom participants will see what you're sharing.
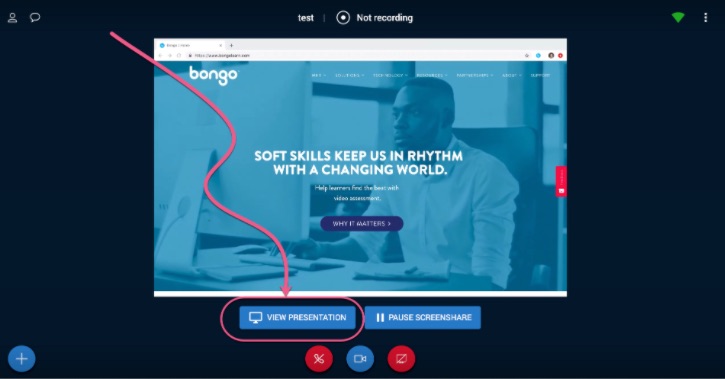
- After uploading your presentation, you can share your desktop at the same time and switch between the two screens by clicking on the View Presentation/View Screenshare button.
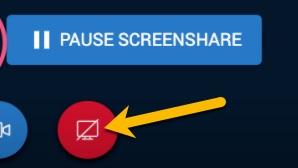
- When you’re done sharing, click the Exit desktop icon. You can also pause the screenshare at any time with the PAUSE SCREENSHARE button.
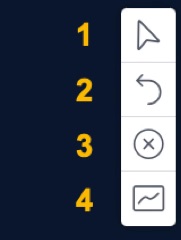
- With the Pointer tool, you can draw attention to specific areas in the presentation space. If you click the Pointer icon again, you’ll see additional Drawing and Text tools.
- To clear your last annotation, click the Undo Annotation button.
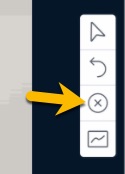
- If needed, you can clear all annotations. When you use this function, it will only clear the annotations of the current page, along with any polls created. This will not affect other pages of the whiteboard/presentation. (If multi-user mode is turned on, clearing all annotations will only clear your annotations.)
- To allow other participants to draw on the presentation space, you can turn multi-user mode on.
- Click the Record icon at the top of the screen.
- “Recording” displays in red text to indicate the recording is in-progress. When you are finished, click the Recording icon again to stop. (The meeting recording will be listed on the Meetings page after it’s processed by the system.)

Create rooms
Monitor rooms
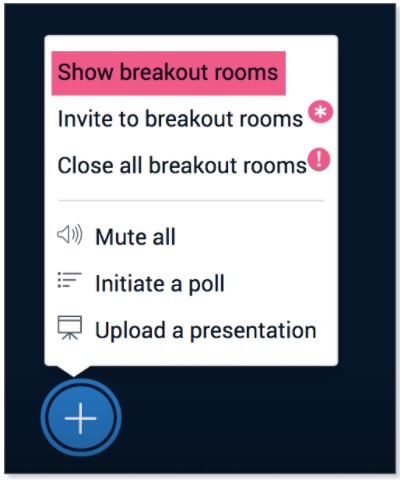
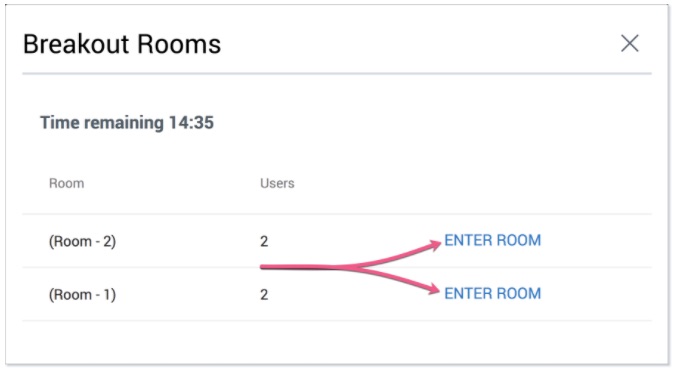
You can monitor Breakout Rooms by clicking the + button and selecting Show breakout rooms.
To join a Breakout Room, click Enter Room. The Breakout Room will open a new tab.
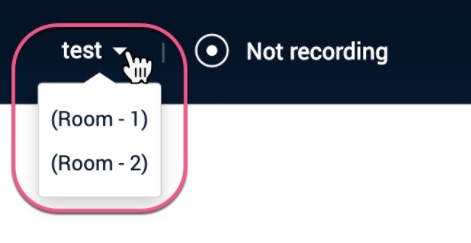
You can also join a Breakout Room by clicking on the caret icon next to the meeting name. If you would like to leave one room and join another, close the Breakout Room tab and repeat the process above.
Close rooms
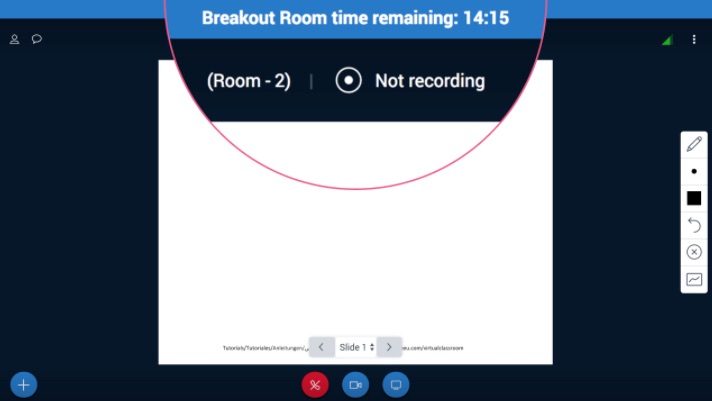
There is a countdown timer in the Breakout Room. Learners will automatically rejoin the Virtual Classroom when the timer runs out. You can also end the Breakout Room session early by clicking the + button and selecting Close all breakout rooms.
Share Screen

Annotation Tools The Virtual Classroom has annotation tools you can use to support the activity.
Recording You can record meetings in the Virtual Classroom, which can be useful for learners that are not able to attend or for later general reference. To test this feature, do the following.


More Info
Click here for more information about using the Virtual Classroom.
1 - Set Up Virtual Office Hours
You can use the Virtual Classroom feature to set up re-occuring “virtual office hours,” where your learners can ask you questions and interact with you in real-time. The process for setting up Office Hours in Composer is the same as setting up synchronous learning activities, with a couple of minor differences. Watch the video below to see how it’s done. You can also follow the Step-by-Step instructions below.
Step-by-Step Instructions
Access the Collaboration Admin Page
- Click the Lock & Edit button at the top of the screen. Select the context menu for your practice lesson, and then select the Edit Collaboration option.
- The Collaboration Admin Page displays.
Set Up Office Hours
- Select the menu icon at the upper left corner of the Collaboration Admin Page. Then select the Meetings option.
- The Meetings page opens. Select the ‘+’ icon at the bottom right corner of the page to 'Schedule Meeting.'
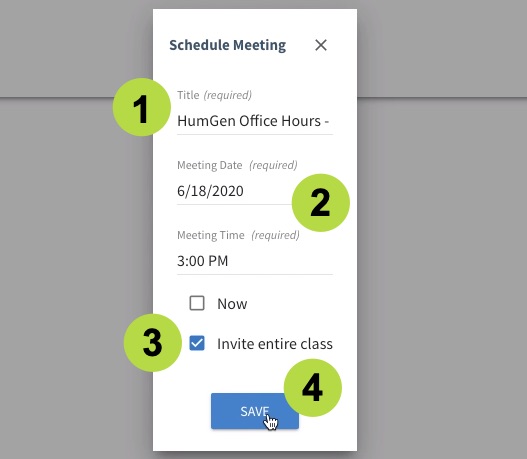
- The Schedule Meeting panel opens. This meeting is for your first Office Hours session - give the session a name, preferably with the date included.
- Set a Date and Time for the Office Hours session. This should be a time when most of your learners are available if possible, so you should find out this information before setting up the meeting.
- Select the Invite entire class option. This allows a meeting to be scheduled for the entire class without having to invite all users in the course and having to go back and invite more users who join the class later.
- Select Save when you are finished.
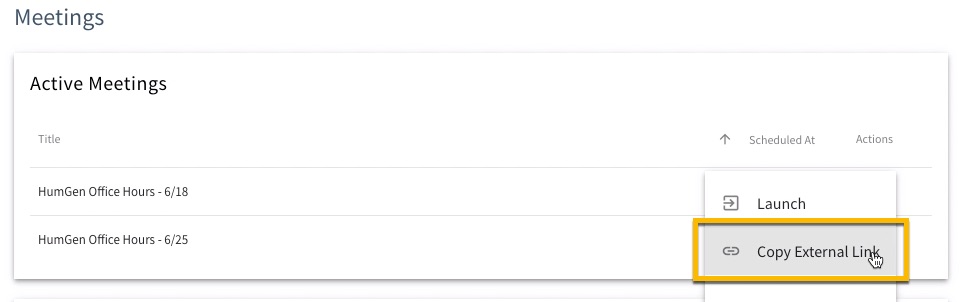
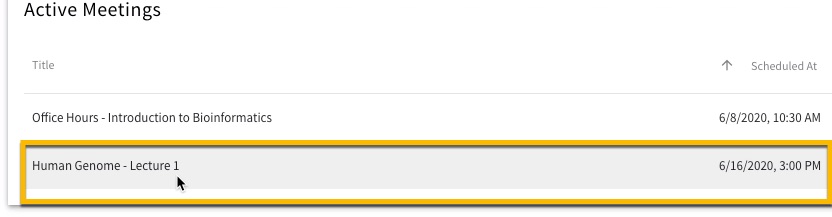
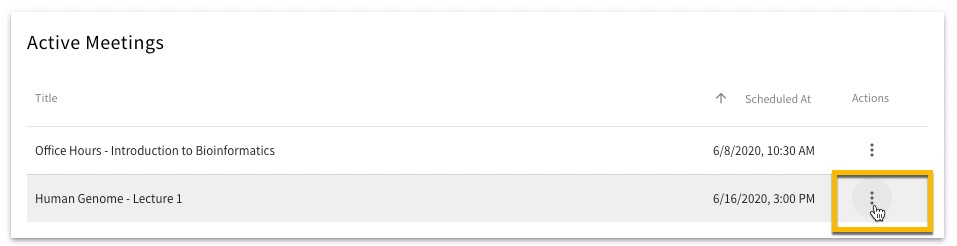
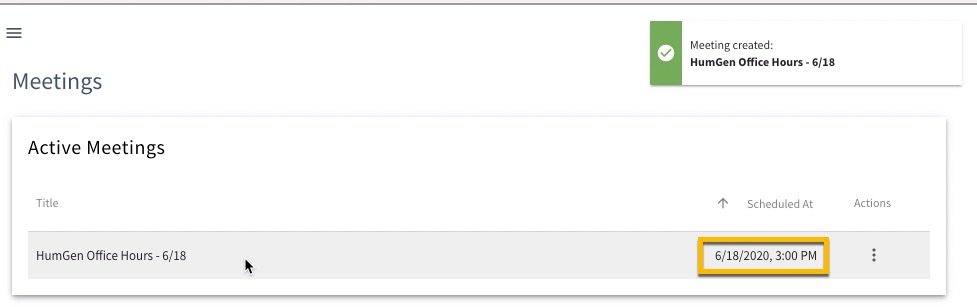
- The new Office Hours session is added to the ‘Active Meetings’ list, with the scheduled date and time indicated.
- Repeat the steps above for each additional Office Hours session you plan to hold (e.g., twice a week, weekly, etc.). Continue to the next session to see how to map each Office Hours session to a lesson resource.
 (back to top)
2 - Map Office Hours to a Lesson Resource
Your Office Hours session is set up, but there's one last step. You need to map it to a resource so your learners will be able to see and access it. Watch this video for a quick example of how to map an Office Hours session to a resource. You can also follow the Step-by-Step instructions below.
Step-by-Step Instructions
- Select the context menu for the Office Hours session and select the Copy External Link option. Then select the Close button at the top of the Meetings page.
- Select the Resources option in the side menu.
- The Resource Mapper page loads. Make sure it is the right page for your practice lesson/course by looking at the breadcrumbs at the top of the screen. If your lesson/course isn't displayed, click the last breadcrumb to open the course selection screen and then select your lesson. Then select the Add Resource button.
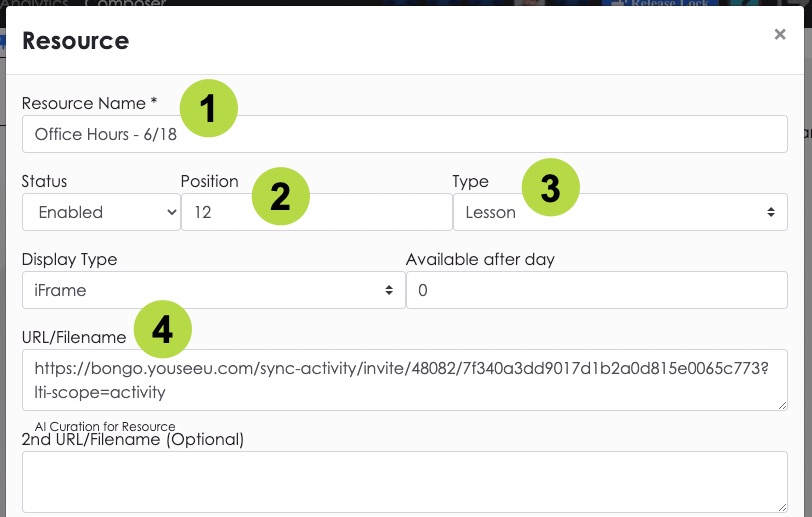
- The Resource settings panel opens. Give your Office Hours session a name.
- Set the Position for the session so it displays in the right order in the lesson.
- Set the Resource Type to "Lesson."
- Paste the "External Link" you copied in Step 1 into the URL/Filename field.
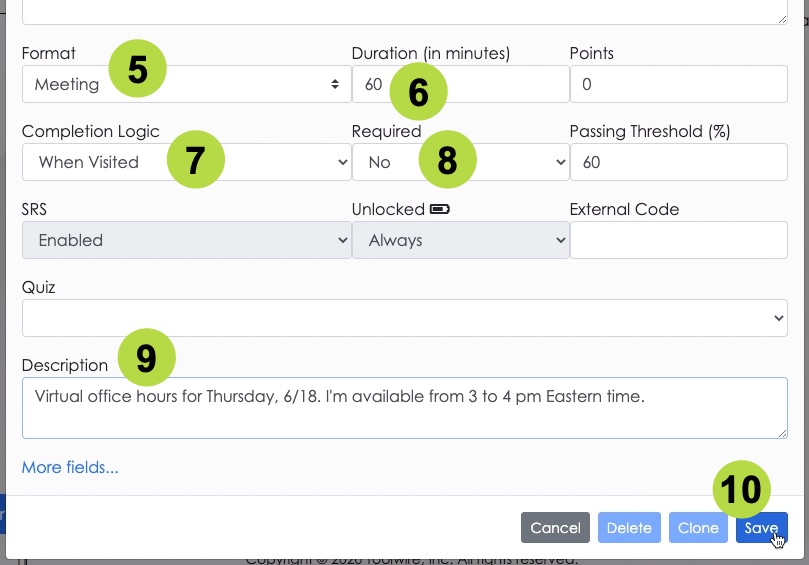
- Set the Resource Format to "Meeting."
- Set the Duration for the Office Hours session.
- Set the Completion Logic to "When Visited."
- Set the Required field to "No," since Office Hours are optional.
- Enter a brief Description of the Office Hours. Learners will see this description in the course interface.
- Select Save when you are ready.
- The activity appears in the resource list, but is not yet mapped. Click the empty cell next to the activity name to activate it.
- Click OK in the confirmation box. The activity is now enabled and ready for your learners!