Post Virtual Classroom Recordings Guide: Overview

Posting a Virtual Classroom recording is a simple process with two main steps:
- Copy the Meeting Link
- Update the Activity Resource
For more detail, follow the step-by-step instructions below.
Step-by-Step Instructions
Copy the Meeting Link
Follow these steps to make sure the “Meetings” (Virtual Classroom) feature is enabled for the activity:
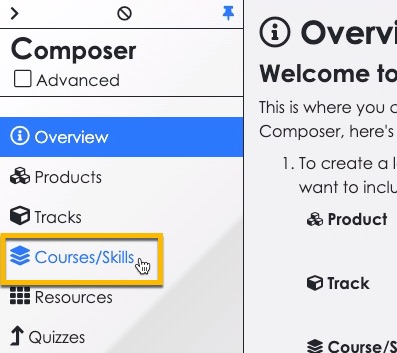
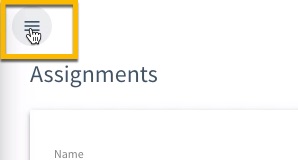
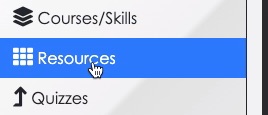
- Select the Courses/Skills option in the side menu.
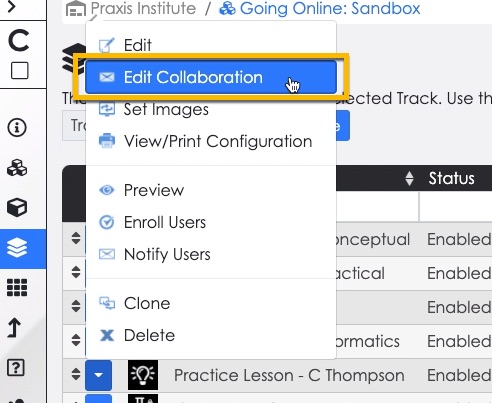
- Select the context menu for the skill/lesson, then select the Edit Collaboration option.
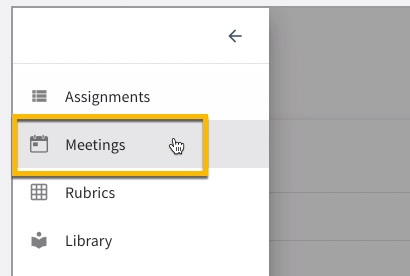
- The Collaboration Admin Page displays. Select the menu icon at the upper left corner of the page, then select the Meetings option.
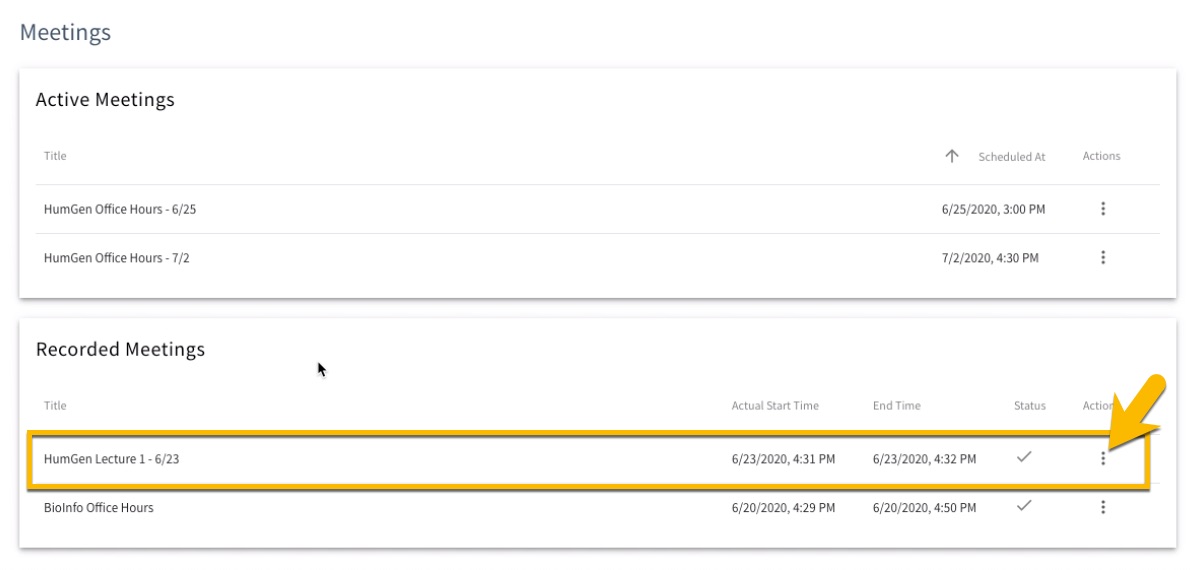
- The Meetings page opens. Go to the ‘Recorded Meetings’ section and select the context menu icon for the activity you recorded.
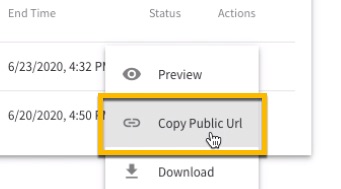
- Select the Copy Public URL option.
You are now ready to use the meeting recording in the activity resource – just follow these steps:
- Select Close at the top of the Meetings page. Then select the Resources option in the Composer side menu.
- The Resource Mapper page loads. Make sure it is the right page for your practice lesson/course by looking at the breadcrumbs at the top of the screen. If your lesson/course isn't displayed, click the last breadcrumb to open the course selection screen and then select your lesson. Next, select the Virtual Classroom activity or office hours session you want to use the recording for (e.g. “Human Genome - Lecture 1”).
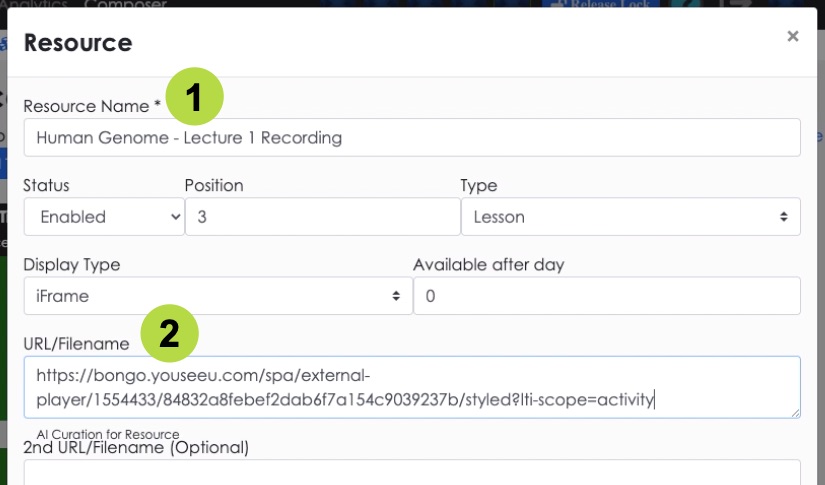
- The Resource settings panel opens. Update the activity name as desired to indicate that it is now a recorded, asynchronous event instead of “live.”
- Replace the current activity link in the URL/Filename field with the “Public URL” link you copied previously for the activity recording.
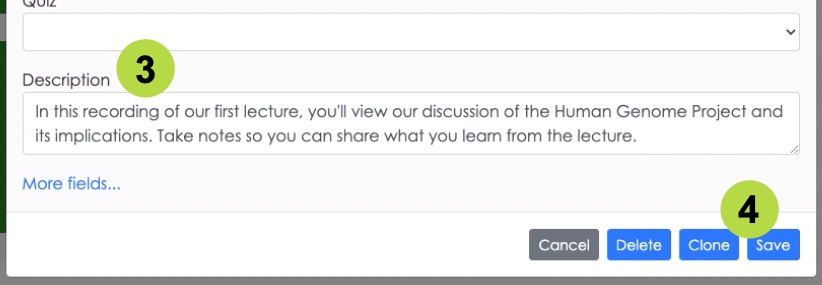
- Update the activity Description as appropriate. Update any other resource settings as desired.
- Select Save when you are ready.

NOTE: We recommend updating the same resource instance you used for the synchronous activity, instead of creating a new resource. This makes it easier for your learners to find the activity recording – even for those who attended.
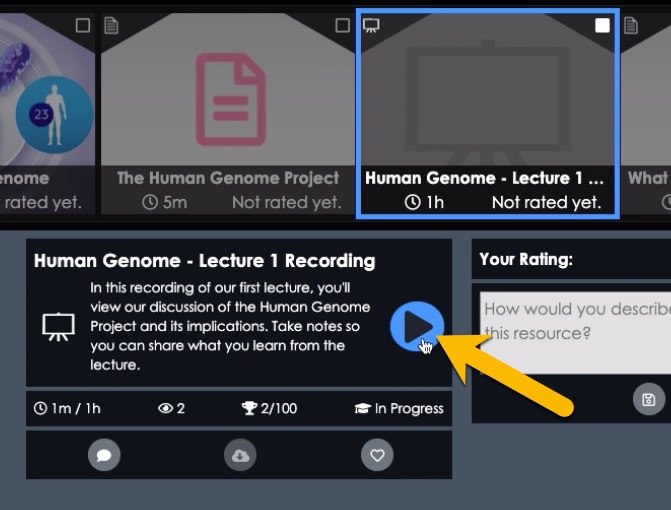
You may want to see how the resource update looks from the learner’s perspective.
- Click ‘Portal’ at the top of the screen. Then select the updated activity in the Resource Carousel and click the Launch button.
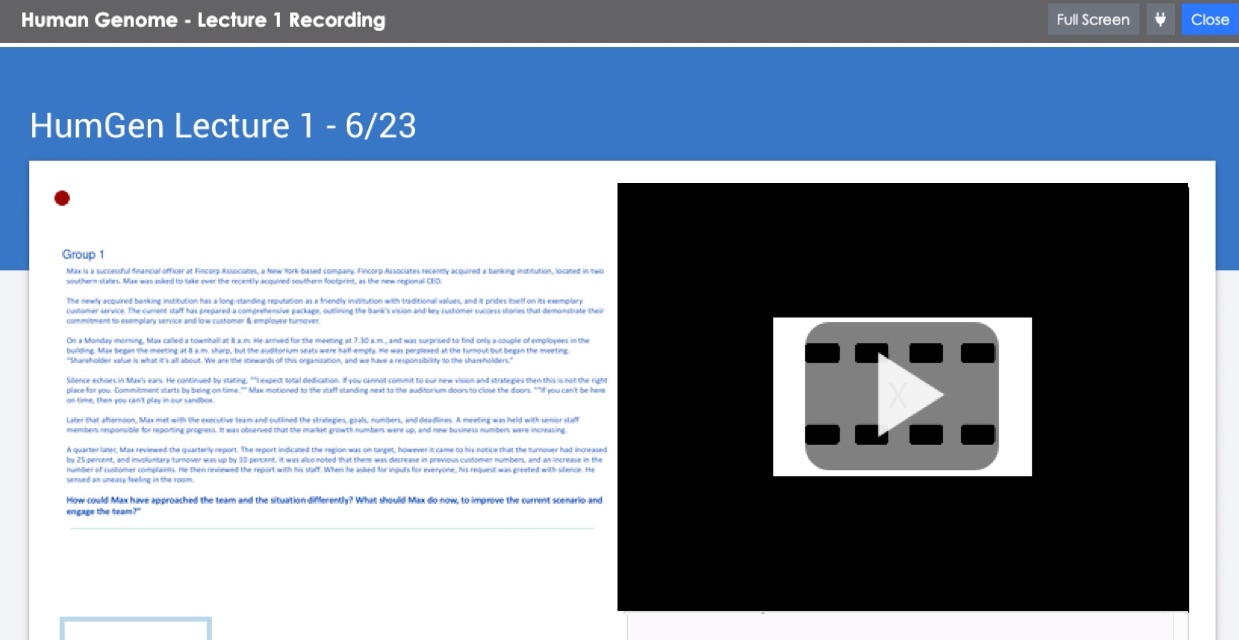
- The meeting recording loads. Watch the recording to confirm it plays as expected.