Video-based Assessment: Overview

There are four types of video collaboration activities that can be used for formal assessment in TILE. Each has features that may be best suited to your learning objectives. You may have already learned about how to use these same activity types for practice, in the “Build Activities” skill. If not, here’s a brief description to bring you up to speed on each:
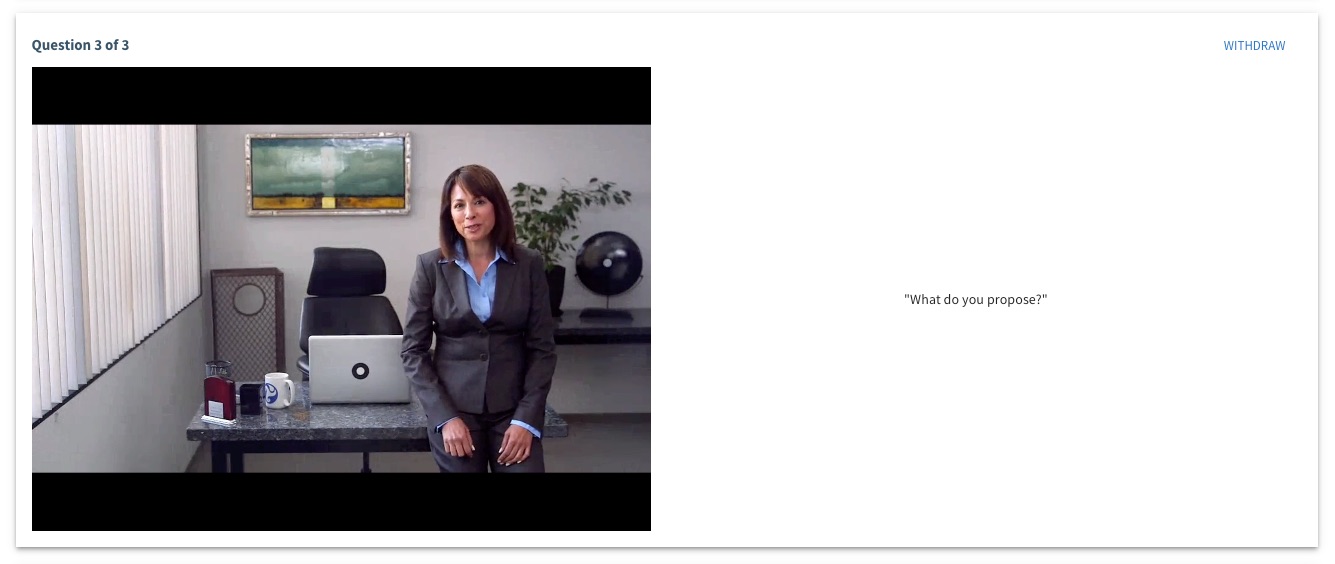 Question & Answer – the learner is presented with a series of prompts and given a set amount of time to respond. The learner only has one opportunity to answer each prompt, replicating the high-stakes environment of being asked questions in a face-to-face setting.
 Individual Project – learners record or upload a video of themselves presenting on a topic or demonstrating a specific skill. With the screenshare feature, learners can also enhance their project with visual aids. This activity type includes an Artificial Intelligence (AI) “Auto Analysis” feature.
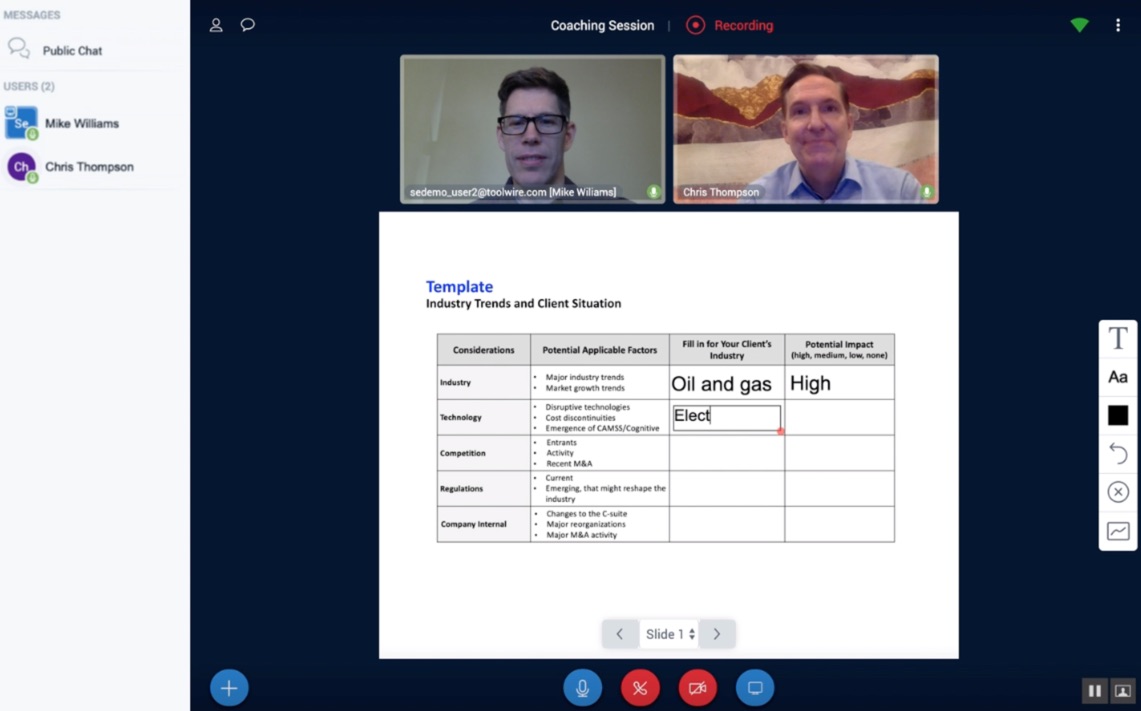 Group Project – learners collaborate synchronously and asynchronously to complete the activity requirements. Individuals have the ability to create milestones, evaluate their peers, meet with group members virtually, and compile all of their submissions within a project dashboard.
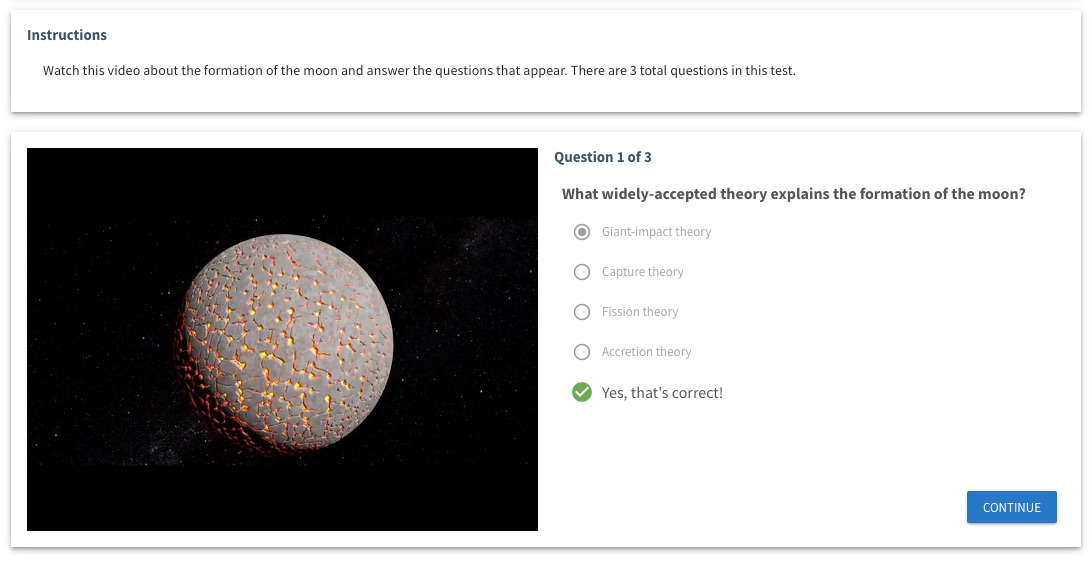 Interactive Video – learners watch a video and respond to questions and prompts at pre-set points in the video.
Refer to the tabs for step-by-step guidance on how to create each of these video-based assessment types.
Overview
(Preview this assessment type)
There are three steps to create a “Question & Answer” (Q&A) video assessment in TILE Composer:
- Create a scoring rubric
- Create the Q&A assessment
- Map the assessment to a lesson resource
Click each section below for step-by-step guidance.
Step 1 - Create a Rubric
Watch this video for a quick example of how to create a rubric in Composer. You can also follow the Step-by-Step instructions below.
Step-by-Step Instructions
Access the Collaboration Admin Page
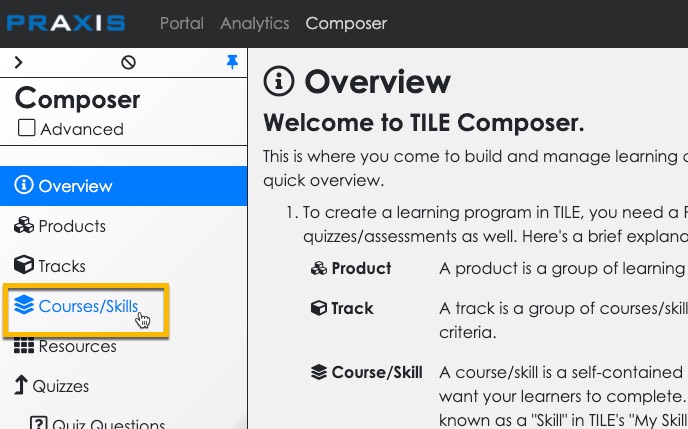
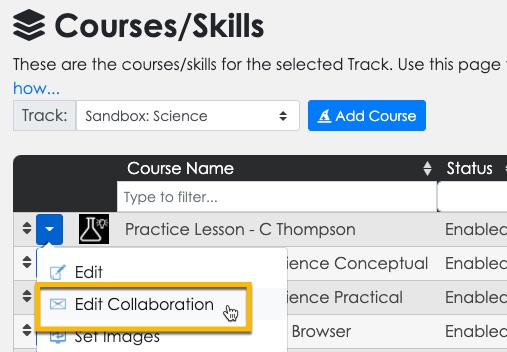
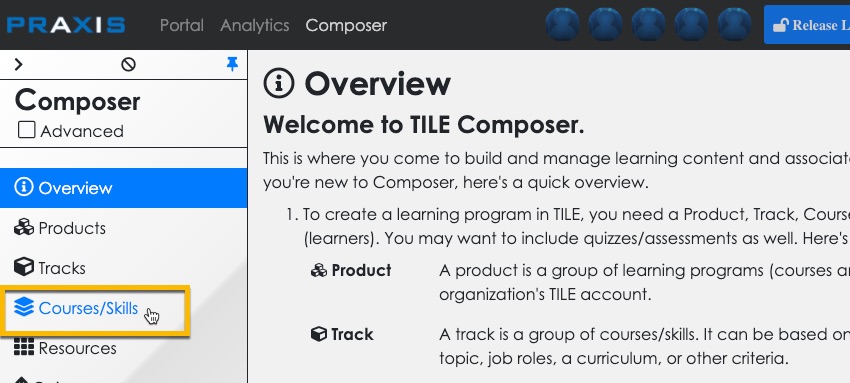
- Select the Courses/Skills option in the side menu.
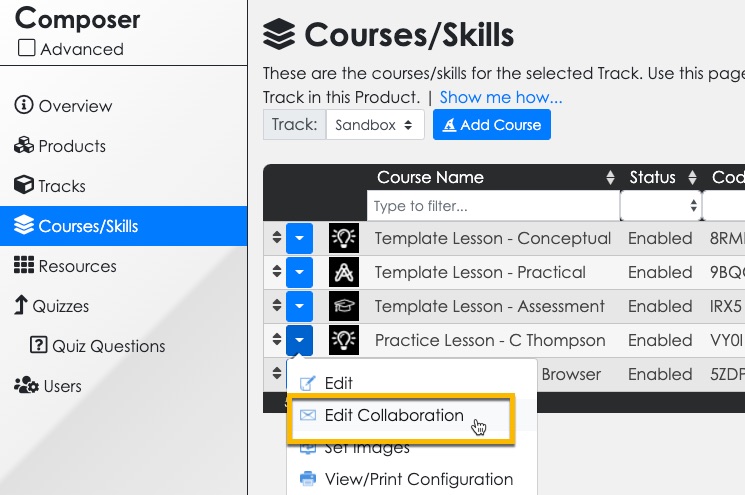
- Select the context menu for your practice lesson, and then select the Edit Collaboration option.
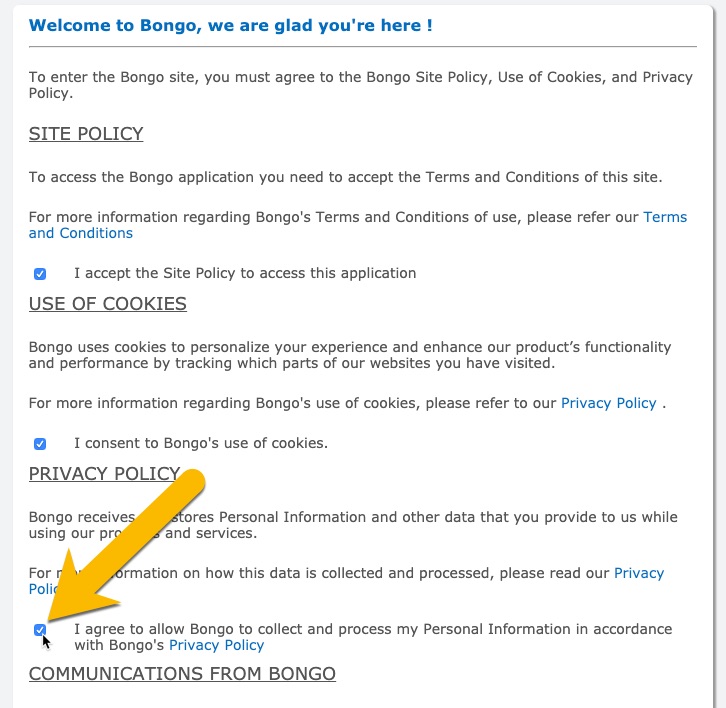
- (If this is your first time accessing the Collaboration Admin Page) select the “I agree…” checkbox to agree to the Bongo plugin terms of use. Then select OK at the bottom of the agreement.
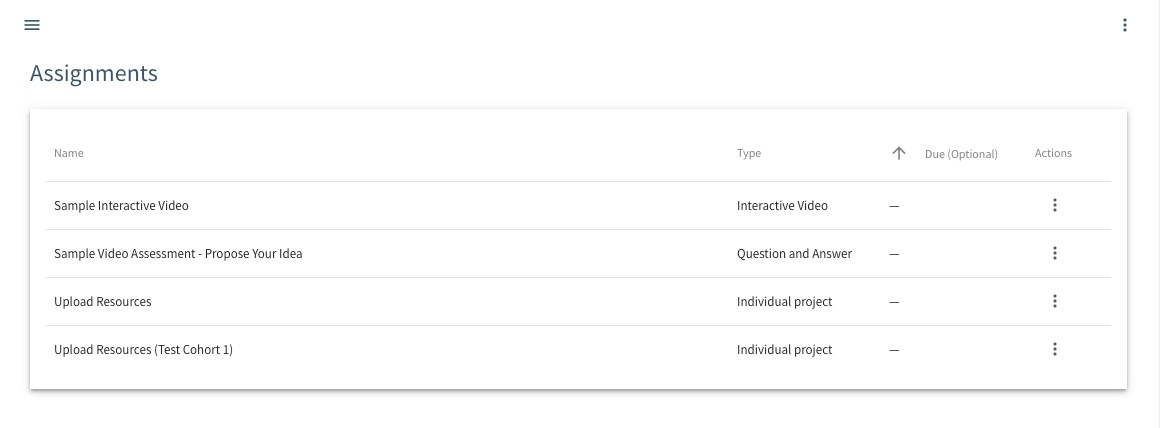
- The Collaboration Admin Page displays.
Create a Rubric
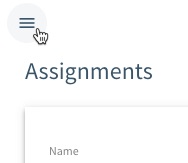
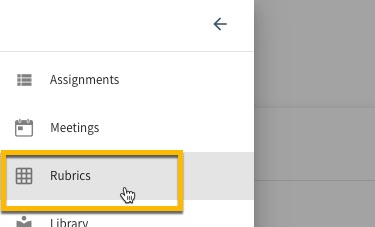
- Select the menu icon at the upper left corner of the Collaboration Admin Page. Then select the Rubrics option.
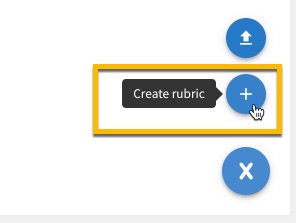
- The Rubrics page opens. Select the ‘+’ icon at the bottom right corner of the page and then select the ‘+’ icon again to ‘Create rubric.’
- The Create Rubric panel opens. Give your rubric a name.
- Write a criterion/objective for each row of the rubric.
- Write a descriptive label for each scoring column of the rubric.
- Assign a default point value for each scoring column. (Point values will need to be a whole number; decimals are not permitted.)
- [Optional] Write descriptions in for each scoring cell, for each criterion in the rubric. (You can also enter a point value in a scoring cell if you wish to override the default point value for the column.)
- To add or remove a row or column, use the ‘+’ or ‘trash’ icons.
- Select Save when you are finished.


Import a Rubric
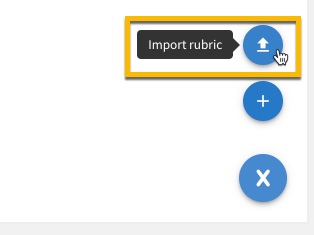
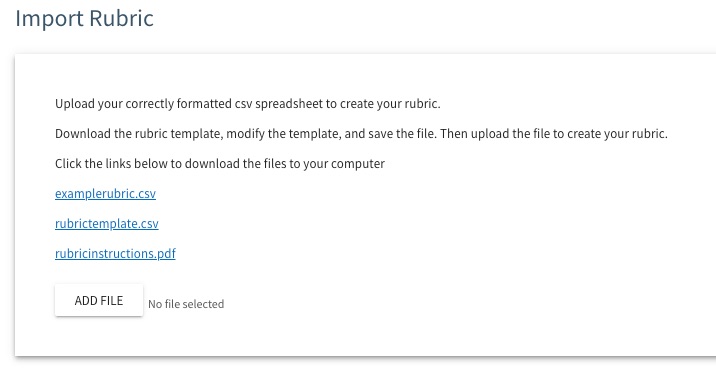
- The Rubrics page also gives you the option to import a rubric. Select the ‘+’ icon at the bottom right corner of the page and then select the ‘up arrow’ icon to ‘Import rubric.’
- The Import Rubric panel opens. Follow the instructions on this page to convert your existing rubric into a format that can be imported.
 (back to top)
Step 2 - Create the Q&A Assessment
Watch this video for a quick example of how to create the Q&A activity. You can also follow the Step-by-Step instructions below.
Step-by-Step Instructions
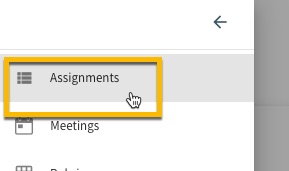
- (If you’re still on the Rubrics page) select the menu icon at the upper left corner of the page, then select the Assignments option.
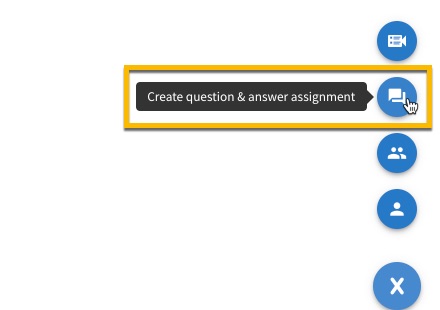
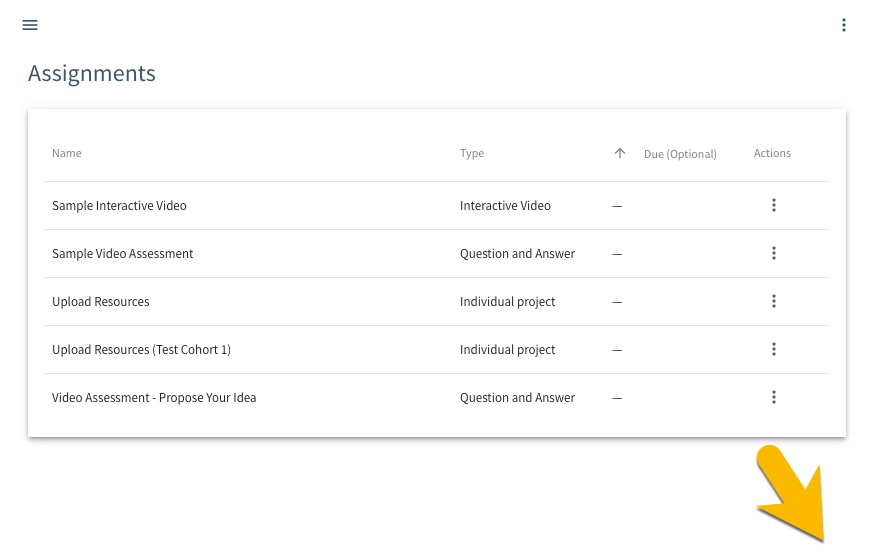
- The Assignments page opens. Select the ‘+’ icon at the bottom right corner of the page and then select the ‘chat bubble’ icon to ‘Create question & answer assignment.’
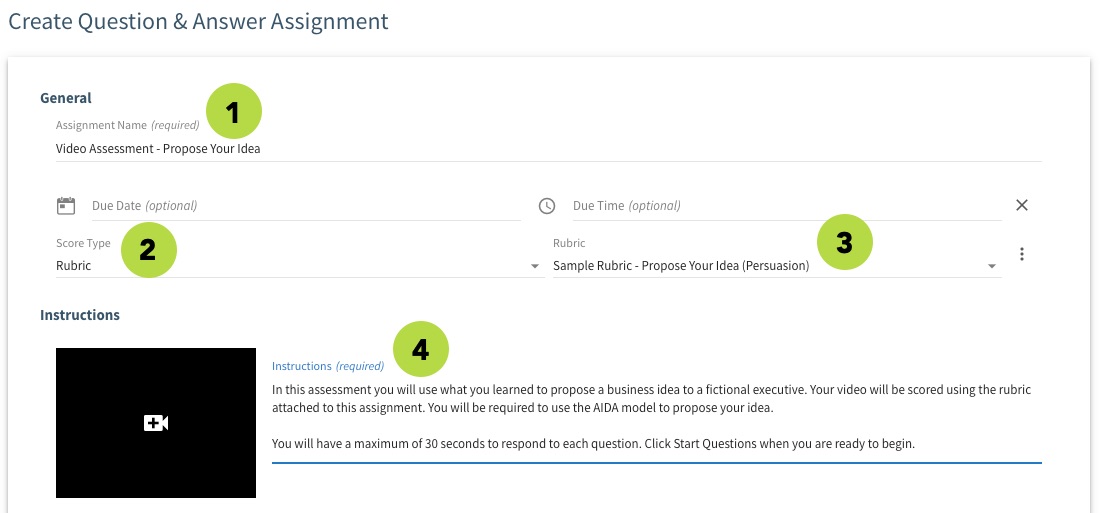
- The Create Question & Answer Assignment panel opens. Give your assessment a name.
- Select a Score Type in the drop-down menu. If you’re using a rubric, select the ‘Rubric’ option. (Other options for a formal assessment include Percentage and Pass/Fail.)
- If you’re using a rubric, select the rubric you created in the Rubric drop-down menu. (If you haven’t created a rubric yet, refer to Step 1 in this tab.)
- Write Instructions for the assessment. (You have the option to record or upload a video here as well.)
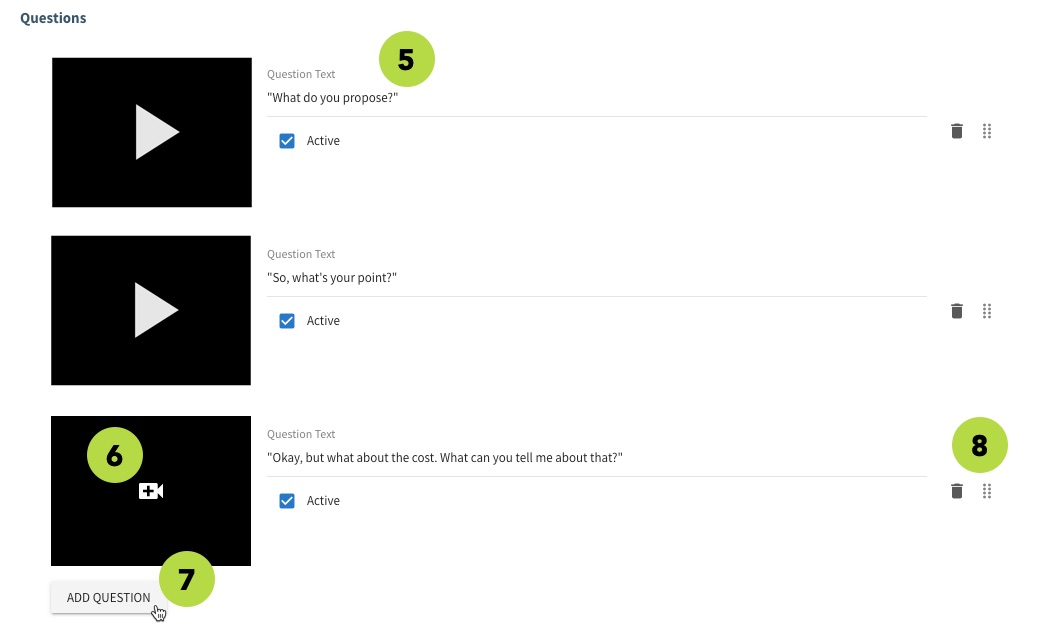
- Write Question Text for each question in the assessment.
- You also have the option to add a prompt video for each question – just click the +video icon and follow the prompts to record or upload a video.
- Select the ADD QUESTION button to add more questions to the assessment. (You can add up to 20 questions.)
- Click the ‘trash’ icon to remove a question. Click the ‘handle’ icon to drag a question to a different position. (NOTE: Under each question, you can mark the question as active or not. If left unchecked, the question will not be asked when the user launches the activity.)
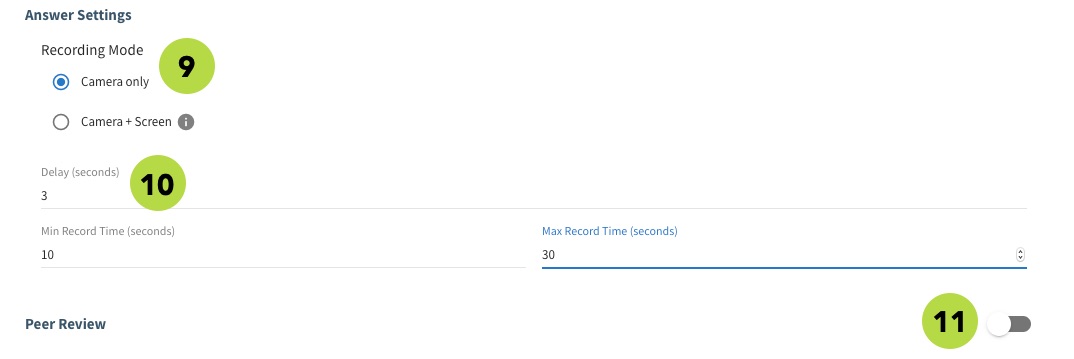
- Select the Recording Mode options you want available to the learners: camera only, or camera plus screen recording.
- Set the parameters for the video recording time. The Delay is the time between the end of the question and the time the learner’s camera will automatically start to record. Select the Min Record Time and Max Record Time (in seconds) to set the amount of time allowed for the learner’s response.
- Turn the Peer Review toggle to the off position. (This option is not recommended for formal assessment.)
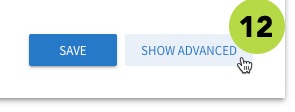
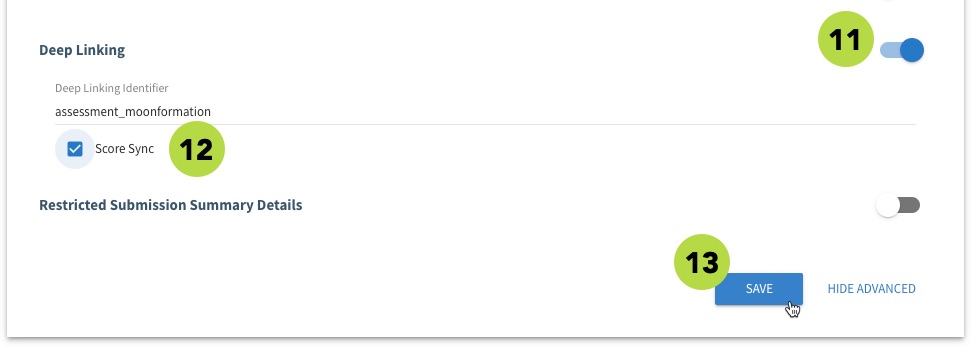
- Select the SHOW ADVANCED button at the bottom right corner of the panel.
- Enter a Deep Linking Identifier for the assessment, then select the Score Sync checkbox. IMPORTANT: The “Deep Linking Identifier” is the ID that will link the assessment to resource instance in the course. Copy this ID for Step 3 – Map Assessment to a Lesson Resource. (The ID should be all lower case without spaces.)
- Select Save when you are finished configuring the assessment.

Your new assessment is displayed in the Assignment list. You’re almost done!
 (back to top)
Step 3 - Map Assessment to a Lesson Resource
Your assessment is all set up, but there's one last step. You need to map it to a resource so your learners will be able to see and access it. Watch this video for a quick example of how to map a video assessment to a resource. You can also follow the Step-by-Step instructions below.
Step-by-Step Instructions
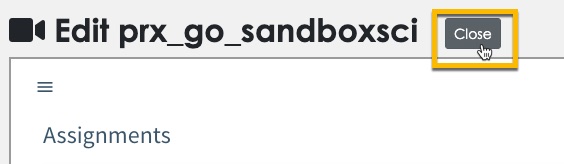
- Select the Close button at the top of the Collaboration Admin Page.
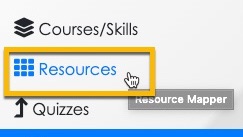
- Select the Resources option in the side menu.
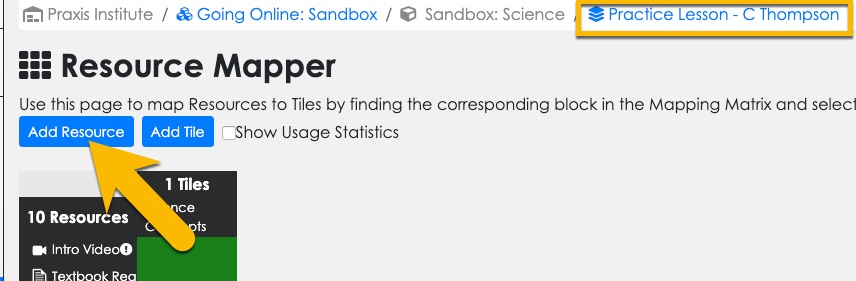
- The Resource Mapper page loads. Make sure it is the right page for your practice lesson/course by looking at the breadcrumbs at the top of the screen. If your lesson/course isn't displayed, click the last breadcrumb to open the course selection screen and then select your lesson. Then select the Add Resource button.
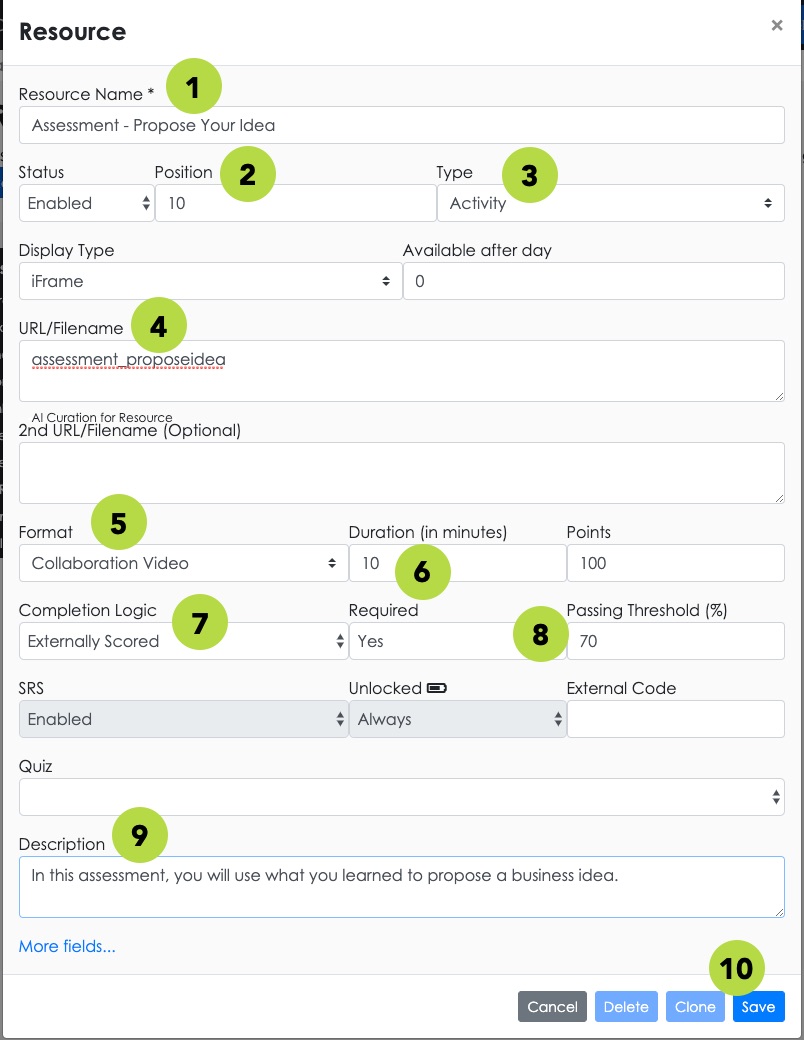
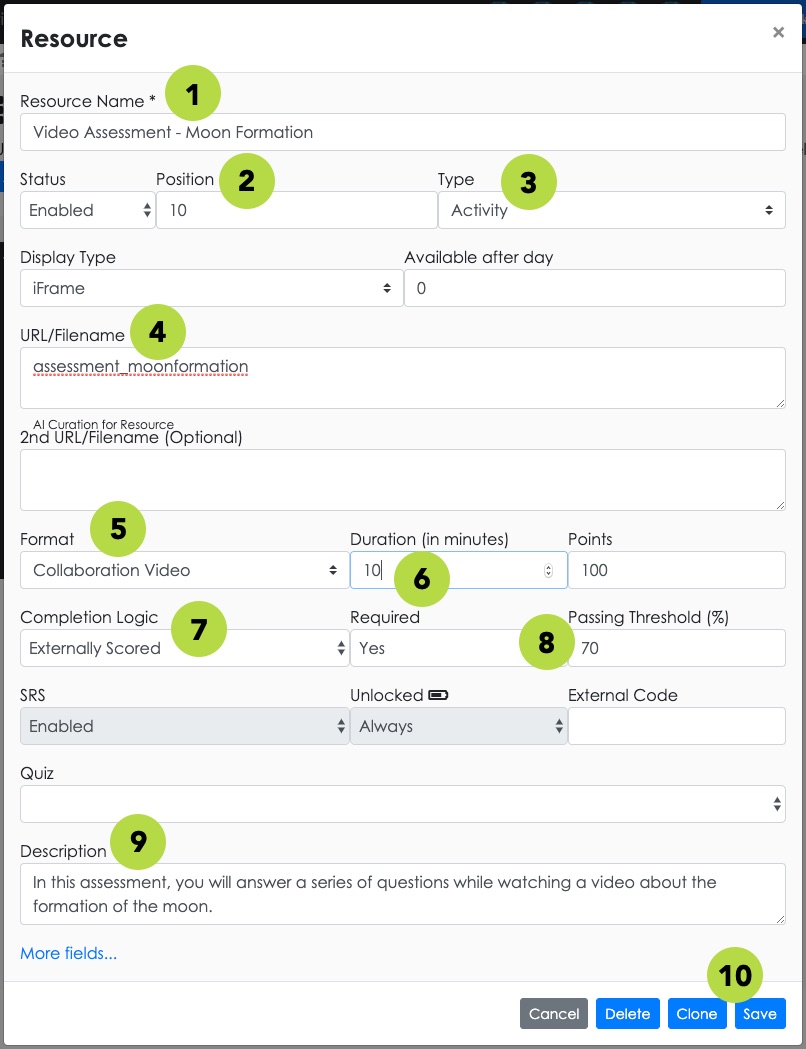
- The Resource settings panel opens. Give your assessment a name.
- Set the Position for the assessment so it displays in the right order in the lesson.
- Set the Resource Type to "Activity."
- Enter the “Deep Linking Identifier” ID from Step 2 into the URL/Filename field.
- Set the Resource Format to "Collaboration Video."
- Set the Duration for the assessment.
- Set the Completion Logic to "Externally Scored."
- Set the Passing Threshold for the assessment.
- Enter a brief Description of the assessment. Learners will see this description in the course interface.
- Select Save when you are ready.
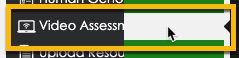
- The assessment appears in the resource list, but is not yet mapped. Click the empty cell next to the assessment name to activate it.
- Click OK in the confirmation box. The assessment is now activated and ready for your learners!


Check Learner Access to Assessment
Follow the steps below to check the appearance and behavior of your video assessment to learners.
Step-by-Step Instructions
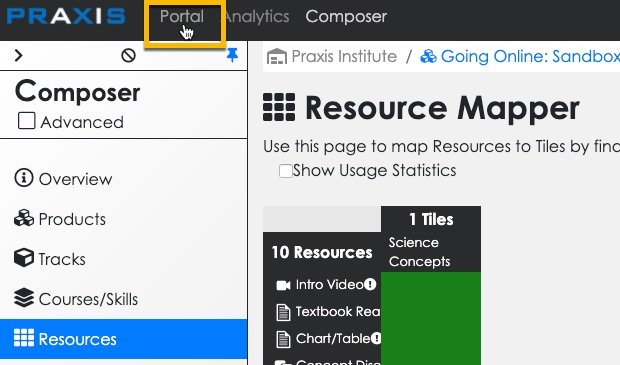
- Exit Composer by selecting the Portal option at the top of the screen.
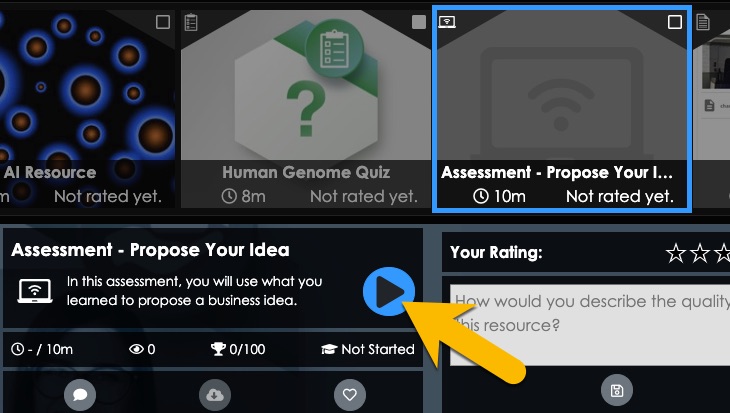
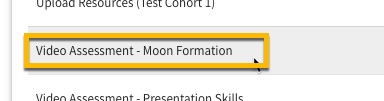
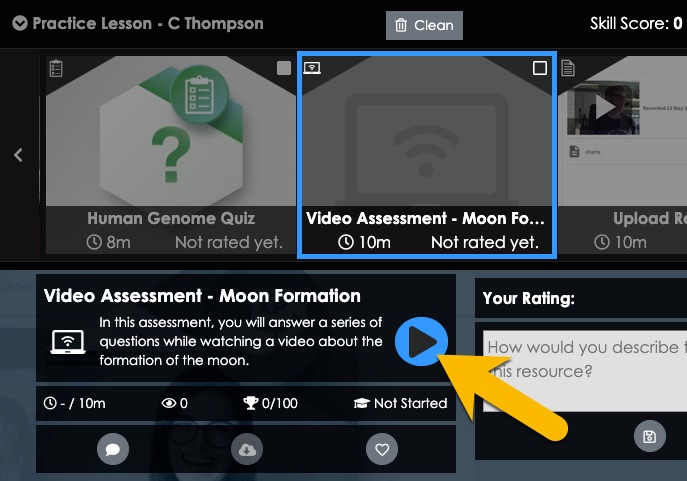
- Locate and select your assessment in the interface. Then click the Play button to launch it.
- Go through the assessment activity as a learner would and check on wording, appearance, behavior, etc. Then revise your assessment settings if necessary.
More Info
Click here for more information about how to use the Q&A video assessment type.
Overview
(Preview this assessment type)
There are two steps to create an “Individual Project” video assessment in TILE Composer:
- Create the Individual Project assessment
- Map the assessment to a lesson resource
Click each section below for step-by-step guidance.
Step 1 - Create the Individual Project Assessment
Watch this video for a quick example of how to create the Individual Project. You can also follow the Step-by-Step instructions below.
Step-by-Step Instructions
Access the Collaboration Admin Page
- Select the Courses/Skills option in the side menu.
- Select the context menu for your practice lesson, and then select the Edit Collaboration option.
- (If this is your first time accessing the Collaboration Admin Page) select the “I agree…” checkbox to agree to the Bongo plugin terms of use. Then select OK at the bottom of the agreement.
- The Collaboration Admin - "Assignments" page displays. Scroll down on the page for the next step.
Create Individual Project
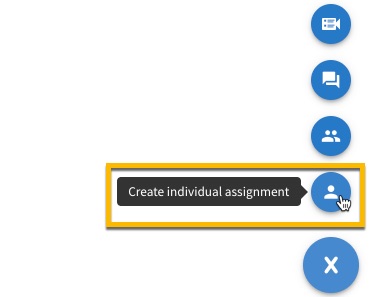
Select the ‘+’ icon at the bottom right corner of the page and then select the ‘person’ icon to ‘Create question & answer assignment.’
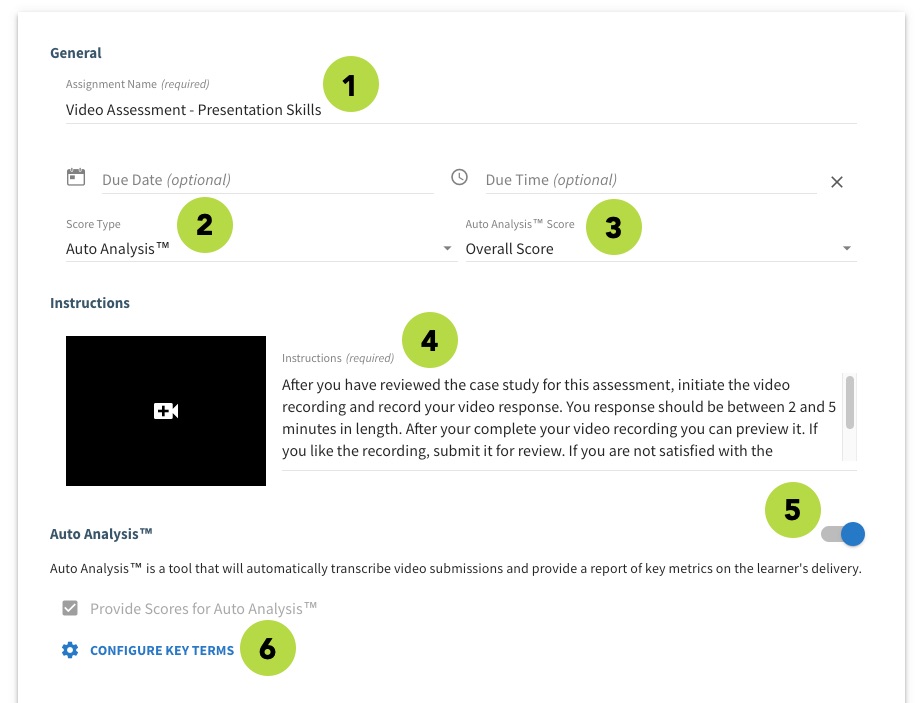
- The Individual Assignment panel opens. Give your assessment a name.
- Select a Score Type in the drop-down menu. We recommend using the “Auto Analysis” option to auto-grade the assessment using artificial intelligence (AI). Other score type options for a formal assessment include Rubric, Percentage and Pass/Fail. Auto Analysis™ is an automated reporting feature that provides deeper insight into an individual’s performance and progress. By generating metrics like rate of speech, speech clarity, and use of filler words, Auto Analysis™ gives the presenter a better sense of what to focus on and helps the evaluator provide more targeted feedback. If this score type is selected, the Auto Analysis™ overall score for the submitted video will be used as the score and does not require any user with an instructor role to assign the score. Instructors are able to manually override the automatic score within the Scorebook if desired.
- If you’re using Auto Analysis, select “Overall Score” for the Auto Analysis Score option.
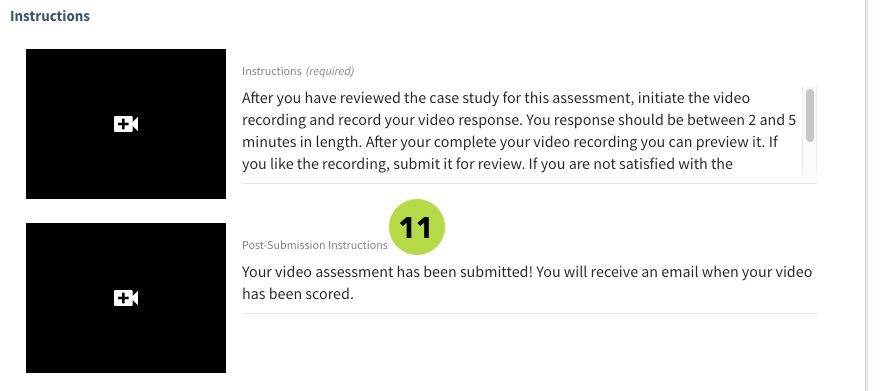
- Write Instructions for the assessment. (You have the option to record or upload a video here as well.)
- Select the Auto Analysis toggle to activate that feature.
- Select the 'Configure Key Terms' option to enter terms that are required for the learner to use in their video recording.
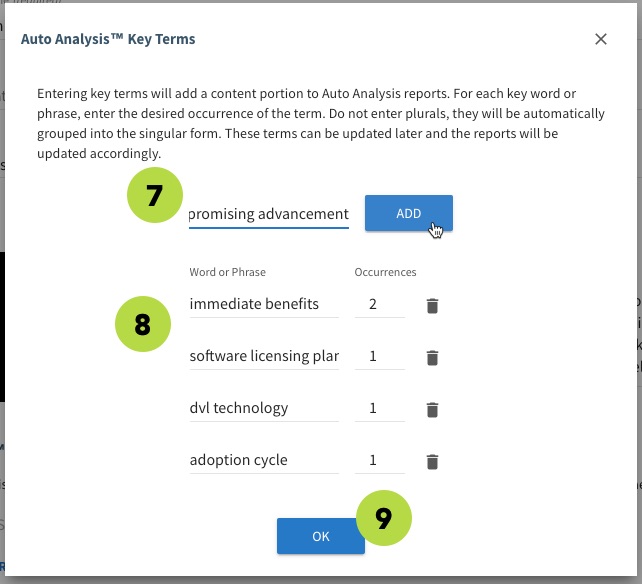
- The ‘Auto Analysis Key Terms’ panel opens. Enter each key term and then click ADD.
- Entered terms will display in a list. For each term you can specify the number of required Occurrences of that term. (Select the ‘trash’ icon to remove a term.)
- Select OK when ready.
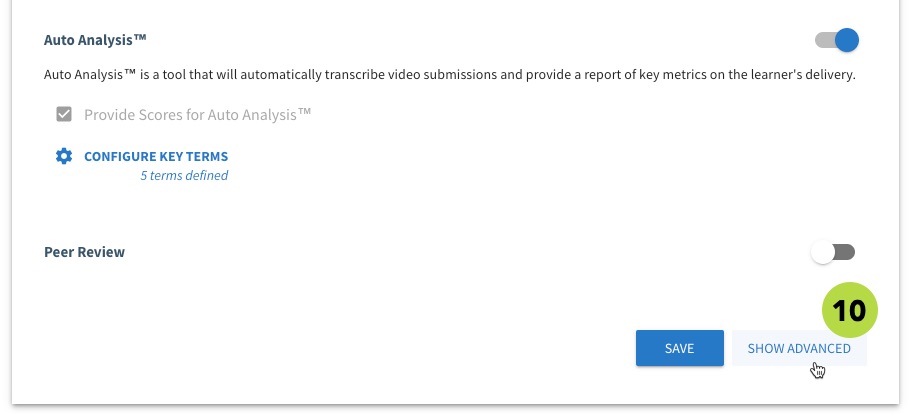
- Select the SHOW ADVANCED button at the bottom right corner of the panel.
- Enter Post-Submission Instructions for the learner to follow.
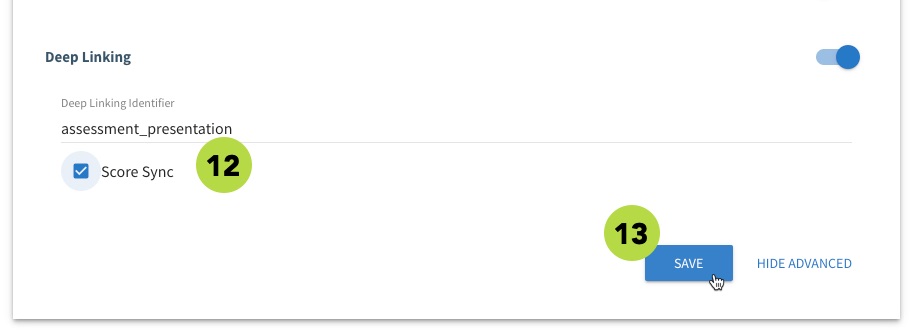
- Enter a Deep Linking Identifier for the assessment, then select the Score Sync checkbox. IMPORTANT: The “Deep Linking Identifier” is the ID that will link the assessment to resource instance in the course. Copy this ID for Step 2 – Map Assessment to a Lesson Resource. (The ID should be all lower case without spaces.)
- Select Save when you are finished configuring the assessment.
Your new assessment is displayed in the Assignment list. You’re almost done!
 (back to top)
Step 2 - Map Assessment to a Lesson Resource
Your assessment is all set up, but there's one last step. You need to map it to a resource so your learners will be able to see and access it. Watch this video for a quick example of how to map a video assessment to a resource. You can also follow the Step-by-Step instructions below.
Step-by-Step Instructions
- Select the Close button at the top of the Collaboration Admin Page.
- Select the Resources option in the side menu.
- The Resource Mapper page loads. Make sure it is the right page for your practice lesson/course by looking at the breadcrumbs at the top of the screen. If your lesson/course isn't displayed, click the last breadcrumb to open the course selection screen and then select your lesson. Then select the Add Resource button.
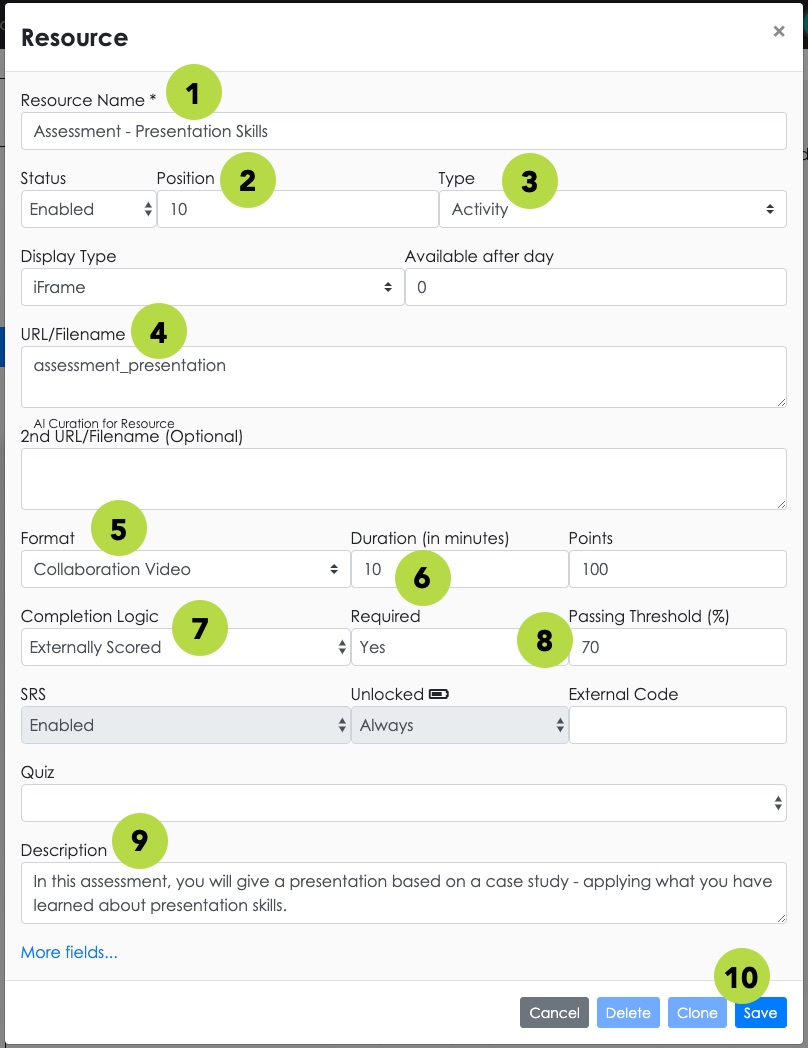
- The Resource settings panel opens. Give your assessment a name.
- Set the Position for the assessment so it displays in the right order in the lesson.
- Set the Resource Type to "Activity."
- Enter the “Deep Linking Identifier” ID from Step 1 into the URL/Filename field.
- Set the Resource Format to "Collaboration Video."
- Set the Duration for the assessment.
- Set the Completion Logic to "Externally Scored."
- Set the Passing Threshold for the assessment.
- Enter a brief Description of the assessment. Learners will see this description in the course interface.
- Select Save when you are ready.
- The assessment appears in the resource list, but is not yet mapped. Click the empty cell next to the assessment name to activate it.
- Click OK in the confirmation box. The assessment is now activated and ready for your learners!
Check Learner Access to Assessment
Follow the steps below to check the appearance and behavior of your video assessment to learners.
Step-by-Step Instructions
- Exit Composer by selecting the Portal option at the top of the screen.
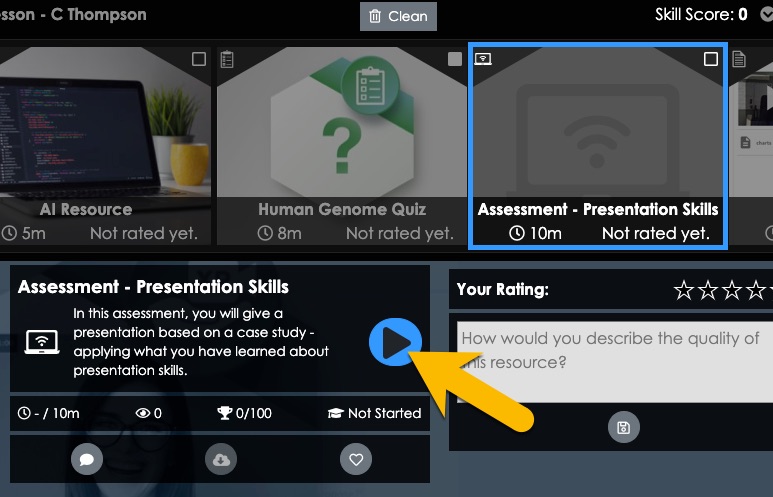
- Locate and select your assessment in the interface. Then click the Play button to launch it.
- Go through the assessment activity as a learner would and check on wording, appearance, behavior, etc. Then revise your assessment settings if necessary.
More Info
Click here for more information about how to use the Individual Project video assessment type.
Overview
(Preview this assessment type)
There are two steps to create a “Group Project” video assessment in TILE Composer:
- Create the Group Project assessment
- Map the assessment to a lesson resource
Click each section below for step-by-step guidance.
Step 1 - Create the Group Project Assessment
Watch this video for a quick example of how to create the Group Project. You can also follow the Step-by-Step instructions below.
Step-by-Step Instructions
Access the Collaboration Admin Page
- Select the Courses/Skills option in the side menu.
- Select the context menu for your practice lesson, and then select the Edit Collaboration option.
- (If this is your first time accessing the Collaboration Admin Page) select the “I agree…” checkbox to agree to the Bongo plugin terms of use. Then select OK at the bottom of the agreement.
- The Collaboration Admin - "Assignments" page displays. Scroll down on the page for the next step.
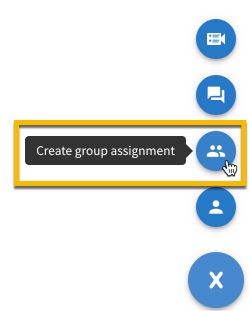
Create Group Project
Select the ‘+’ icon at the bottom right corner of the page and then select the ‘group’ icon to ‘Create question & answer assignment.’
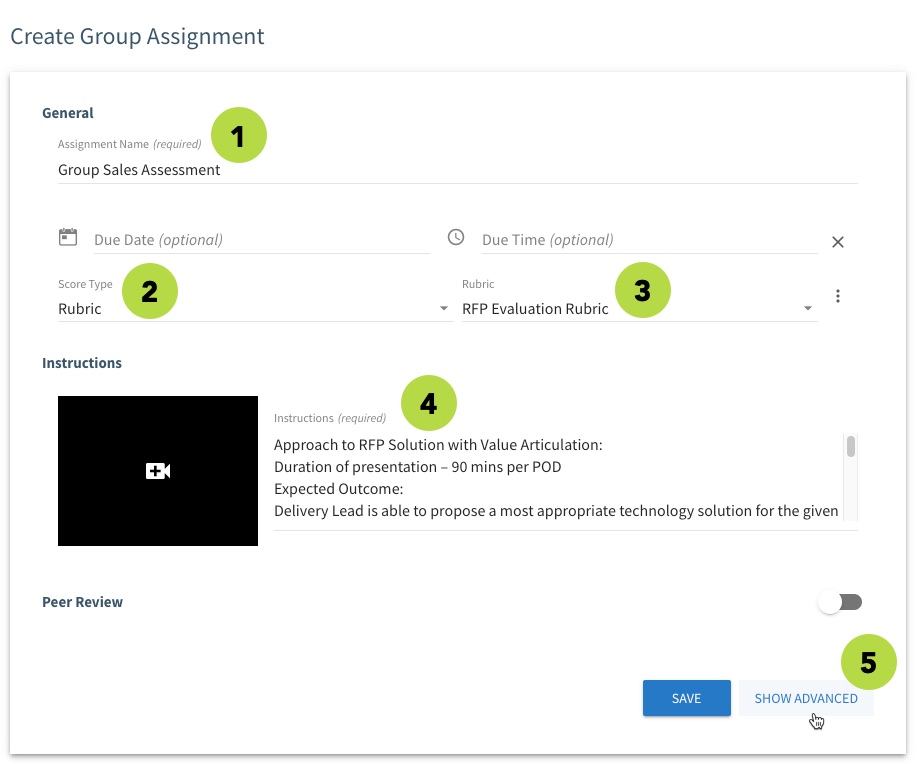
- The Create Group Assignment panel opens. Give your assessment a name.
- Select a Score Type in the drop-down menu. If you’re using a rubric, select the ‘Rubric’ option. (Other options for a formal assessment include Percentage and Pass/Fail.)
- If you’re using a rubric, select the rubric you created in the Rubric drop-down menu. (If you haven’t created a rubric yet, refer to Step 1 in this tab.)
- Write Instructions for the assessment. (You have the option to record or upload a video here as well.)
- Select the SHOW ADVANCED button at the bottom right corner of the panel.
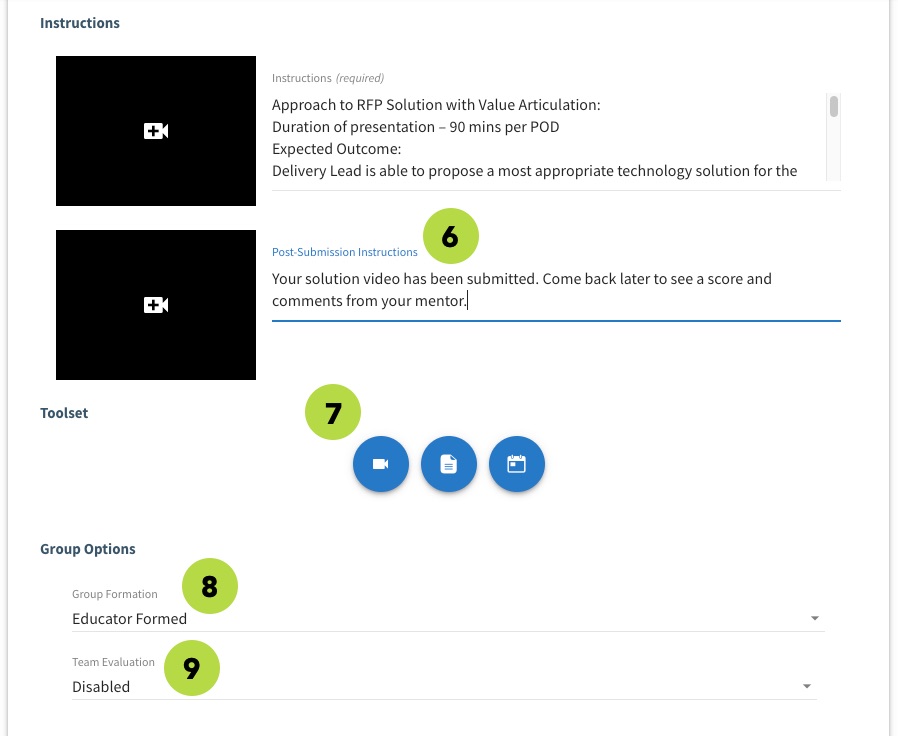
- Enter Post-Submission Instructions for the learner to follow.
- Select the user Toolset you want to allow for the assessment. By default the ‘Video,’ ‘Documents,’ and ‘Meetings’ options are enabled. You can require one or more of these to be submitted as part of the assessment, based on your rubric. (NOTE: learners can submit group video recordings using the “Combined Video” option in the Video tool, or using the recording feature in the Meetings tool.) For more information about the Toolset features and capabilities, refer to this guide.
- Select the Group Formation option you want to use for setting up the learner groups. By default, group formation is “Educator Formed”, which allows you to create groups manually. You also have the option to allow learners to choose their own groups or have the system create groups based on availability. Refer to this guide for more information.
- Leave the Team Evaluation option as disabled, unless you want your learners to rate the performance of their group peers.
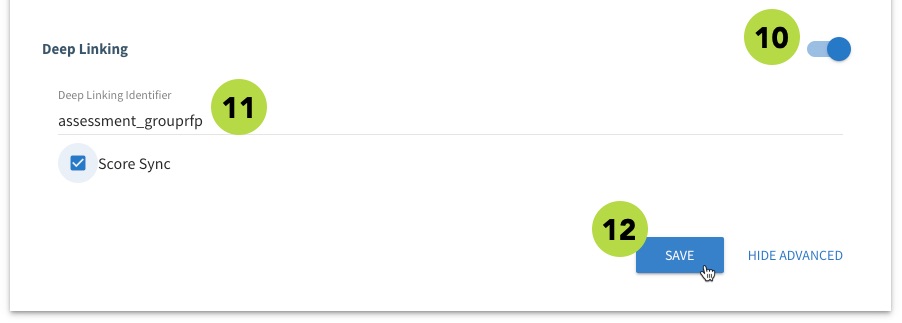
- Select the Deep Linking toggle to enable it.
- Enter a Deep Linking Identifier for the assessment, then select the Score Sync checkbox. IMPORTANT: The “Deep Linking Identifier” is the ID that will link the assessment to resource instance in the course. Copy this ID for Step 2 – Map Assessment to a Lesson Resource. (The ID should be all lower case without spaces.)
- Select Save when you are finished configuring the assessment.
Your new assessment is displayed in the Assignment list. You’re almost done!
 (back to top)
Step 2 - Map Assessment to a Lesson Resource
Your assessment is all set up, but there's one last step. You need to map it to a resource so your learners will be able to see and access it. Watch this video for a quick example of how to map a video assessment to a resource. You can also follow the Step-by-Step instructions below.
Step-by-Step Instructions
- Select the Close button at the top of the Collaboration Admin Page.
- Select the Resources option in the side menu.
- The Resource Mapper page loads. Make sure it is the right page for your practice lesson/course by looking at the breadcrumbs at the top of the screen. If your lesson/course isn't displayed, click the last breadcrumb to open the course selection screen and then select your lesson. Then select the Add Resource button.
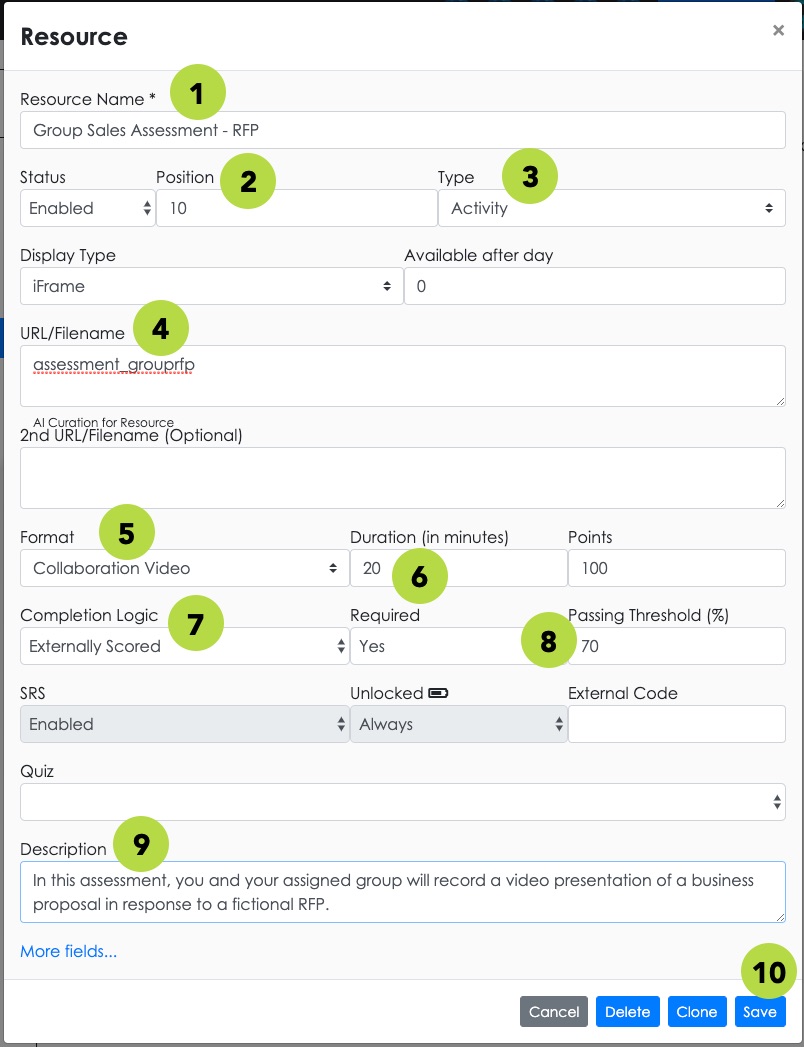
- The Resource settings panel opens. Give your assessment a name.
- Set the Position for the assessment so it displays in the right order in the lesson.
- Set the Resource Type to "Activity."
- Enter the “Deep Linking Identifier” ID from Step 1 into the URL/Filename field.
- Set the Resource Format to "Collaboration Video."
- Set the Duration for the assessment.
- Set the Completion Logic to "Externally Scored."
- Set the Passing Threshold for the assessment.
- Enter a brief Description of the assessment. Learners will see this description in the course interface.
- Select Save when you are ready.
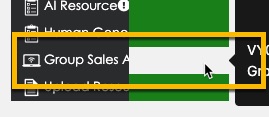
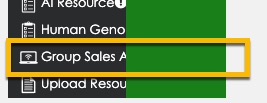
- The assessment appears in the resource list, but is not yet mapped. Click the empty cell next to the assessment name to activate it.
- Click OK in the confirmation box. The assessment is now activated and ready for your learners!
Check Learner Access to Assessment
Follow the steps below to check the appearance and behavior of your video assessment to learners.
Step-by-Step Instructions
- Exit Composer by selecting the Portal option at the top of the screen.
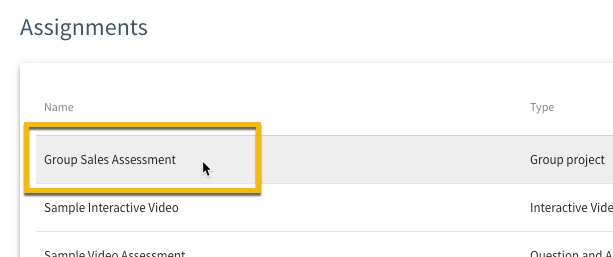
- Locate and select your assessment in the interface. Then click the Play button to launch it.
- Go through the assessment activity as a learner would and check on wording, appearance, behavior, etc. Then revise your assessment settings if necessary.

More Info
Click here for more information about how to use the Group Project video assessment type.
Overview
(Preview this assessment type)
There are two steps to create a “Interactive Video" assessment in TILE Composer:
- Create the Interactive Video assessment
- Map the assessment to a lesson resource
Click each section below for step-by-step guidance.
Step 1 - Create the Interactive Video Assessment
Watch this video for a quick example of how to create an Interactive Video. You can also follow the Step-by-Step instructions below.
Step-by-Step Instructions
Access the Collaboration Admin Page
- Select the Courses/Skills option in the side menu.
- Select the context menu for your practice lesson, and then select the Edit Collaboration option.
- (If this is your first time accessing the Collaboration Admin Page) select the “I agree…” checkbox to agree to the Bongo plugin terms of use. Then select OK at the bottom of the agreement.
- The Collaboration Admin - "Assignments" page displays. Scroll down on the page for the next step.
Create Interactive Video
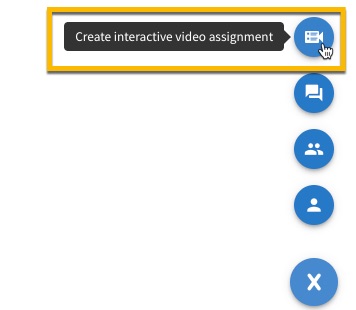
Select the ‘+’ icon at the bottom right corner of the page and then select the ‘video quiz’ icon to ‘Create interactive video assignment.’
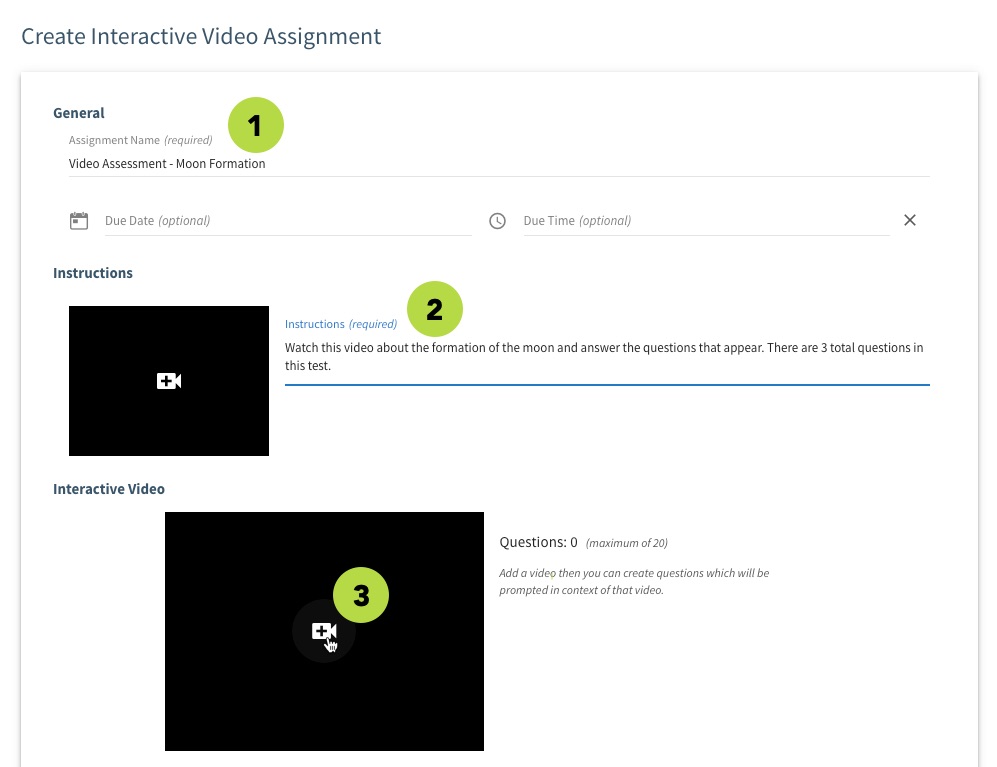
- The Create Interactive Video Assignment panel opens. Give your assessment a name.
- Write Instructions for the assessment. (You have the option to record or upload a video here as well.)
- Click the '+ video' icon in the interactive video section. You must add a video before you can add the questions.
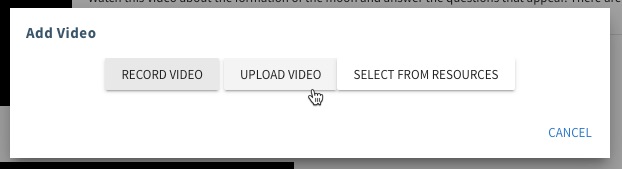
- Select a method to add a video. Select RECORD VIDEO to record a webcam or screenshare video. Select UPLOAD VIDEO to use a previously-recorded video. (Ignore the ‘SELECT FROM RESOURCES’ option.) Follow the on-screen prompts to record or upload your video.
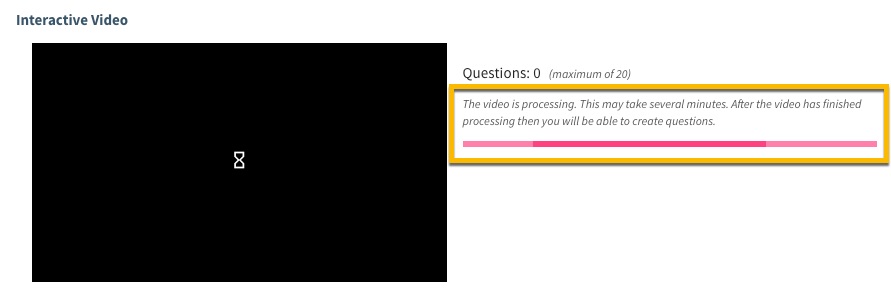
- After adding the video, you will see a “video is processing message.” You can add questions for the video when it is finished processing.
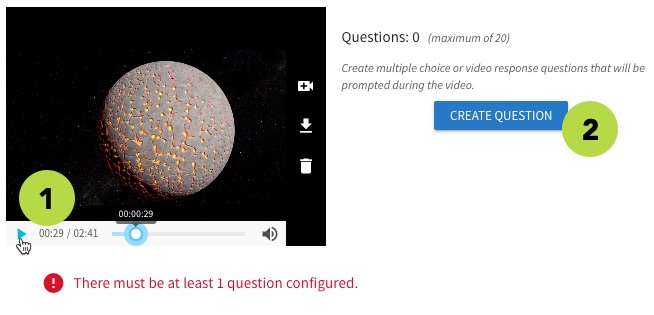
- To add a question, first use the play button or scrollbar to navigate to the point in the video where you want to ask a question.
- Then select the CREATE QUESTION button.
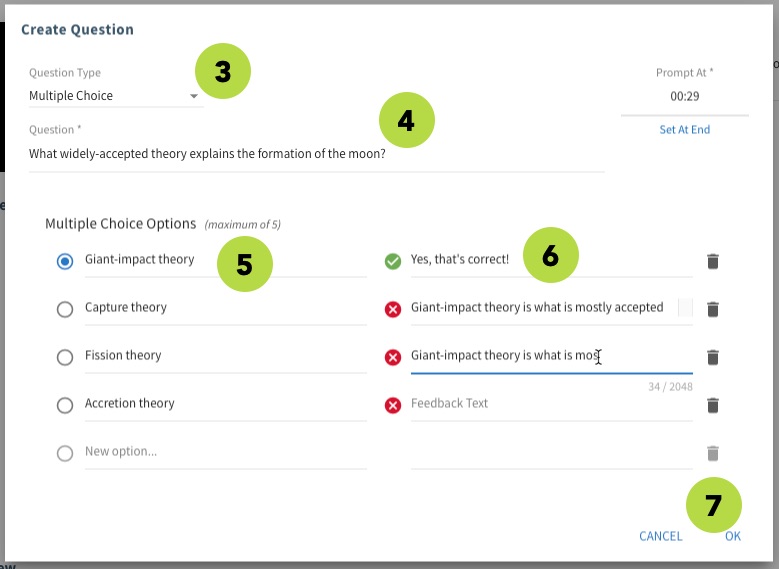
- Select the Question Type – either Multiple Choice (user will select an answer) or Video Response (user will record a video answer and submit it).
- Enter the Question.
- Enter two or more answer Options. (The first answer in the list is always the correct one.)
- (Optional) Enter feedback text or a hint for each answer option. You can click the ‘trash’ icon to remove an answer option.
- Select OK when you are ready.
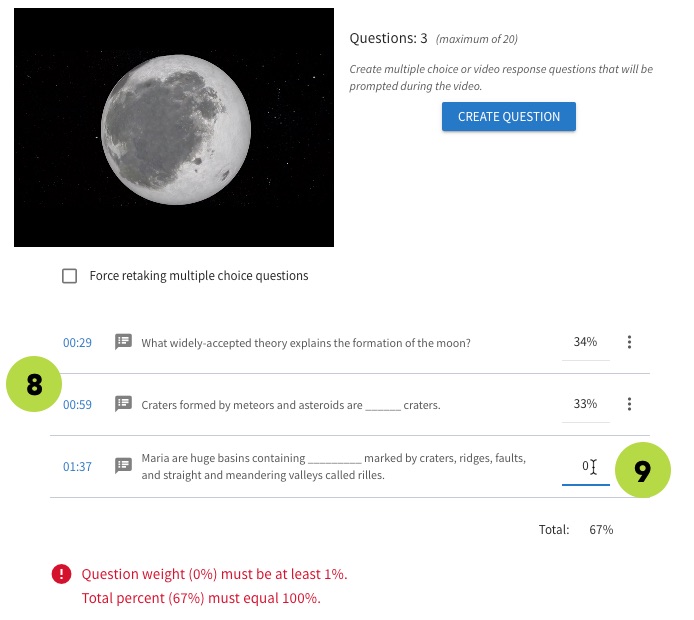
- Repeat steps 2 through 7 for each question in the assessment. (You can add up to 20 questions.)
- Enter the score weight for each question. (The weight total must equal 100%.) You can click the menu (3 dots) for a question to edit or delete it.
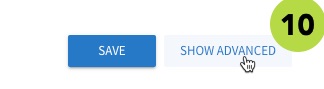
- Select the SHOW ADVANCED button.
- Select the Deep Linking toggle to enable it.
- Enter a Deep Linking Identifier for the assessment, then select the Score Sync checkbox. IMPORTANT: The “Deep Linking Identifier” is the ID that will link the assessment to resource instance in the course. Copy this ID for Step 2 – Map Assessment to a Lesson Resource. (The ID should be all lower case without spaces.)
- Select Save when you are finished configuring the assessment.
Your new assessment is displayed in the Assignment list. You’re almost done!
 (back to top)
Step 2 - Map Assessment to a Lesson Resource
Your assessment is all set up, but there's one last step. You need to map it to a resource so your learners will be able to see and access it. Watch this video for a quick example of how to map a video assessment to a resource. You can also follow the Step-by-Step instructions below.
Step-by-Step Instructions
- Select the Close button at the top of the Collaboration Admin Page.
- Select the Resources option in the side menu.
- The Resource Mapper page loads. Make sure it is the right page for your practice lesson/course by looking at the breadcrumbs at the top of the screen. If your lesson/course isn't displayed, click the last breadcrumb to open the course selection screen and then select your lesson. Then select the Add Resource button.
- The Resource settings panel opens. Give your assessment a name.
- Set the Position for the assessment so it displays in the right order in the lesson.
- Set the Resource Type to "Activity."
- Enter the “Deep Linking Identifier” ID from Step 1 into the URL/Filename field.
- Set the Resource Format to "Collaboration Video."
- Set the Duration for the assessment.
- Set the Completion Logic to "Externally Scored."
- Set the Passing Threshold for the assessment.
- Enter a brief Description of the assessment. Learners will see this description in the course interface.
- Select Save when you are ready.
- The assessment appears in the resource list, but is not yet mapped. Click the empty cell next to the assessment name to activate it.
- Click OK in the confirmation box. The assessment is now activated and ready for your learners!
Check Learner Access to Assessment
Follow the steps below to check the appearance and behavior of your video assessment to learners.
Step-by-Step Instructions
- Exit Composer by selecting the Portal option at the top of the screen.
- Locate and select your assessment in the interface. Then click the Play button to launch it.
- Go through the assessment activity as a learner would and check on wording, appearance, behavior, etc. Then revise your assessment settings if necessary.
More Info
Click here for more information about how to use the Interactive Video assessment type.